How to use Timeshift to backup and restore Linux Mint – Linux Mint 21.2 edition
by John Been July 28, 2023 · Backup / How to / Latest blog / Linux beginner
They sometimes jokingly say there are two types of people in the world, those who have already had a hard drive crash and those who can expect one soon. The question is not if your storage device will break down, but when it will actually happen. Every storage device like a hard drive or SSD device has a limited lifespan and the moment it stops working is always at an unexpected and undesirable moment. But the risks are not only about crashes, as it also involves flooding, fire and lightning strike, but also just wrong human actions and decisions. So we need to be aware about those situations and act on it by setting up a good backup implementation. In this article I will discuss how to use Timeshift to backup and restore Linux Mint. It is a perfect little application to backup and restore your system files.
Content
- Article information
- What is Timeshift
- What is the primary purpose of Timeshift
- How to install Timeshift
- How to use Timeshift to backup and restore Linux Mint
- How to use Timeshift to recover your Linux Mint system
Article information
- Linux Mint 21.2 Cinnamon and older
What is Timeshift
Since Linux Mint 19, thus also in Linux Mint 21.2, Timeshift is a simple backup application that is standard integrated in the Mint distribution. If you use an older version of Linux Mint you can just simply install it via the Software Manager. Timeshift is not meant for every backup situation. To secure and restore your individual personal files, such as text documents, spreadsheets, photos and films, which are maybe even stored on separate drives, it is advisable to use another backup application such as LuckyBackup or Cronopete. More about that later. But for securing your system implementation including your home folder, Timeshift is a perfect solution, as it enables you to recover your whole system when something really went wrong. And by the way, Timeshift can be used in whatever other distribution as well.
Timeshift works on the basis of incremental backups. The first time, when there is nothing backed up yet, Timeshift will have to make a full initial backup of course, but from then on Timeshift only looks at the modified files and then only makes a backup of those changes. The advantage of this is that these backups are much faster, since the number of files that are in scope is much smaller. But also the amount of storage needed is much smaller.
What is the primary purpose of Timeshift
Timeshift is primarily intended to completely reverse your system to the situation of a certain moment in the past when the system was still working properly. Timeshift is in my opinion not meant for every backup situation. It is always important to determine what requirements you have for a backup tool. Do you want to be able to access your backed up personal files directly without being dependent on specific software? Do you want to be able to select an individual file out of multiple versions in time? For these use cases Timeshift is not the right solution as it only offers you to restore a backup of a complete set of multiple files. Timeshift is not intended to restore individual files.
It is possible to set a backup schedule in Timeshift. The incremental backups will be executed on the basis of this schedule. In Timeshift the backup moments are shown in an overview and based on this overview you can choose from which moment in the past you want a restore to take place. That is a very powerful functionality, because you are in control and you can decide which moment was a safe situation to be used as a basis for the recovery. And this is not only on a daily, weekly or monthly basis but it is even possible to do this on an hourly schedule.
How to install Timeshift
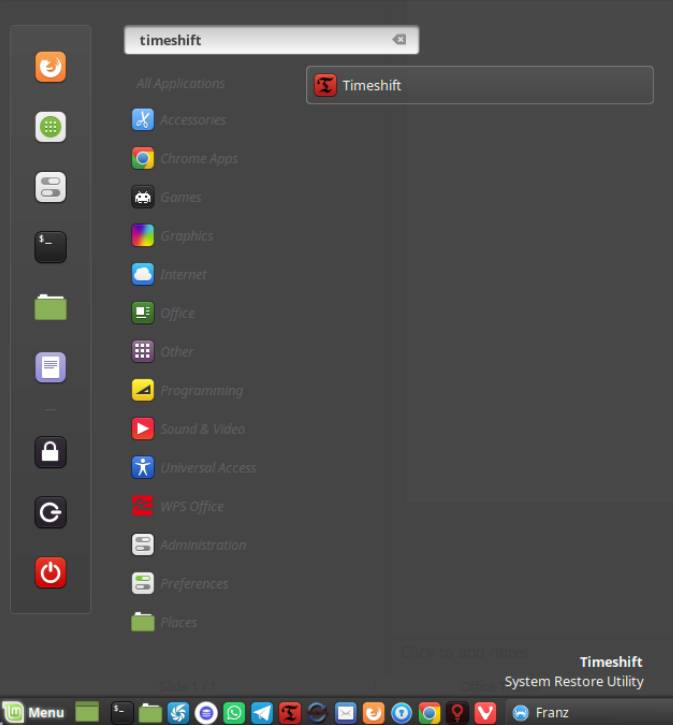
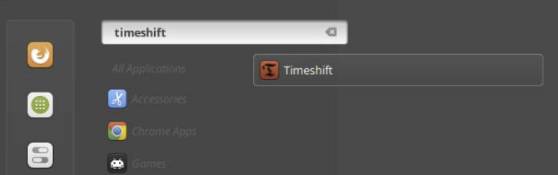
As already said Timeshift is a standard application within Linux Mint 19 and higher, so if you are in that situation, you just go to your applications menu and search for Timeshift.
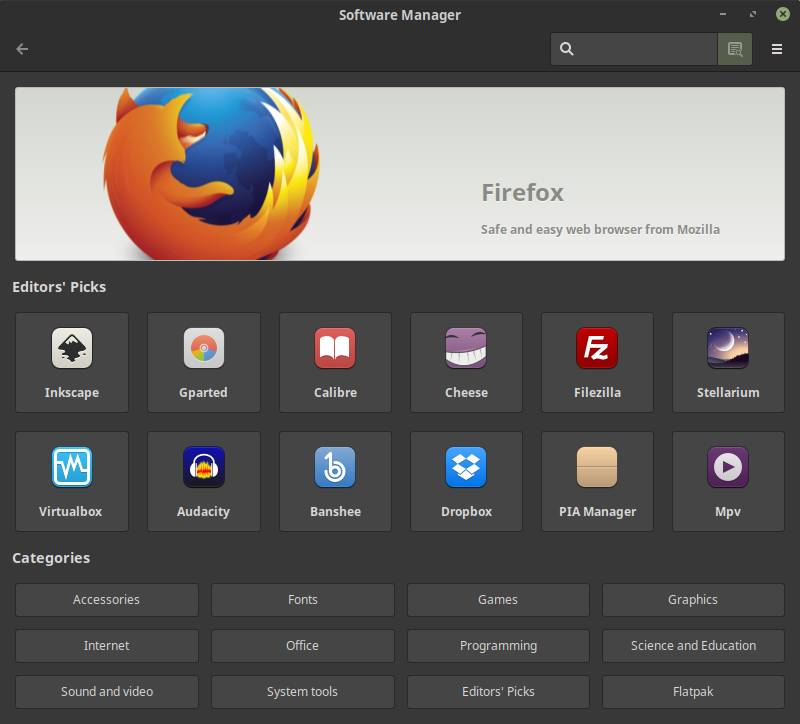
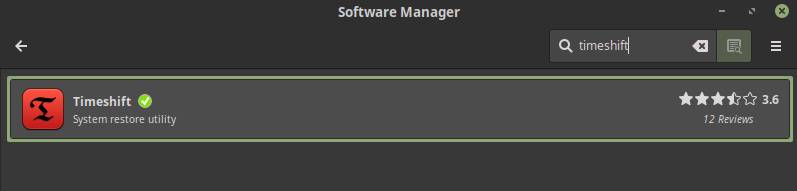
If you run an older version, like 18.X of Linux Mint you go to the Software Manager in your applications menu…
…and look it up there.
If you don’t run Linux Mint or a much older version, you probably won’t find Timeshift in the repositories of the distribution. Then use for Debian based distributions the following command line instructions:
sudo apt-add-repository -y ppa:teejee2008/ppa
sudo apt-get update
sudo apt-get install timeshift
How to use Timeshift to backup and restore Linux Mint
Before we start I assume that you have an extra external hard drive at your disposal that you can use as a backup device. If not, then run immediately to your local computer dealer to buy one.
1) Start Timeshift via your applications menu.
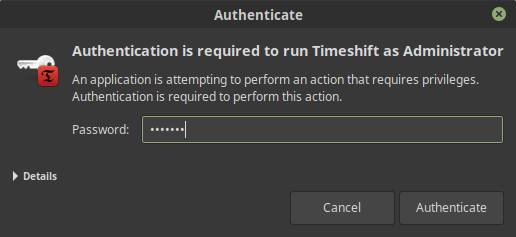
2) You must login as administrator so give your admin password.
The first time the Setup Wizard will be presented to you:
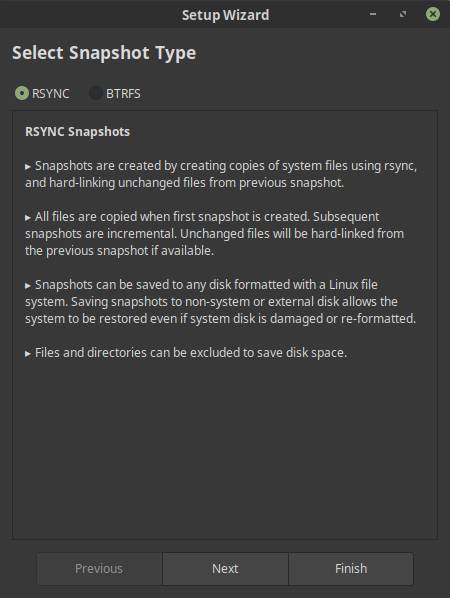
Here you can choose between RSYNC and BTRFS. The most important difference between the two is that BTRFS is a filesystem that needs its own partition, while RSYNC can save the data anywhere, so is more flexible.
3) Select RSYNC and click Next.
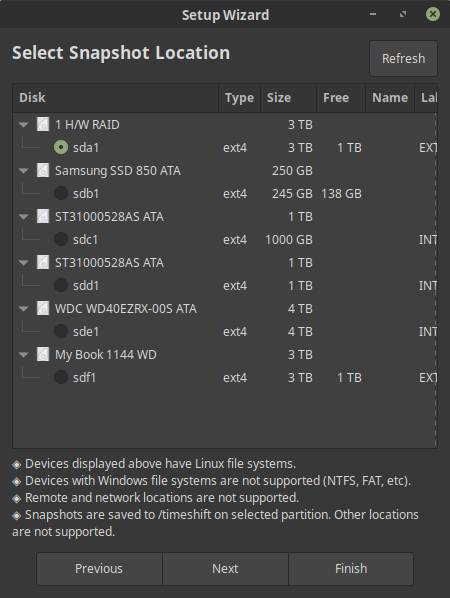
4) Select the external drive that you want to use for your Timeshift backups. Click Next.
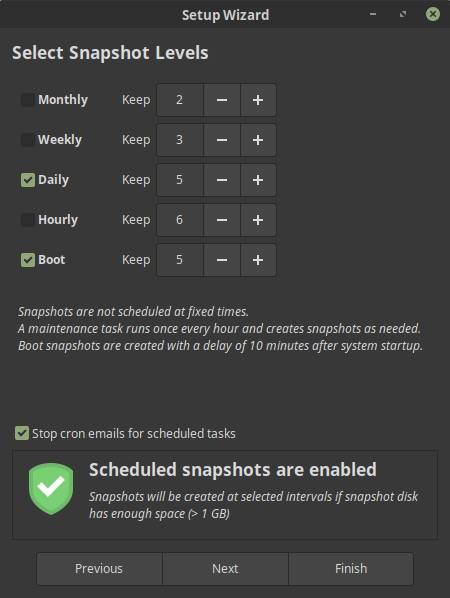
Here you can decide on the backup frequency. It all depends on how you use your system. In my case, as I ue it intensively on a daily basis I want I high backup frequency. You can also decide if you want to receive mails on the status of the backup process. Standard this has been disabled.
5) Make your selections and click on Next and on the next screen click on Finish.
That’s basically it. But let’s have a look first at the settings as you might want to change some things.
6) Click on the Settings option.
7) Click on the Users tab.
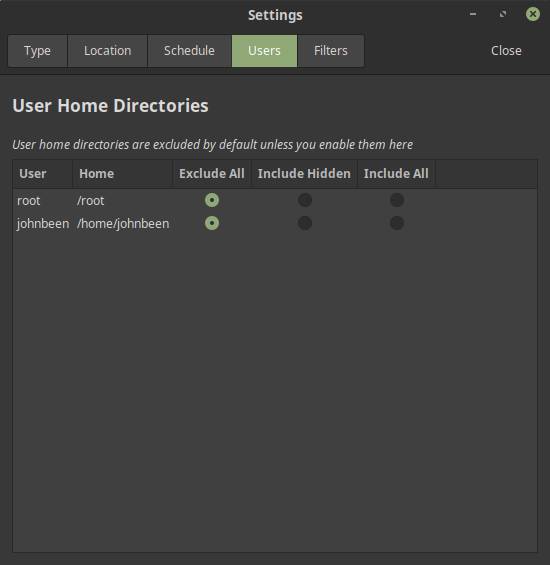
Here you can decide if you want to include the user home directories. Standard this has been disabled as the developer is in the opinion that these directories sometimes contain large amounts of data which will cost large amounts of space on your backup device. As Linux Mint 21.2 also contains a separate backup tool for your files, settings and other content of your home folder and for your software selection, you could leave it in Timeshift as it is.
8) Click on the Filters tab.
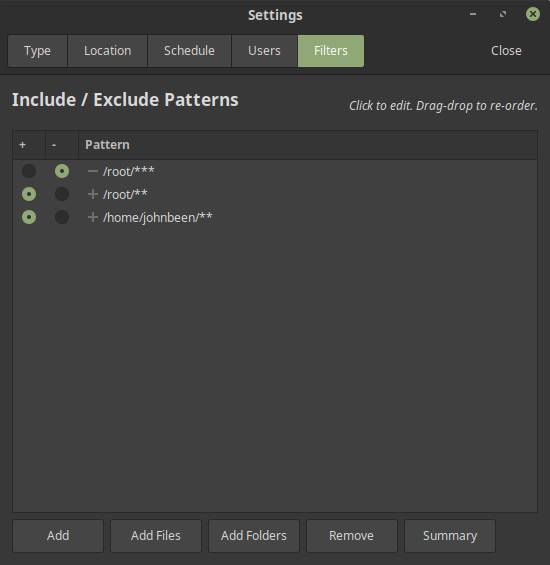
In this tab you can add or exclude patterns, files and folders to include in the backup scope. So you can for example add your video folders and photo folders on your external drives, which then will be part of the backup procedure. As said earlier the backed up user files cannot be recovered on individual file level. Recovery is always on the complete scope of the Timeshift settings. For user file based backup it is therefore better to use a backup tool like LuckyBackup or Cronopete. Read my articles luckyBackup is a powerful backup solution for linux and
Cronopete backup software for Linux is a good alternative to Apple Time Machine.
You can now close the application as it will handle backups automatically, but I think it is a good idea to start a backup directly.
9) Click on Create.
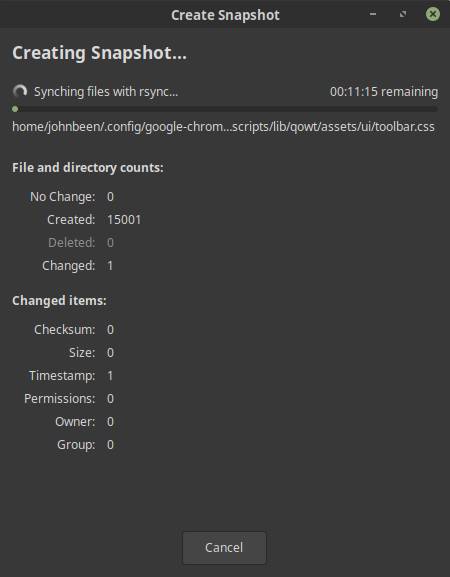
The backup will be created to your external storage device.
How to use Timeshift to recover your Linux Mint system
The above is all of course about the happy flow and we actually hope that we never need a recovery. But practice says that this is not realistic thinking. So what if there is something really wrong and we want to jump back in time to a moment that we know our system was still working as expected. Here there are basically two scenarios:
1) You can still access your operating system.
2) You can’t access your operating system.
Ad 1) If you can still access your operating system but it is unstable or something else is wrong, just start Timeshift, select one of the snapshots and click on Restore.
Ad 2) If you can’t access your operating system than you need to start from your Linux Mint USB Live environment. Read my article How to use Linux Mint without installing on a PC or How to use Linux Mint without installing on a Mac for further details.
When you have booted in the Linux Mint Live environment it depends if you use Mint 19 and higher, or maybe an older one. As already said Timeshift is a standard application within Linux Mint 19 and higher, so if you are in that situation, you just go to your applications menu and search for Timeshift. If you run an older version, like 18.X of Linux Mint you go to the Software Manager in your applications menu and look it up there.
Launch the Timeshift application, click on Browse, browse to your backup location, select the backup folder and select Restore.
Final words
I think Timeshift can be a lifesaver. Well, maybe a bit exaggerated, but it offers a simple but powerful lifebuoy for Linux Mint users, but also for users with other Linux distros.