How to setup and use Cronopete backup software for Linux
by John Been June 7, 2019 · Apps per category / Backup / How to / Latest blog / Tools
You have just made the switch to Linux or you are still deciding and need more background information on all available open source software options as an alternative to the closed source commercial offerings you use now? One of the first things to think though is how to set up your backup strategy and what software to use for that. In this post I will give some more information on Cronopete of Rastersoft, a intentionally look alike piece of software that is comparable in look and feel and in operations with Apples Time Machine backup software. Cronopete backup software for Linux is a good alternative to Apple Time Machine?
As stated in an earlier blog post thinking about and setting up a robust backup strategy is very important. There are two types of people in the world, those who have already had a hard drive crash and those who will get one soon. The question is not if your hard disk will break down once, but when it will actually happen. But many people have stored all their data just once only on their internal hard disk of their laptop or workstation. In the event of a crash of the hard disk, fire or theft, they lose their valuable photos and documents. That is why a well-considered backup strategy is of vital importance to your customers and the continuity of your organization. But also for all your important private data.
Why compare to Apple’s Time Machine backup software
Before I switched to Linux Mint I was a long time (15 years) Apple user and to be honest a bit of an Apple fanboy. And although I am a true Linux switcher now and love what is possible within the Opens Source world, in my opinion a lot of things Apple is doing are not that bad as a lot of other people want to try to convince you to. Time Machine is a very popular backup application developed by Apple that has been an integrated part of Apple’s desktop operating system since the 10.5 version of Mac OS X, now called macOS. This backup application was initially designed to seamlessly work with the Apple Time Capsule hard drives (Apple announced that they will stop the production of the Time Capsule), but is also suitable to use with whatever external or internal hard disk. Time Machine is a very simple application at the front but very clever in the backend. It makes periodic backups, which the user can later use to recover files in a very user friendly and visual manner. It is possible to restore your entire system, a number of files or a single file. The user interface of Time Machine is very pretty. Versions of your backup data are arranged in a row, with the most recent version in the front and the oldest version in the back. The user can scroll through the list and compare how the folder or file looked in the past.
Is Cronopete backup software for Linux a good alternative to Apple Time Machine?
According to the developer Cronopete is a Linux clone of Time Machine. It actually aims to copy the look and feel and the operations as closely as possible. The name comes from anacronopete (“who flies through time”), which is a time machine featured in the novel from Enrique Gaspar y Rimbaud, and published in 1887 (I always love nice facts). Although being a one man supported application the update cycle is very frequent (this year 11 releases already), which is a good thing. Cronopete can be installed on all Linux distributions but in this post I will focus on the installation and operation in Ubuntu based environments like Linux Mint.
Cronopete has in my opinion a very nice interface and is quite different from other applications like LuckyBackup. LuckyBackup has a more traditional, professional feel, whereas Cronopete has a more playful and accessible vibe.
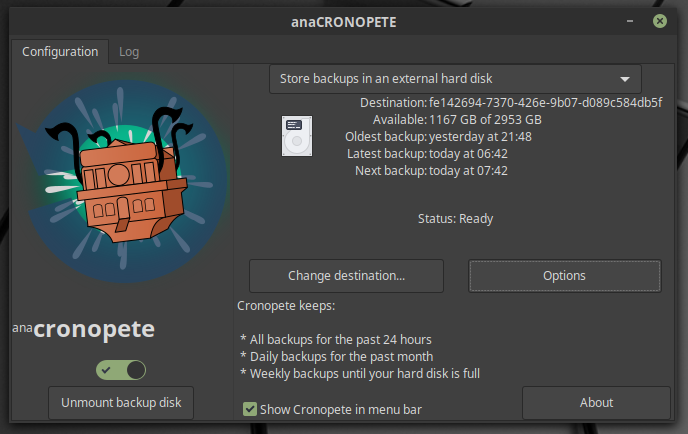
As the screenshot shows you can choose to Store your backups on an external hard drive (which can be an extra internal drive as well ofcourse) or you can store your backups in a folder on the same drive you use for your operating system, your applications and your data. Keep in mind that in the latter option this is no real backup as you still lose everything in case of a hardware failure. I wouldn’t advice to choose for this option. Please backup to another physical drive.
Further you can change the destination, so if you have multiple hard drives you can choose which one Cronopete needs to use. Cronopete keeps standard all backups for the past 24 hours, daily backups for the past month and weekly backups until your hard drive reaches its capacity. The options button gives you among others the possibility to change the interval of the hourly backup to maybe a 2 or 3 hourly frequency. Further you can determine here which source locations need a backup and you can exclude folders if necessary. And that is basically it. All the real magic will be done behind the scenes.
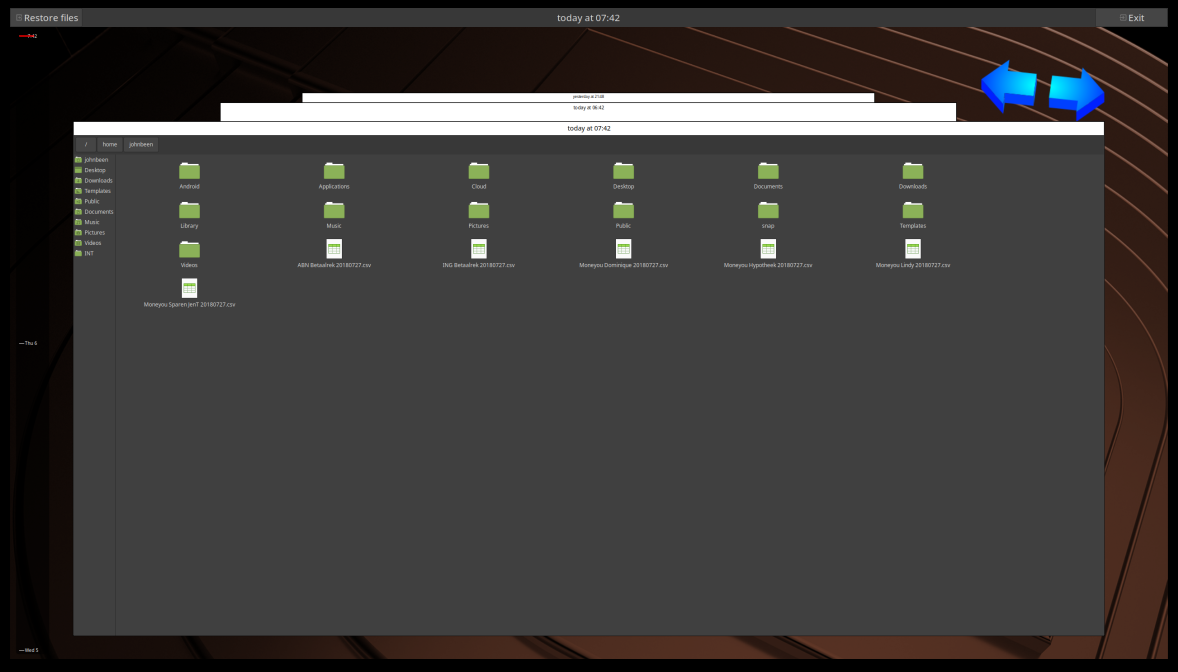
This was the settings part, but what about if we need to recover an actual file or complete folder from a moment in time. The nice thing of Cronopete is that you can recover data from whatever day since you started the backup process. A use case can be that you are working on a document for weeks now and for whatever reason the changes of the past two days are not required anymore by your manager and she wants you to continue with the version of your document of two days ago. You simply choose for Restore files from the dedicated icon in your menu bar and browse visually through time to see the different available copies.
Installation of Cronopete
Installation in for example Ubuntu or Linux Mint is very simple.
1) Go to the download zone on https://www.rastersoft.com/programas/cronopete.html
There are different packages of Cronopete available for different Ubuntu and Ubuntu based versions. Select the one that fits your currenbt situation.
Ubuntu 18.04.x >> Bionic Beaver >> Package for Ubuntu bionic 64bit
Ubuntu 18.10 >> Cosmic Cuttlefish >> Package for Ubuntu cosmic 64bit
Ubuntu 19.04 >> Disco Dingo >> Package for Ubuntu disco 64bit
Linux Mint 19.x >> based on Ubuntu 18.04 >> Package for Ubuntu bionic 64bit
2) Click on the package you need.
A .deb file will be downloaded now to your download folder.
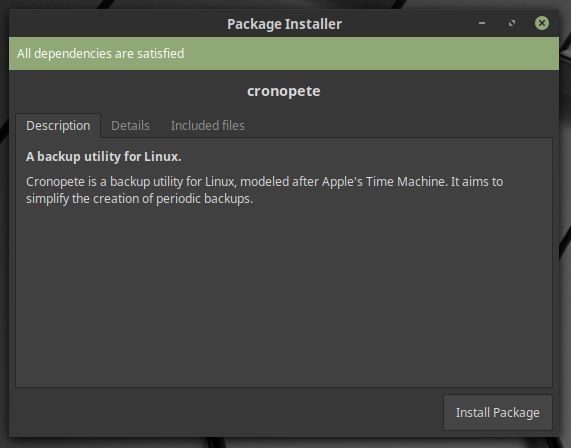
3) When finished double click the .deb file and you can install from there. Easy.
If you like to use the command line, that is possible as well.
1) Open the terminal via keyboard combination Ctrl + Alt + T
2) Type the following and give Enter:
wget http://www.rastersoft.com/descargas/cronopete/cronopete-bionic_4.9.0-ubuntu1_amd64.deb
Note: Keep in mind that 4.9.0 is the current version. If there is a newer version available you should adapt above command accordingly by changing the version number.
2) Type the following and give Enter:
sudo apt-get install gdebi
2) Type the following and give Enter:
sudo gdebi cronopete*.deb
Cronopete setup
OK. Cronopete has been installed, so now some real fun.
1) Start Cronopete via the command line with “cronopete” or via your start menu.
Here you see the options Backup Settings and Restore Backup. What you see as well is a small icon on your menu bar of a circular arrow. We come back to that one later.
2) Choose for Backup Settings and the following screen will be presented.
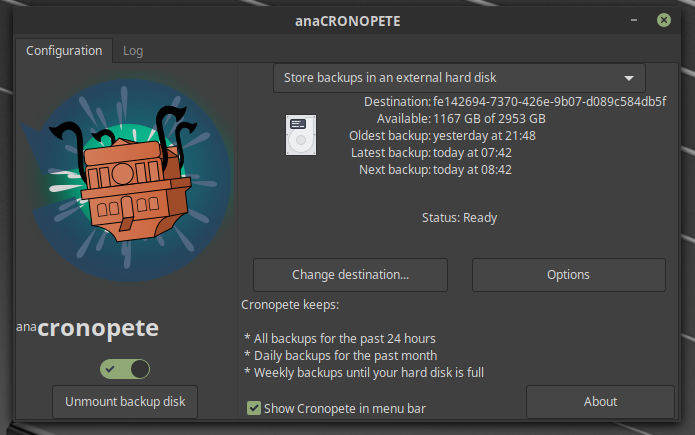
3) First be sure that the option “Store backups in an external hard disk” has been selected.
4) Click on Change destination. All your (mounted) hard drives will be visible.
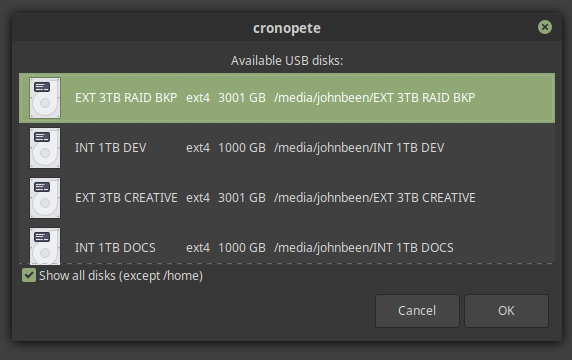
5) Choose the hard drive you want to use for your backup and click OK.
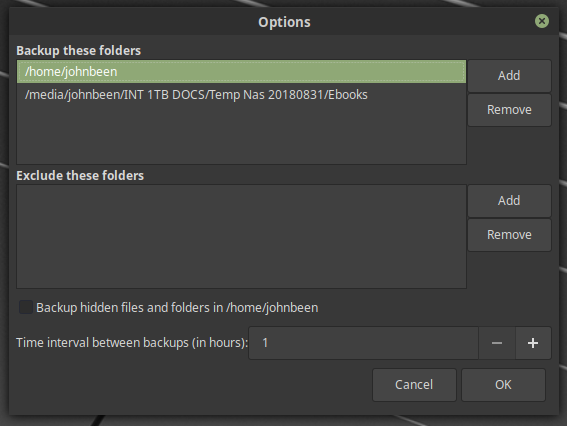
6) Now you a re back on the main screen. Click on Options.
Here initially your home folder has been added, but you can add whatever folder or complete hard drive you like. And if you add a complete hard drive you can exclude some of it as well. Also determine if you want hourly backups or maybe another interval.
And that is it for the setup! Very simple.
Recover a backed up version
The backup process will now run every hour and what it does is not doing a complete copy of all your files, but it will look only for the changes. This is what we call an incremental backup.
1) When you want to recover a file or maybe a complete folder, click on the small Cronopete circular arrow icon in your menu bar and choose Restore files.
2) Now you will be presented a visual 3d like overview like below image.
With the arrows you can fly through time and select from there an individual file or folder.
That’s it. It works perfectly well. So give it a try.