You are a professional portrait, product or wedding photographer and have been using Apple products for years. Or if you are more economically oriented or not a fan of the Apple ecosystem, then you are probably a user of the Windows platform. But then you read and hear more and more positive things about that obscure third operating system called Linux and you wonder if there are possibilities to convert your current professional photography workflow into a workable process within this free alternative landscape. I myself have also been in this situation. In addition to my regular work as a senior development engineer for a large Dutch bank, I have also been a self-employed professional portrait and wedding photographer. At the beginning of that extra career I was still an Apple user, but when my iMac stopped working and I also could no longer upgrade my MacBook, an attempt to design a Linux based photography workflow became more and more interesting to me. And now I can look back on that transition with a very good feeling and I no longer have any reason to return to the Apple ecosystem. And to help other independent photographers in their decision, in this article I will look at how to setup a Linux and Open Source based workflow for professional photographers.
Why should you choose Linux as a professional photographer?
Before I start with the description of my personal photography workflow, I think it’s useful to first explain in short what Linux actually is, why Linux could be a good alternative and why a switch from the more mainstream operating systems could be right for you. If you already know enough of the basics of Linux then you can skip this part and jump right to the paragraph that describes my photography workflow.

In this article it is not my intention to start a tirade about how bad other operating systems are, because I do not think so. I just want to show, partly from the experiences and demands of a one man store professional photographer, that there is a world outside Microsoft and Apple that could be unexpectedly interesting for many people and above all, is completely free.
Linux in short
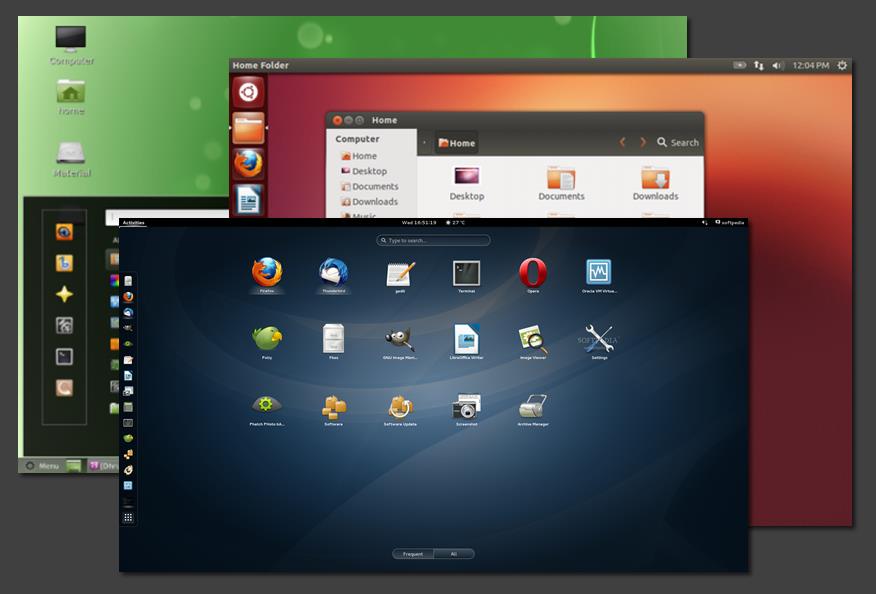
Unlike Microsoft or Apple, which basically offer one current version of their operating system, hundreds of variants are available based on the Linux kernel, called distributions. Most distributions consist roughly of the Linux kernel, a desktop environment and software packages. From this software environment, which is a collection of distribution dedicated software, the by the user desired software can be simply installed. The latter is maybe a bit comparable to an app store, such as the Android Play store, but specifically tailored to a specific distribution.
From a Windows or macOS user perspective we have always been used to searching for software on the internet, downloading it and then installing it, with possible security and virus problems because you never know if the website you download from is a reliable choice. And when you downloaded the software, the next step, the installation, can be a quite cumbersome process as well. On the other hand to install software in your Linux distribution, go to the software manager already present in your operating system (in which software is offered that has been checked by the distributor and can therefore be labeled as safe), make a choice based on ratings, descriptions and user feedback and press Install. Then the software including all necessary dependencies is downloaded from the right place and installed within a couple of seconds. Finished! It is that simple. A single Linux distribution can contain tens of thousands of beautiful software packages, and when you install the distribution mostly a lot of good applications are already installed by default and ready to use.
Benefits of Linux
No tracking
Soon after Windows 10 was released and the system could be thoroughly investigated for the first time, it became clear that Windows 10 closely follows the user. This allows you to keep track of which apps you use and how often and for how long you have used them, which websites you have visited and recordings of your voice via Cortana are analyzed and registered non-stop. Many of these settings can be turned off, but absolutely not everything. And why are not they just disabled by default and you choose whether you want to turn them on. With Linux you do not have to worry about all this. Because of the open source idea, there is no commercial thought behind the operating system and most software and your activities are therefore not registered in any way. Nobody in the open source community has the primary goal of earning money with their software and commercially tracking you.
You see what you have
Do you know exactly what software is running on your Apple or Microsoft computer and which versions of it? Are you aware of all hidden processes running in the background? Are you easily able to completely remove the unwanted software? Do you know exactly what Microsoft or Apple adds to your computer with automatic updates? No, that is absolutely impossible for most people to figure out. You will not have any problems with these under Linux. Linux works with a very clear package list, from which you can see exactly and in detail what is installed and what connections there are between components. And if you want to delete an already installed package, then everything is also deleted up to the last bit. So there is no software pollution, even in the longer term.
Performance
Declining performance has been an issue with Windows and macOS systems for a long time. Without many people being aware, there are many processes in the background that require a lot of the system. For example, Windows 10 loads standard, without clearly communicating about this, Cortana, OneDrive and Windows Defender. But in addition, these systems as a whole require very much of the underlying hardware. To be able to work with a large photo database in a professional photo management and editing application such as Adobe Lightroom, you need a lot of memory (16GB) and a modern multi core processor. Linux, on the other hand, requires much less of the hardware. Linux is very modular, allowing the user to decide about what should and should not be used. In addition, the core is set up much more efficiently. As a result, Linux is perfectly capable of running smoothly on an old Core 2 Duo processor from 2008 with 2GB of memory and a large photo database via Digikam or Darktable is easy to manage on the same machine with 4 or 8GB of memory. Then you can imagine what you can achieve with an even more modern setup.
No viruses
Slightly less for macOS, but certainly for Windows, is the virus aspect. Since Windows is the most popular desktop platform, it is interesting for malicious people to develop viruses and related assets. Actually you can not operate without a virus scanner that is continuously working in the background. Linux does not have any problems with viruses, so you work with a very secure system that also runs faster due to the absence of a background scanner.
Support
For both OSX and Windows it is closed source systems and if important issues are found by users only Microsoft or Apple are the appropriate parties to find and roll out a solution. But even if there are specific user requirements, these suppliers ultimately determine what will actually be added in a new version. Linux, on the other hand, is an open source system that everyone can look into, be able to tinker with and be able to improve and put up improvements. If there are issues or specific user requirements, then they can be communicated via communities and these points are usually resolved very quickly or workarounds are offered.
Disadvantages Linux
Overwhelming number of options
Of course Linux is not just a fragrance of roses and moonshine. Linux also has its points of attention and issues. Linux has a huge amount of choices and possibilities that are actually available to the end user. For the novice user this can sometimes be a bit overwhelming. On the other hand, Linux is offered in a large number of variants, called distributions. Distributions can be specially adapted to specific user groups or use cases, like photography. But that large amount of different distributions can also be a disadvantage. Freedom of choice is good, but it also can make things complex.
Not pre-installed on new computers
Linux is usually not pre-installed on new computers by default. Brands such as Dell and HP offer a limited number of models that can be ordered with Linux, but Windows is still the standard. That makes it more difficult for many people to switch to Linux, because they have to do the installation of the system themselves. That keeps the average user away from Linux, which is a shame because it is a formidable system. On the other hand, it is very easy to install Linux on a USB memory stick and start the computer from this stick. This way you can for example try Ubuntu or Linux Mint first before doing a real installation on your hard drive.
And then we finally arrived at the part you really came for: an example of a Linux and Open Source based workflow.
[sta_anchor id=”workflow” /]
How to setup a Linux and Open Source based workflow for professional photographers
Because I am always interested to broaden my horizon and to investigate whether I can achieve the same results at lower or even no costs, I myself have spent a long time investigating a possible switch from macOS to Linux. Another reason was that my 27 inch Apple iMac got serious technical defects, so I could no longer rely on this machine for my professional photography assignments and the required deadlines. So I build a powerful machine and installed and tried Linux and a lot of applications to find the optimal match for my workflow. And now my complete transfer to Linux is done and it feels like a success for me.
Below I will further clarify the workflow solutions I have chosen. I look at all aspects needed for an independent professional photographer. And in order to find the right distribution and applications, one first has to look at which steps and activities can be identified in the workflow of a photographer. As already showed before, my personal photography workflow looks roughly like this:
So what software solutions do I use to support this photography workflow with the means of Linux and Open Source? Let’s start.
The operating system: Linux Mint Cinnamon
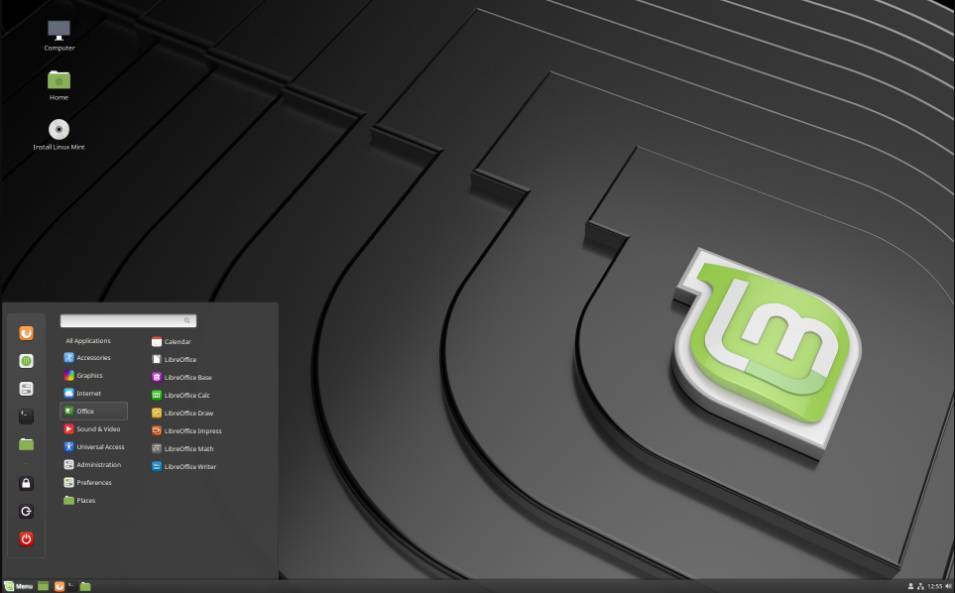
As mentioned earlier, a large number of Linux distributions are available for free. It is impossible to list them all, but the most popular options at the time of writing are Manjaro, Linux Mint, Elementary, MX Linux and Ubuntu. From my role as a photographer, I am not interested in computer technology, but I am a content creator and therefore a pure computer user and demand that the system works stable and stable out of the box without too many adjustments being necessary. My search resulted in the conclusion that this is absolutely Linux Mint for me. This distribution is fast, stable, works immediately after installation without problems and offers a beautiful, bright working environment with the Cinnamon desktop environment. An absolute must.
If you want to know more about the selection procedure, read my articles How to choose the best Linux distro for your needs and How to choose the best Linux Desktop Environment for your needs.
You can download Linux Mint here:
https://www.linuxmint.com/download.php
Preparation for the photoShoot: LibreOffice
When I do something, I always do that well prepared. Especially when it comes to customers and emotions, I leave nothing to chance. I therefore prepare everything together with the customer, discuss all wishes at a detailed level and record this in a kind of project document. This document then goes back and forth between me and a future wedding couple or family to be photographed, until we have everything clear for the important day.

I use LibreOffice for writing this kind of documents. I think LibreOffice is a very versatile package, so I do not really understand why there are so many people who still pay for Microsoft Office for private purposes or as a freelancer. Assuming that these people probably use only 30% of the functionality that Office offers, it is a waste of money if you do not use LibreOffice.
LibreOffice is standard in every Linux distribution. If you want to know more about LibreOffice go to:
https://www.libreoffice.org/
Screen Calibration: DisplayCal
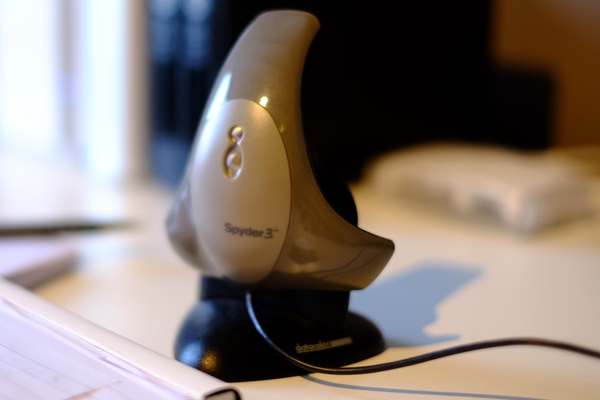
When you are serious about photography and image editing, it is very important that your monitor displays colors accurately and with the correct brightness, tone and intensity. Just think what happens when the screen is set too dark. Then your photo seems darker than it actually is. Then you adjust the brightness of the photo mistakenly to the bright side to make it visually match what you expected. If you now have the photo printed at a professional lab, the end result will be an overexposed image. To avoid this, the first step in your photography workflow should always be the calibration of your monitor with a device intended for that purpose, also known as a colorimeter. I use an old Spyder 3 pro myself, but there are multiple options that work perfectly with Linux.
If you are interested you can still buy the Spyder 3 pro second hand [affiliate link].
But there are newer versions available that work also great with Linux, being the Datacolor SpyderX Pro and the Datacolor SpyderX Elite [Affiliate Links].
The following examples of colorimeters works perfectly with Linux, but there are more colorimeters out there that will work fine as well with Linux.
- Gretag-Macbeth i1 Pro (spectrometer)
- Gretag-Macbeth i1 Monitor (spectrometer)
- Gretag-Macbeth i1 Display 1, 2 or LT (colorimeter)
- X-Rite i1 Display Pro (colorimeter)
- X-Rite ColorMunki Design or Photo (spectrometer)
- X-Rite ColorMunki Create (colorimeter)
- X-Rite ColorMunki Display (colorimeter)
- antone Huey (colorimeter)
- MonacoOPTIX (colorimeter)
- ColorVision Spyder 2 and 3 (colorimeter)
- Colorimètre HCFR (colorimeter)
And a really unique device is the ColorHug2, which is a 100% open source display colorimeter designed and build for Linux by Ania and Richard Hughes.
https://hughski.com/
To use a screen calibration device in Linux the right way, you need software that works seamlessly together with your device. I use the DisplayCal application. DisplayCAL (formerly known as dispcalGUI) is a display calibration and profiling application. It has screen accuracy in mind (the developer is even in the opinion that this software is the most accurate ICC compatible display profiling solution available). The software is setup in a very clear way and you are guided through the process by logical steps.
You can find the DisplayCal software here:
https://displaycal.net/
You can read about monitor calibration in far more depth in my separate article How to color calibrate your monitor in Linux.
Download, Rename and Backup original files: Rapid Photo Downloader
Anyone who is very involved in photography or videography will automatically come to the point of thinking about a workflow, or an optimal process that includes, among other things, logical steps for importing files, the folder structure and the naming of the photo and video files. Rapid Photo Downloader’ is absolutely my favorite. Rapid Photo Downloader is designed and built by Damon Lynch, who is doing a PhD in sociocultural anthropology. He researches what war does to a war survivor’s sense of time. He is a photographer as well and his pictures have a great social context. Being a photographer himself helps to better understand what a photographer actually needs in his workflow.

Rapid Photo Downloader does not try to be everything in one application, but is very clearly focused on just one part of a photo or video workflow. Where all-in-one applications are often a bit alright in everything, but do not really excel at anything, precisely because of this limited scope Rapid Photo Downloader has become a very powerful tool for the limited part for which it is intended. For me as a Linux user I am very happy that this application is available and it has therefore become my default starting point in my photo workflow. It is unfortunate that Windows and macOS users can not benefit from this solution. In my opinion Rapid Photo Downloader is the best open source photo and video download software for Linux.
It’s goal is to greatly simplify the transfer of photos and videos from the memory card to the computer via self-defined rules. When one or more memory cards are inserted into a card reader, Rapid Photo Downloader automatically scans the photos and videos on your media and is then given the opportunity to choose which files should be downloaded. Rapid Photo Downloader downloads your media files into designated folders. It automatically creates subfolders, based on the default options that can be set themselves. Setting up the folder structure is very extensive, but also very clear. Multiple levels can be set, using date / time, free text, filename, metadata and job code. The same can be done for the naming of the media files. Multiple name blocks can be set, using date / time, free text, filename, metadata, sequences and job code.
Before I knew about Rapid Photo Downloader my download process contained 13 steps:
1) Connect card reader to pc
2) Insert memory card in card reader
3) Find memory card in file manager
4) Open DCIM folder
5) Find newest files
6) Open extra file manager
7) Select correct destination drive
8) Go to photo main folder
9) Create new folder for new files
10) Create subfolders if required
11) Copy new files to new (sub) folder
12) Rename copied files to your own standards
13) Create backup of your new files
But now that I use Rapid Photo Downloader I reduced it to 5 steps:
1) Connect card reader to pc
2) Insert memory card in card reader
3) Start Rapid Photo Downloader
4) Push Download button
5) Select Job Code (if you use that in your preset) and hit OK
You can all about Rapid Photo Downloader in my article Rapid Photo Downloader is the best open source photo and video download software for Linux.
You can find Rapid Photo Downloader here:
https://www.damonlynch.net/rapid/
Photo scoring and selection: digiKam
Before I start editing my RAW files, I first want to clean, categorize and select the images with the help of ratings and keywords. digiKam enables me to do this in an efficient manner, among other things with the aid of star ratings and color indicators. digiKam is an advanced open-source digital photo management application that runs on Linux, Windows, and MacOS. The application provides a comprehensive set of tools for importing, managing, editing, and sharing photos and raw files. digiKam can handle raw files, and the application uses the excellent LibRaw library for decoding raw files. The library is actively maintained and regularly updated to include support for the latest camera models.
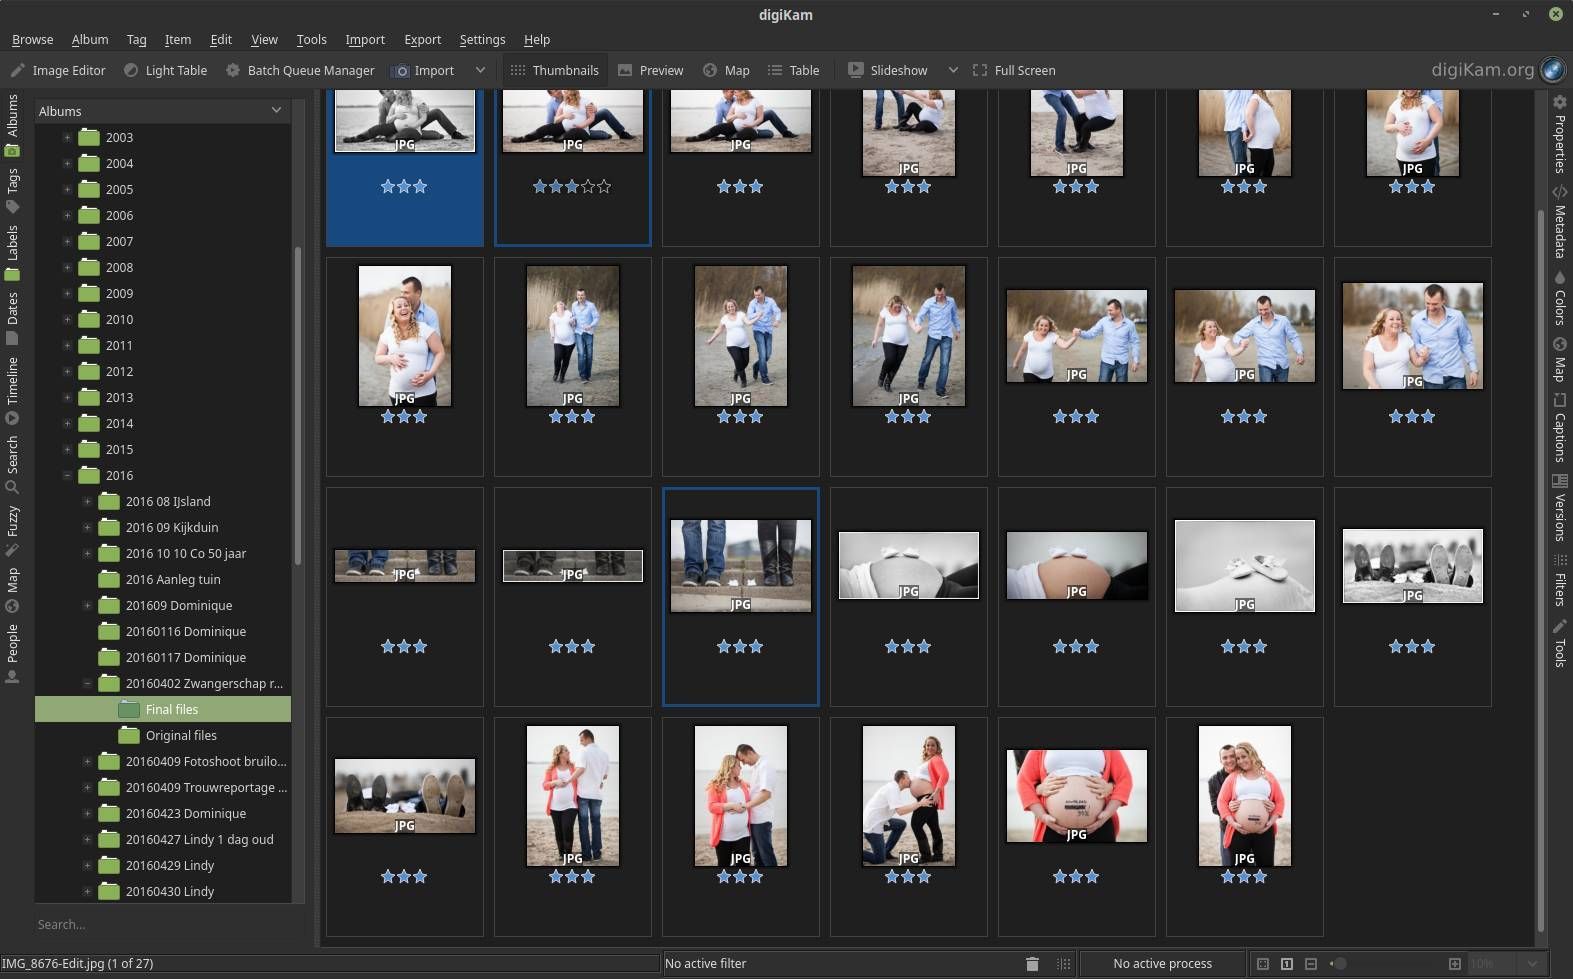
Within digiKam I can quickly view a collection of images, I can add a star rating of 1-5 and then I can filter on these ratings. IPTC metadata such as keywords, description and copyright information can also be added here. When the final raw operation has taken place, Digikam functions as a database for the final results. A great advantage of digiKam compared to for example Adobe Lightroom, I personally think that no use is made of a database, but that digiKam recognizes the photos without import and just shows them. Therefor digiKam feels faster than Adobe Lightroom.
You can find an extensive overview of all features here:
https://www.digikam.org/about/features/
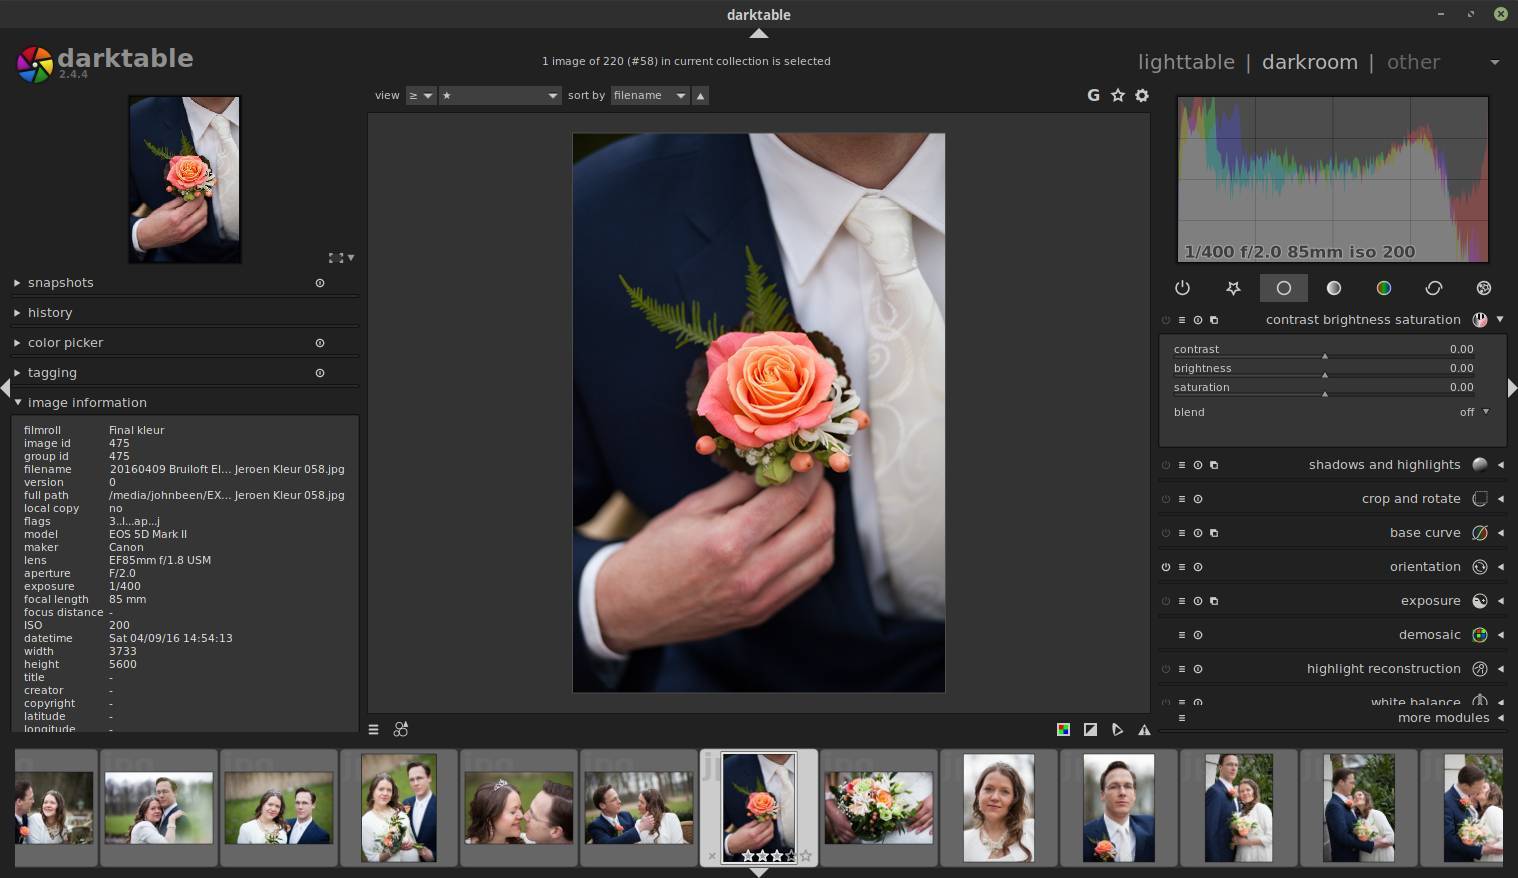
Raw editing: darktable
Adobe’s Lightroom has been the de facto standard for professional and serious RAW editing for Windows and macOS for years. And we can only say that Lightroom is one of the most robust software solutions to organize and process RAW photo files. As lovers of Linux and open source software, however, we do not have Lightroom at our disposal, but that doesn’t mean we don’t have similar needs when it comes to serious processing of RAW photo files and accompanying workflow support. And in my opinion the fulfillment of those needs is offered to us in the form of the powerful open source solution darktable.
When it comes to image editing under Linux, we are not disappointed. A surprisingly large number of high quality RAW editors are available for Linux, such as RAWTherapee, GTKRAWgallery and Lightzone. But anyone who appreciates a clear and professional workflow for importing, valuing, editing, synchronizing, presenting, printing and exporting and looking at the enormous range of high-quality machining modules can hardly ignore darktable. In my opinion a must have in your professional workflow.
In addition, darktable is what is called a fully “color managed” application, so it fits perfectly into a workflow where color management plays a crucial role from conception to print. For example, darktable supports automatic detection of display profiles, including built-in ICC profile support for sRGB, Adobe RGB and linear RGB color spaces.
Darktable also offers the possibility to work “tethered”, in which a camera is connected directly to the PC and the images are shown directly in darktable. This is especially strong for portrait and product photographers working in a studio. And in terms of performance, we are served on our hints. If you have a relatively powerful GPU, you can use OpenCL when editing the photo files.
Darktable differs from other applications due to the enormous amount of very powerful processing modules. More than 60 modules are available at the time of writing. Using the favorites functionality, modules can be combined into a separate list of preferred modules, so that you do not always have to maneuver through the entire list. A number of important groups of functions can be distinguished: Basic, Tone, Color, Correction and Effect. For example, within Basis you will find the modules contrast, brightness, saturation, shadows and highlights and highlight reconstruction. In the correction group you will find, among other things, the modules liquify, perspective correction and the new module haze removal. With many of the modules offered, powerful mixing options are available and the adjustments can be implemented on the whole or via mask options on parts of a photo. And all this in a non-destructive way and with a powerful history functionality, where executed actions can be compared and undone as desired.
The application darktable is being integrated in more and more Linux distributions, so you can install it easily by just looking it up in your software center or package manager. But you can download it as well here:
https://www.darktable.org/install/
Detailed editing: GIMP
GIMP is an acronym for GNU Image Manipulation Program. It is a program that is very comparable to Adobe Photoshop on a large number of points, but with a somewhat stiffer user interface here and there, but it is continuously improving. It has a very extensive set of possibilities. It can be used as a simple drawing program, but also as an expert photo retouching program.
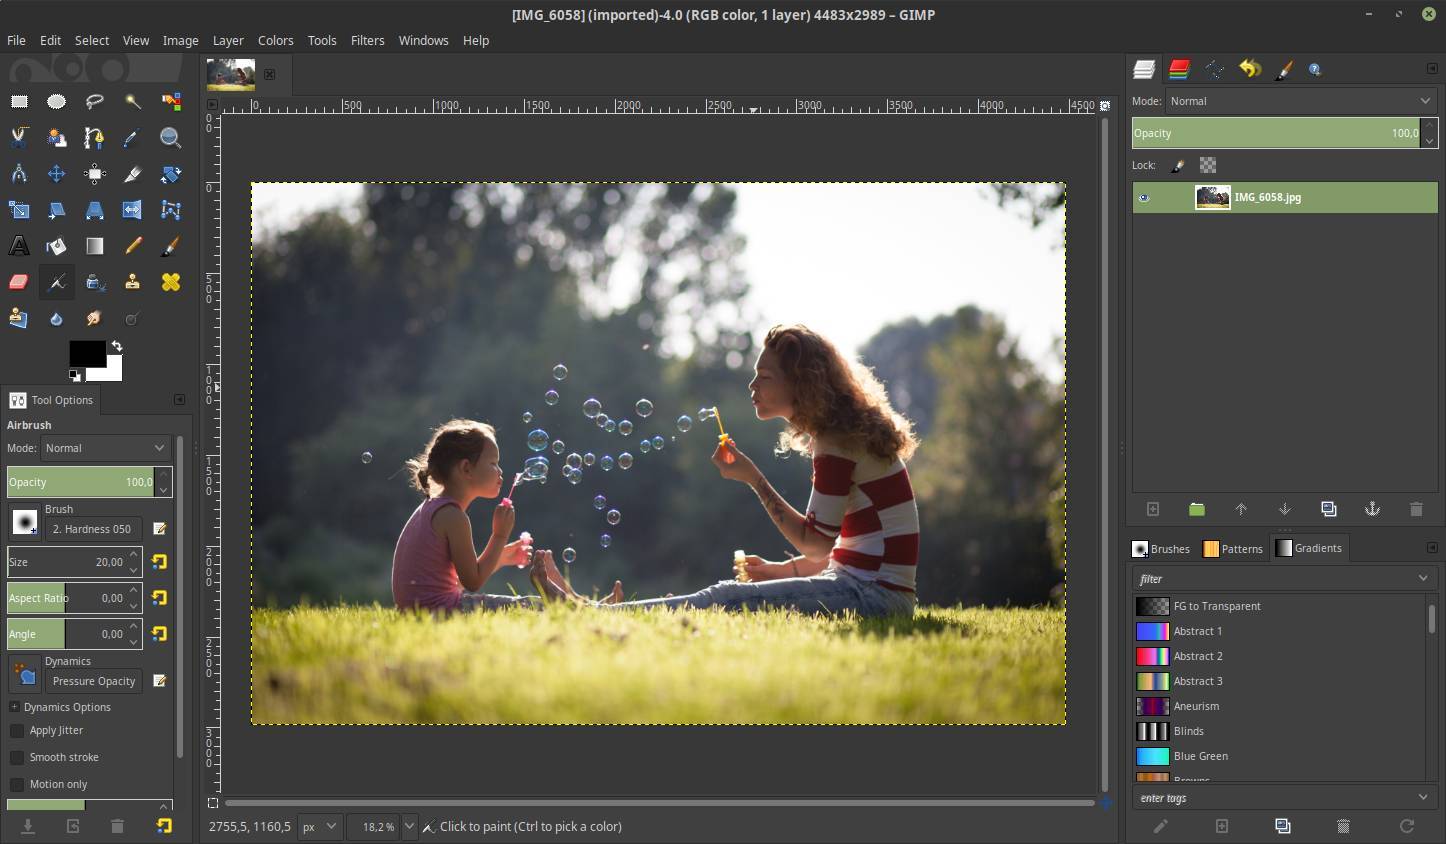
GIMP is designed to be extended with plugins and other types of extensions. The advanced scripting interface makes everything easy to script, from the simplest task to the most complex image manipulation procedures. It offers options such as brushes, pencils, airbrush, clone, sub-pixel sampling, anti-aliasing, gradient editor, blend tool, custom brushes and patterns, full alpha channel support, layers and channels, advanced path tool, bezier and polygon selections. and quick masks. It is the most logical choice as Photoshop alternative under Linux.
Read my article The best technique to remove facial blemishes with GIMP as an example of what you can do in GIMP.
You will find GIMP as part of almost every Linux distribution, so you can install it easily by just looking it up in your software center or package manager. But you can download it in different manners as well here:
https://www.gimp.org/downloads/
Story telling: Geeqie
When you work for an assignment with 2, 3 or 4 cameras, then the original naming of the photo files will sometimes collide with each other. When you then make new versions of photos for black and white conversions, for example, the new naming will also result in a deviation in the chronological order, or the storyline of the photo story. So I need software that makes it very easy to visually change the order of photos instead of a name based approach. So I like something that is a metaphor as if you put multiple photos on the table and mix them up in the order you want. In addition, I want my software to be color-managed. A wonderful piece of software for this story telling step is Geeqie.

This software makes it possible to create a collection, then drag a set of photos to that collection and drop and mix these photos in any order. Then this order determines the new naming of the files. And all that in a very simple and visual way within a simple user interface.
You can find Geeqie here:
http://geeqie.org/
Video editing: Shotcut
Professional photographers are increasingly delivering video to their clients as well. For me, I also offer photo based movies with a nice storyline, animation and music. For this I use the very extensive program Shotcut. A lot of Linux based videographers would probably say that the application kdenlive is the best video editing tool, which is probably true, because of the enormous array of options and flexibility. But for me personally I think Shotcut has a more intuitive user interface and works a bit more organic. Shotcut is a powerful application, but requires some patience and perseverance to discover what it can do.
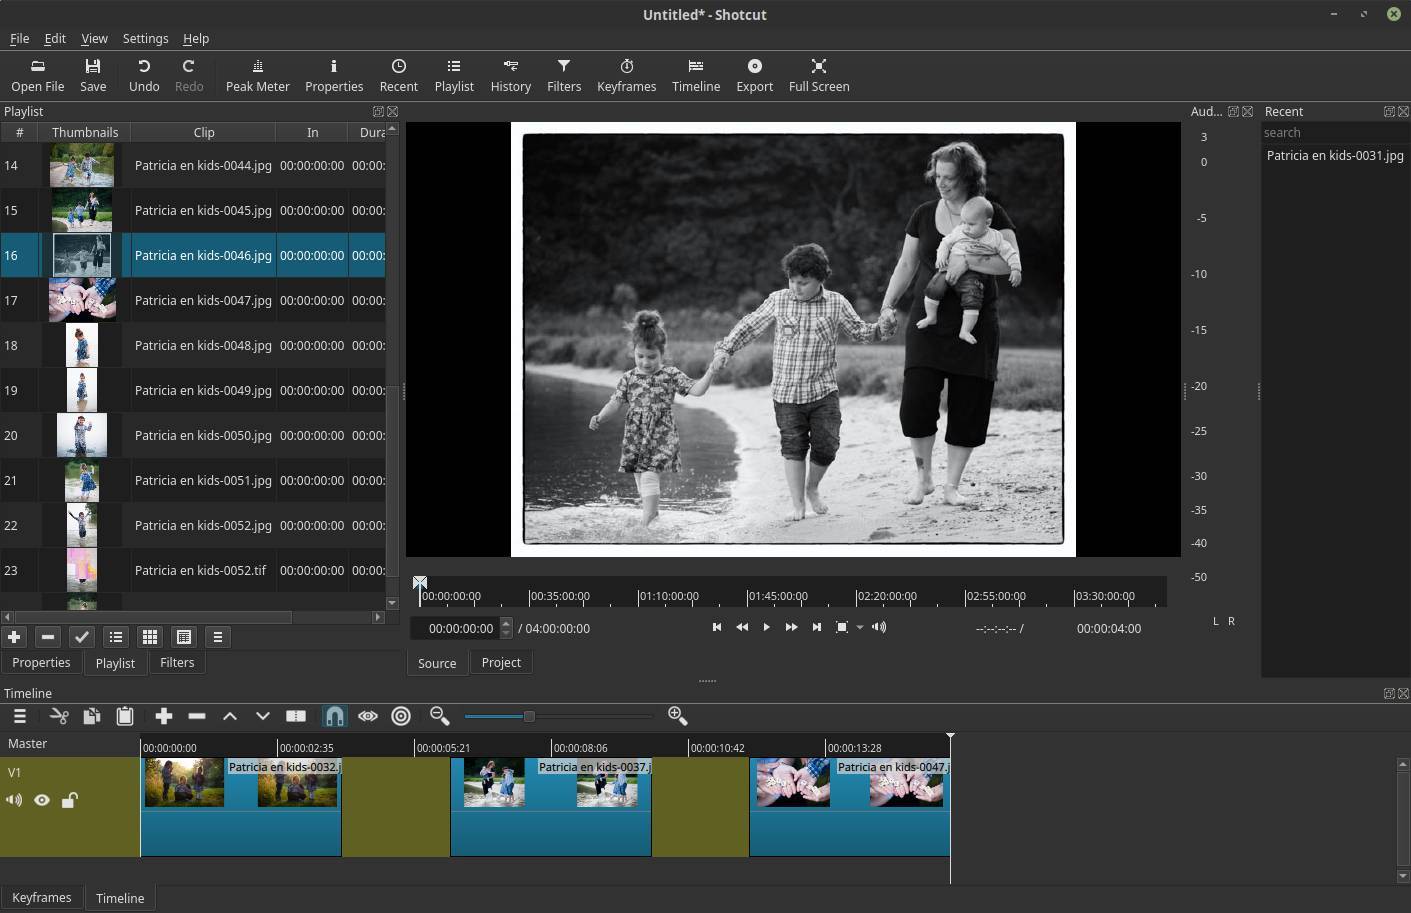
Shotcut is a non-linear video editor based on a clear interface and a powerful set of tools. For the most part, Shotcut works as you would expect from a modern video editor. It uses the same layout as many other apps of its kind. Furthermore, out of the box it offers many expansions, filters and effects. The filters are probably one of the most used tools in an application like this, and they are very well implemented in Shotcut. Choosing and applying filters can be done very easily, and the effects are immediately visible.
Shotcut supports hundreds of audio and video formats and codecs thanks to FFmpeg. No import is required which means native editing, plus multi-format timelines, resolutions and frame-rates within a project are possible. Frame accurate seeking is supported for many video formats.
You can find Shotcut here:
https://shotcut.org/download/
Communication and transfer
Of course you communicate as a professional photographer with your customers. You discuss the wishes, you exchange planning documents, you send offers and bills and you name it. I use the mail application Thunderbird since I started using Linux. This is an extremely versatile open source mail application with very powerful functions. Thunderbird is standard in every Linux distribution.
For some users who, for example, come from the Apple platform and are more accustomed to elegance and have a more minimalistic approach, in my opinion the mail application Geary is a nice alternative. Read my article Lightweight, high quality and user friendly mail app Geary for more background information.
Book keeping: Manager.io
Of course, as a professional photographer making images and making our clients happy is our passion and we do that with heart and soul. But there also still need to be earned some money and this has to be administered again. So we need something to properly do the bookkeeping. For this I use the particularly user-friendly but also extensive Manager.io. Although this application is not open source, Manager.io is free and on desktop natively available for Linux. You can use the desktop edition for as long as you like, use all the features and enter as much data as required. There are no time limits, no usage limits, no ads. If you want to use a real open source solution you can have a look at GnuCash as well.
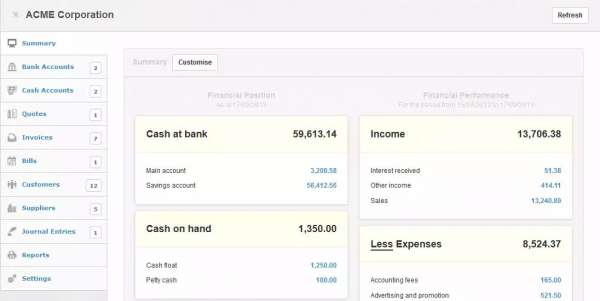
Manager is set up in such a way that you can start immediately. Traditional accounting packages first require setting up, among other things, the opening balances, an account schedule and opening of a financial year. In the case of Manager this is not necessary and for example the account schedule grows along with what you need at that moment. Furthermore, it is designed to be able to work within each country and thus adaptable to the requirements of each country. It supports local tax codes, local date formats, local currency formats, country specific tax reports and more.
here some of the main functionalities:
- General ledger
- Cash management
- Bank reconciliation
- Expense claims
- Accounts receivable
- Accounts payable
- Estimates & quotes
- Purchase orders
- Billing & invoicing
- Credit notes
- Delivery notes
- Sales orders
- Time & service billing
- Capital accounts
- Profit & loss statement
- Balance sheet
- Statement of changes in equity
- Chart of accounts
- Journal entries
- Bank statement importing
- Email templates
- Drill down reports
You can download manager.io here:
https://www.manager.io/desktop/download/
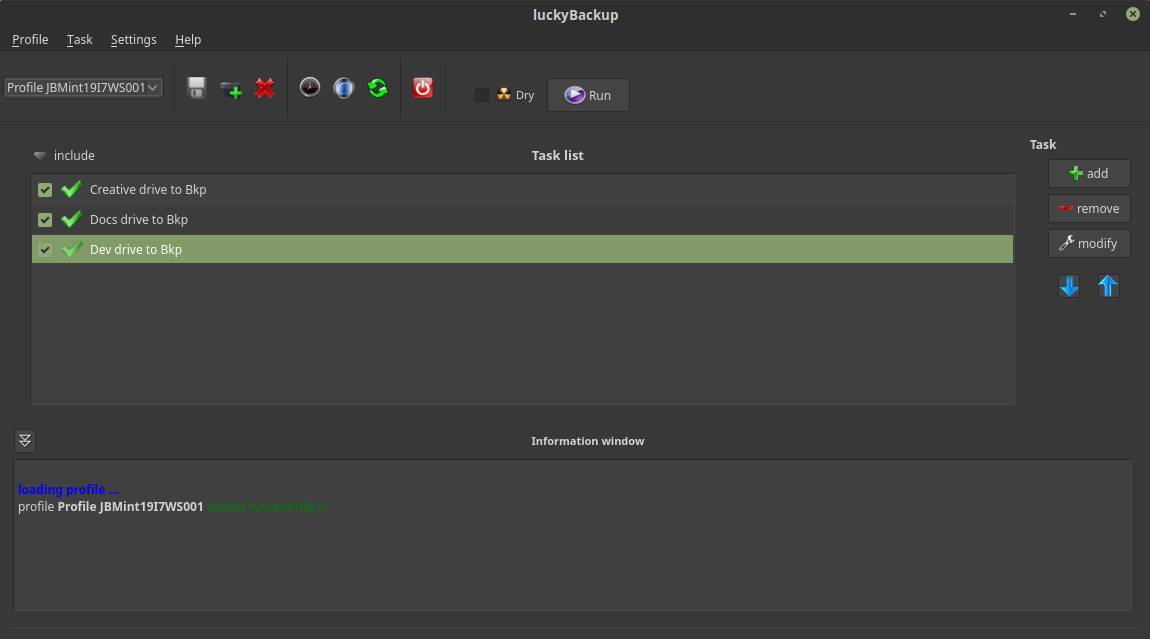
Backup: LuckyBackup and Rapid Photo Downloader
For a complete backup of all my files and applications I use the terrific LuckyBackup. With luckyBackup, the Linux user has a tool available that offers the possibility to create different types of backups with a simple GUI interface. These backups can be scheduled in time. Full backups can be made or they can be synchronized. luckyBackup is easy enough for almost every experience level, so users of all levels can set up reliable backups.
An overview of some characteristics:
- Backup: Backup any directory (source) to another (destination). luckyBackup copies over only the changes you’ve made to the source directory and nothing more.
- Snapshots: Create multiple backup “snapshots”. Each snapshot is an image of the source data that refers to a specific date-time. Rolling back to any of the snapshots is possible.
- Sync: Sync any directories keeping the files that were most recently modified on both of them.
- Simple / advanced option: The add/modify operation dialog is quite simple and everybody can use it with confidence. Hit on the “advanced” push button at the operation properties window and a whole bunch of other options will appear. If you know what you’re doing change anything at will.
- Exclude option: Exclude any file, folder or pattern from the transfer.
- Only include option: Use this option to only transfer over specific file(s), folder(s) or pattern(s) within your source directory and nothing else.
- Restore: Everybody wishes to never use this. But when this time comes, luckyBackup gives you the option to create an operation based on an existing one for restore purposes or use a wizard style procedure that will guide you through.
- Simulation: If you are unsure of the effects on your data when executing an rsync command try the dry-run option. luckyBackup will perform a trial run that doesn’t make any changes (and produces mostly the same output as a real run).
- Scheduling: Scheduling for execution of already created profiles via cronjobs is supported.
Logfile: After each operation a logfile is created in your home folder. You can have a look at it any time you want.
Read my article LuckyBackup is a powerful backup solution for linux for more background information and the installation process.
For the backup of my photo files I use both Rapid Photo Downloader and LuckyBackup. I think a very nice function of Rapid Photo Downloader is the direct backup option. When the photo or video files are imported, it is also possible to make a backup automatically according to the same folder structure and naming conventions to for example one or more external hard disks. For example, photo files can be backed up to a disk other than the video files.
You can find all about Rapid Photo Downloader in my article Rapid Photo Downloader is the best open source photo and video download software for Linux.
You can find Rapid Photo Downloader here:
https://www.damonlynch.net/rapid/
Final words
As a former self-employed professional portrait and wedding photographer I really wanted to succeed in finding a complete Linux based workflow. And although, only by choice but not because of impossibilities, not completely open source based, I found a nice, effective and efficient workflow for myself which could be implemented by other freelance photographers as well. I can look back on this transition with a very good feeling and I no longer have any reason to return to the Apple ecosystem. I hope that with my articles on these kind of topics can move people to think out of the box and look beyond the mainstream solutions. Because then there are a lot of gems to be found in the free open source Linux world. Have fun and success with your own Open Source discovery journey.


