For a long time now, especially in the world of models, the excessive use of Photoshop and related tools has been under discussion. Female models are quickly made unnaturally slimmer, breasts and buttocks are enlarged, torsos lengthened and the skin completely plasticized and flattened to that of a Barbie doll. Necessary discussions are going on about the unwanted influence that the magazine and modeling world and the poorly executed retouching techniques have on the (negative) self-image of girls and women. Apart from these discussions, which I think must absolutely continue and hopefully eventually result in adjusted and healthier standards for models, I still see an important role for professional retouching of portraits. I want to distinguish between aspects of the skin that are permanent and that tell the life story of the person portrayed and thus make the person unique (never remove), and aspects that are of a temporary nature (pimples, scabs and hairs) or have been undesirable because of bad lighting. In this article I will show you the best way to remove facial blemishes with GIMP.
What is the best way to remove facial blemishes with GIMP
There are several ways to Rome to retouch skin, but it is my primary goal to keep the result as natural as possible and to leave the character of the skin in its value. There are tools and plug-ins available that can take over the more complex retouching work, but often also remove the flexibility for the photographer to make their own decisions about the method of retouching and the extent to which to do that. For those who want to stay in control, Frequency Separation is in my opinion definitely the best technique to use.
What makes this technique so good? For example, many photographers use the clone tool or healing brush to clone the pixels from one location to the to be retouched location. But they do that directly on the base pixels. The disadvantage is that you not only clone the texture, but also the color characteristics. This is undesirable that later yields extra work. What you basically want is to separate the texture of the skin (pores, hair, acne, wrinkles) from the color characteristics of the skin (volume, tone and color gradient) and retouch on those separate parts. So you can, for example, eliminate a pimple without affecting the color character of the skin. And that is what we need for the most realistic possible end result.
How to remove facial blemishes with GIMP
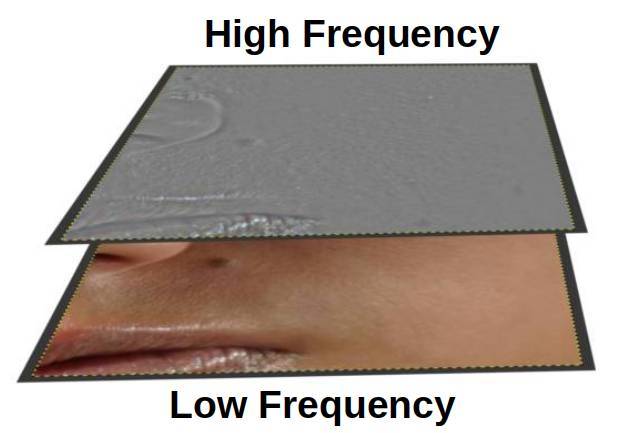
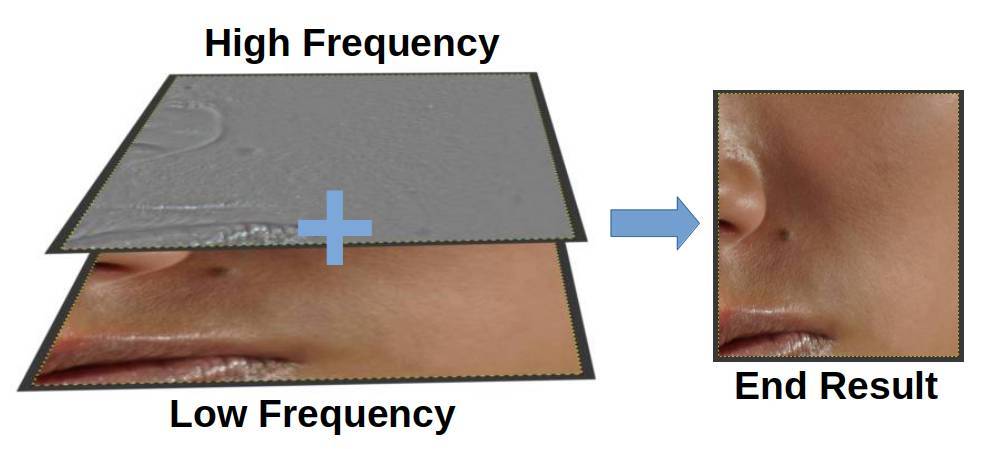
A photo of the face of a model can be split up into high-frequency (the texture) and low-frequency (the color). We call this decomposition. Within a tool like GIMP we can achieve this by creating two layers. When we add these two layers with their specific individual characteristics, these two layers bring the initial photo back again, but separately they only show the structure or only the color.
But how does this work in general and how can we apply this specifically in GIMP? Below I will go deeper into how Frequency Separation can be used in practice.
Create layers
As mentioned earlier, Frequency Separation is based on the use of layers, each with its own characteristic and function. So we start to create these layers.
1) Start GIMP, open the photo to be retouched and rename this layer to “Original”, or something to your liking to recognize that this is the base picture.
You now only see the background layer in the Layers panel. We want to create two new layers for the low and high frequencies.
2) Right click on the Base layer and choose “Duplicate layer”.
3) Rename this new layer to “Low frequency”.
4) Select the layer “Low frequency” and choose from the top menu “Filters / Blur / Gaussian Blur…”.
5) Connect the horizontal and vertical values by closing the chain icon.
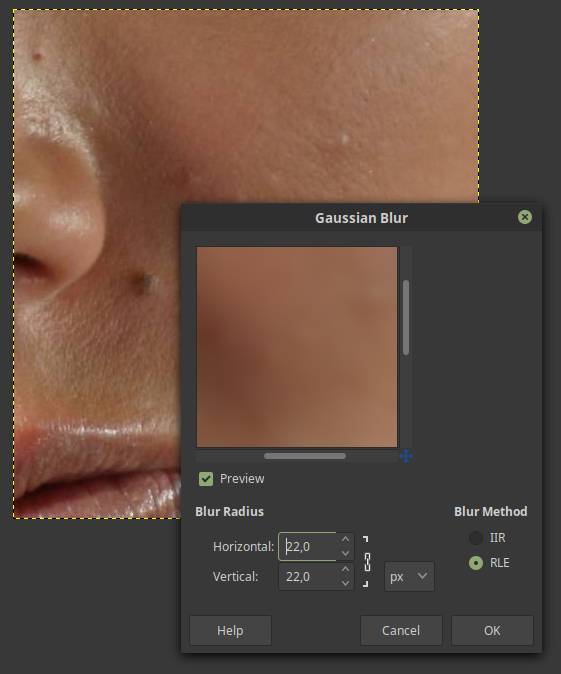
6) Raise both the horizontal and vertical values of the blur radius until the blemishes almost disappear while still recognizing skin characteristics. This is different for each photo, so there is no fixed value to give. The trick is to find the right turning point where the face remains recognizable, but where small details fade. See above image for reference. Hit OK when you are finished.
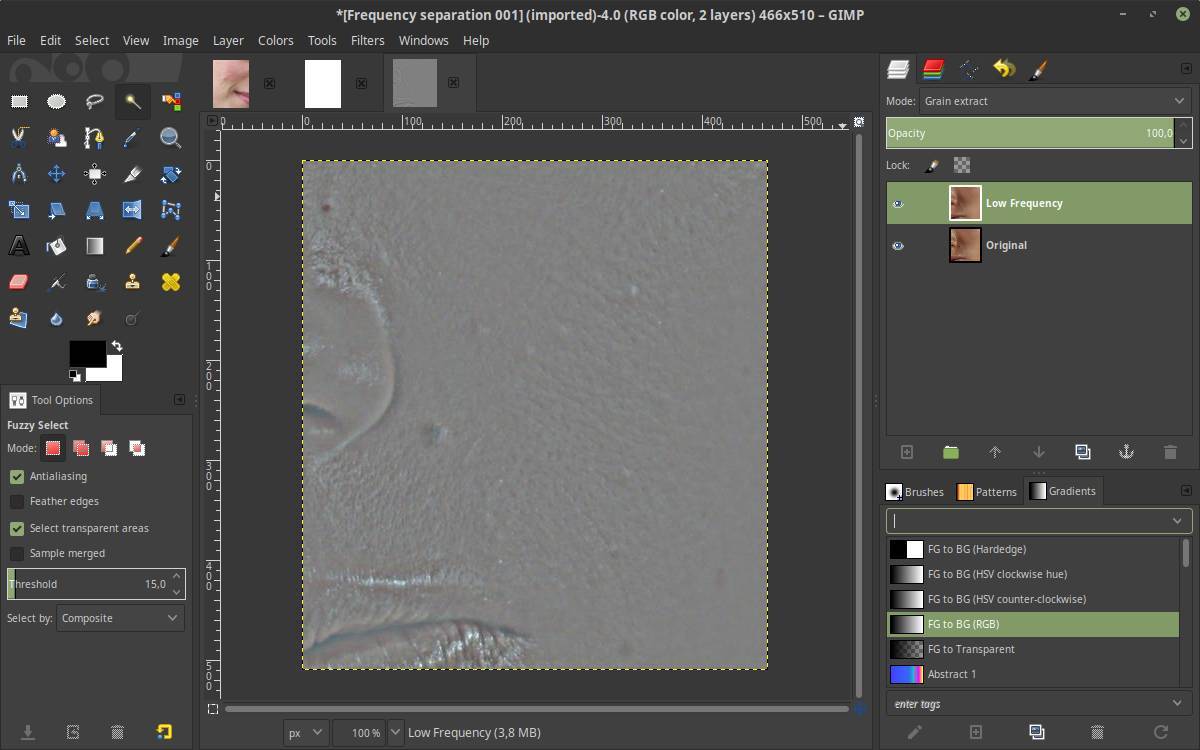
7) Change the blending mode of the Low Frequency layer to “Grain extract”.
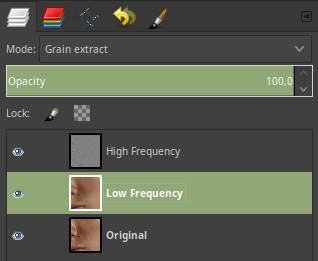
8) Right click the Low Frequency layer and select “New from visible”.
9) Rename the new layer to “High frequency”.
10) Change the blending mode of the “High frequency” layer to “Grain Merge”.
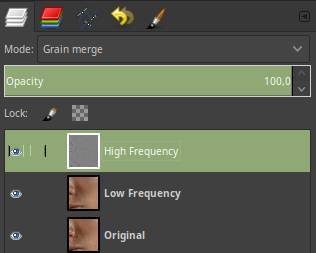
11) Change the blending mode of the Low Frequency layer back to “Normal”.
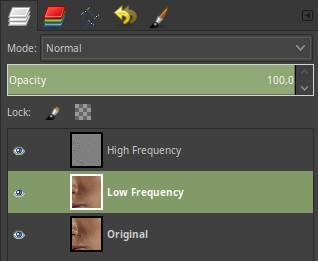
Now you have three layers, of which we will not use the base layer actively, but only as a reference. Make sure that the top layer is the High Frequency layer and the layer below the Low Frequency layer.
The retouching can begin
The goal of this tutorial is to remove blemishes of the skin. We do that by manipulating pixels in the high frequency layer. We are not using the low frequency layer, but in another tutorial I will explain how to use the steps above to improve skin color by manipulating the Low Frequency layer.
12) Select the “Healing tool” and use this tool to remove unwanted blemishes.
![]()
When we use the “Healing tool” it is important to:
- change the size based on the size of the blemish.
- select a realistic source area that optimally matches the target area.
- use a soft brush (like 50% hardness).
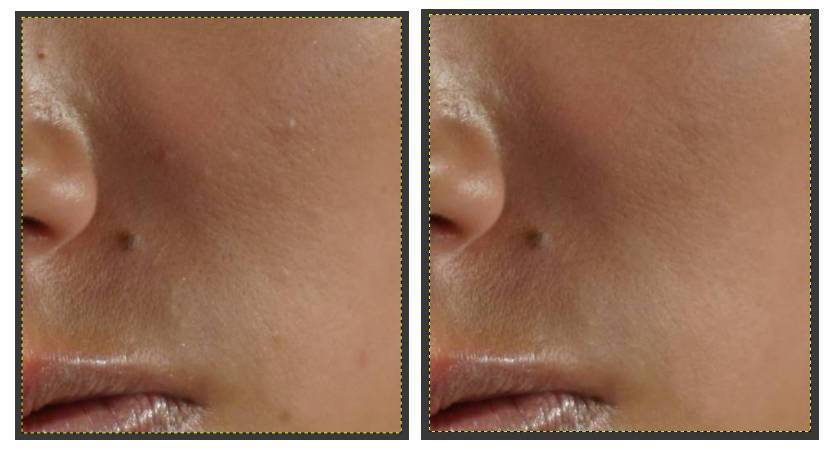
And here we have the before and the after situation. It is clearly visible that we did not destroyed the skin texture and that the color characteristic of the skin has not been impacted as well.
Succes!


