
Ok, let’s talk about printers now. After reading the previous tutorials you will probably realize that I am extremely enthusiastic about everything Linux and especially what Linux Mint has to offer to make Linux potentially a future mainstream operating system. But not everything is automatically great and one of those relatively less positive things has been the installation and use of printers in Linux. Much has changed in recent years, but there is still some room for improvement. This is not necessarily an issue concerning the quality or completeness of Linux but has more to do with the willingness of printer suppliers to write good drivers for Linux. There is plenty to say about installing a printer in Linux, so in this tutorial, we will discuss how to set up your printer in Linux Mint and overcome some potential issues.
Content
- What is the current status of printing in Linux
- What is important in the setup process for your printer
- How to set up a USB connected printer
- How to set up a wired network printer
- How to set up a wireless network printer
- How to set up a NAS connected USB printer
- How to use the CUPS web interface
- How to show the ink levels of your printer
- TurboPrint as a commercial alternative
What is the current status of printing in Linux
In general printing on Linux is handled via CUPS, which stands for Common Unix Printing System. CUPS is a printing system developed by Apple that supports the Internet Printing Protocol (IPP) and runs as a backend service. CUPS is open source software and is used on OS X, Linux, and Unix-like systems. Because of CUPS Linux Mint offers out-of-the-box drivers for an enormous amount of printers. So the chance is already great that if you have a relatively well-known, widely used, or standard printer type, it will be recognized directly by the operating system.
So what is the problem I hear you already say? One of the problems is that these are not drivers developed by the manufacturers, so it is possible that there are some functionalities, like showing the ink level of your cartridges or the state of the toner or some color management options, that are not available for your specific printer.
Another problem can be if you have an all-in-one printer with scanning functionalities. For macOS and Windows, a manufacturer would possibly develop optimally integrated drivers and front-end tools where all combined functionalities are supported with just one application to install. Under Linux, it is possible that only the printer part will work and that you have to setup the scanner part separately.
And what about professional photo printers like the Canon PIXMA PRO-10s or the high-end desktop printer Canon PIXMA PRO-1 which you want to use as a professional or passionate photographer in a color-managed workflow? When you try to download the Linux driver at the website of Canon you will get the nice message “Unfortunately your device is no longer supported under the selected operating system. Please feel free to view our current range of available products”. But also the driver list in Linux does not contain a specific driver for these Canon top-of-the-line photo printers. Luckily for these high-end printers there is a commercial solution from TurboPrint, but later more on that.
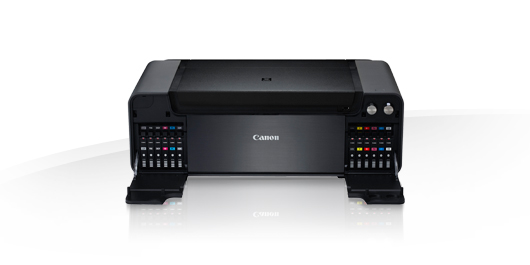
Source: Canon.com
But in general, because of CUPS a lot of printers are supported by Linux and because Linux is becoming more popular, some printers will have their manufacturer specific drivers available as well which you can download from their websites.
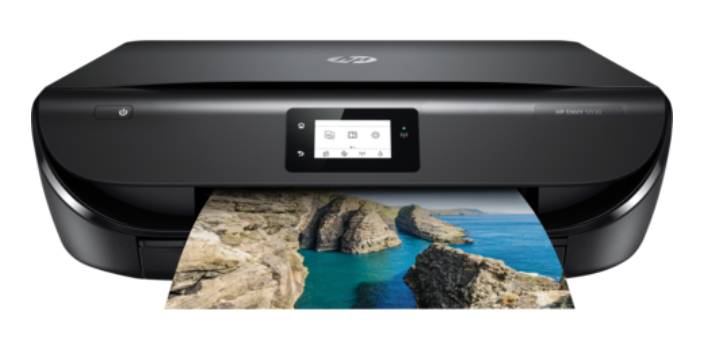
Source: HP.com
If you want to buy a new printer with Linux in mind and you want to have the biggest chance of successful installation, then probably HP printers are your best choice. HP is traditionally the best supported brand in Linux and in addition to that HP offers HPLIP. HPLIP stands for HP Linux Imaging & Printing, which is an HP-developed solution for printing, scanning, and faxing with HP inkjet and laser printers in Linux. The HPLIP project provides printing support for almost 3000 printer models, including Deskjet, Officejet, Photosmart, PSC (Print Scan Copy), Business Inkjet, LaserJet, Edgeline Multifunction Printers, and LaserJet MFPs. HPLIP is open source software and is part of many Linux distributions. If not then have a look at the HPLIP SourceForge page.
What is important in the setup process for your printer
The ease with which you can install a printer in Linux depends to a large extent on the type of device and whether the printer is or is not automatically found by Linux. For example my Brother HL-L2300D laser printer, my Canon PIXMA MG6350 and my Canon PIXMA IP4500 where all immediately after switching on automatically recognized in Linux Mint. For these printers to my surprise very complete settings screens are offered from the Linux driver in which I can really influence every aspect of these printers. I think this is fantastic that in my specific case I do not have to arrange anything myself for these three printers. But of course that does not apply to every printer, so you could be out of that kind of luck. But no worries.
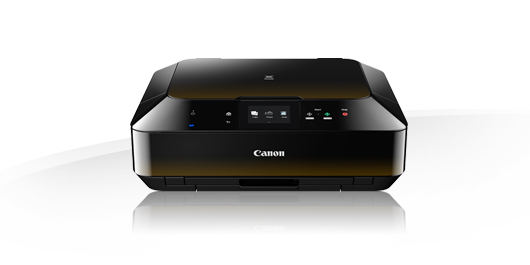
Source: Canon.com
A number of printer characteristics are important to take into account when you want to get a printer operational in Linux Mint:
- Direct recognition vs self selection
- USB printer vs wired network printer vs wireless network printer
- Standard printer vs all in one printer
- Ink levels management
- Color management
So let’s continue with some use cases in which we take the above issues into account.
How to setup a USB connected printer in Linux Mint
As already mentioned the chance that your printer will work out of the box in Linux Mint is a realistic one but depends of course on the brand and the type, but also on connection and communication type between the operating system and the printer. Distributions like Linux Mint and Ubuntu contain an enormous set of printer drivers, so your printer will probably be recognized by the operating system. But it is always a good thing to check first if your operating system is up to date. Update Linux Mint by clicking on the shield that you can find at the bottom right of your bottom panel. Here you can click on Refresh and then Install updates.
After having updated your system connect your printer via USB and turn on the power. If the printer is automatically being recognized there will be a message in right the top of your desktop that a printer was found and a short while later the name of the printer will be presented to you. Done! The rest of this article is maybe less important for you now 🙂 But please read on, maybe the rest is interesting anyway.
If the printer is not being recognized than we have to try something else.
1) In Linux Mint go to your Application Menu and type Printers in the application search bar.
2) Select Printers.
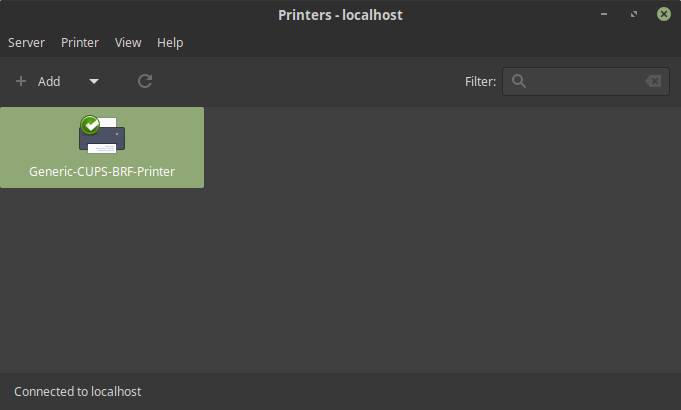
The following screen will be presented to you:
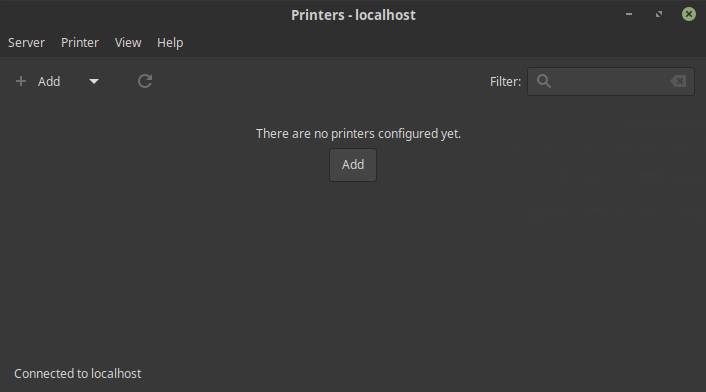
3) Click on Add.
The New Printer screen will be shown:
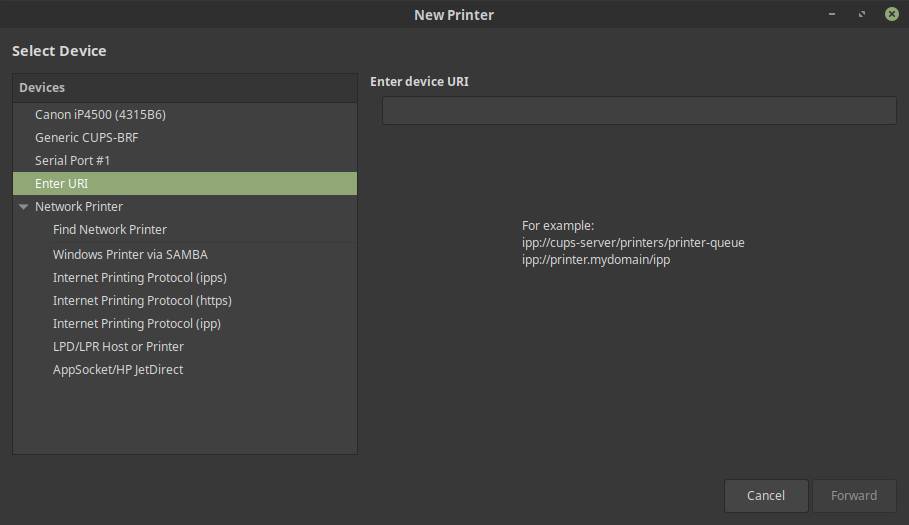
Here you can see a number of options, including Generic CUPS.
4) Select the Generic CUPS option and click Forward.
The software will search for drivers. After that the following screen will be visible:
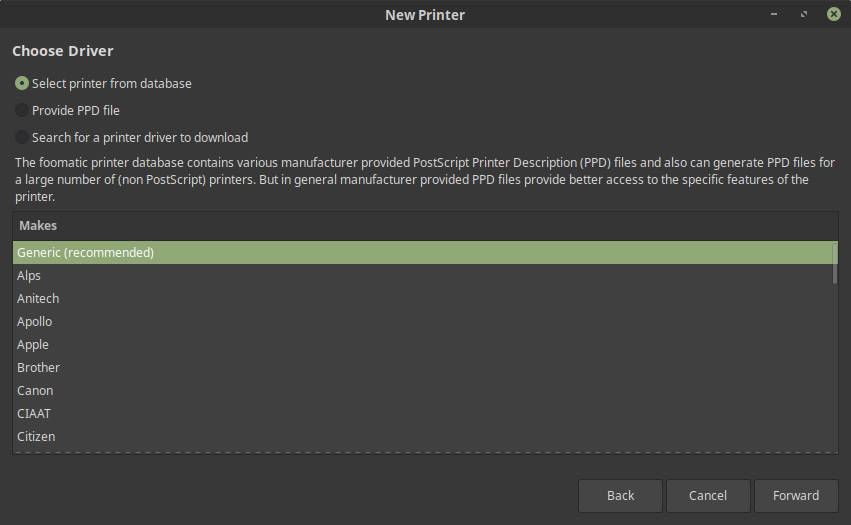
Here you can select the generic driver or look for your brand and choose a type that is as close as possible to your printer type.
5) For example for my old HP Laserjet 4L I select HP and click Forward.
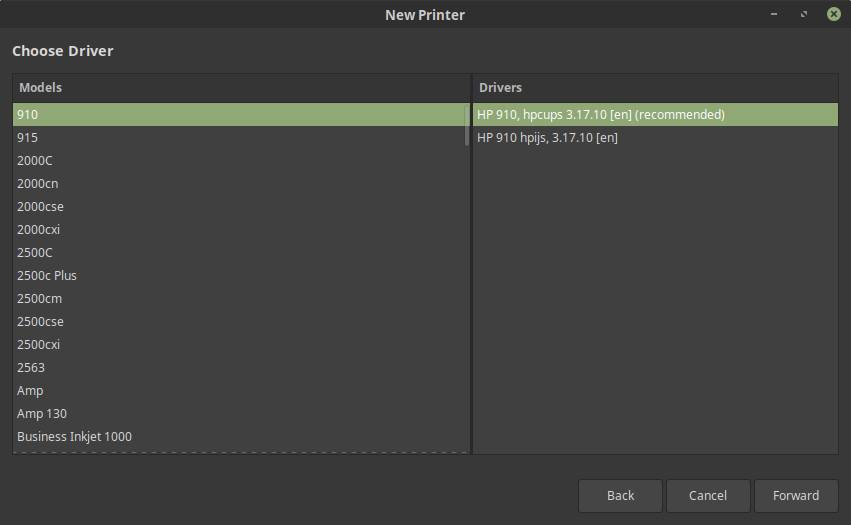
6) Search through the models. In my case I am lucky and select Laserjet 4L and select the recommended driver. Click Forward.
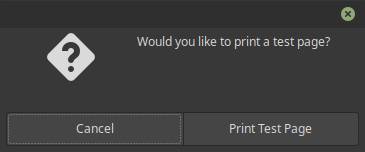
7) In the next screen click on Apply.
Now you can print a test page or cancel.
Now your printer will be visible in the available printers list.
Another option is of course to have a look at the website of your printer manufacturer to see if there are printer drivers available for your specific printer. On that website probably the explanation of the installation process will be available as well.
How to setup a wired network printer in Linux Mint
A lot of new printers have the option to connect the device to the network via a CAT network cable instead of using a USB connection. You probably have to set the right options in the menu of your printer first to enable wired network printing before taking the next steps.
1) In Linux Mint go to your Application Menu and type Printers in the application search bar.
2) Select Printers.
The following screen will be presented to you:
3) Click on Add.
The New Printer screen will be shown:
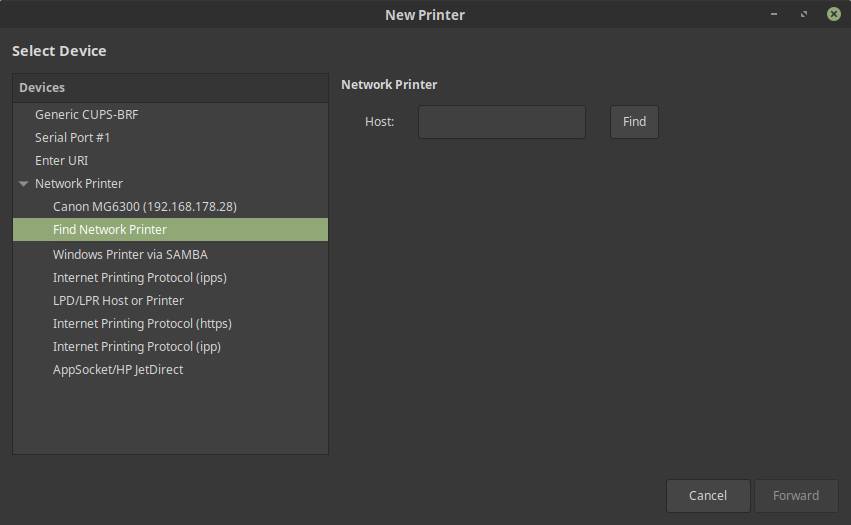
There is a great chance that your wired network printer will be shown here, but let’s say it’s not.
4) Select Find Network Printer and click on Find.
Your printer will be found with the corresponding ip address.
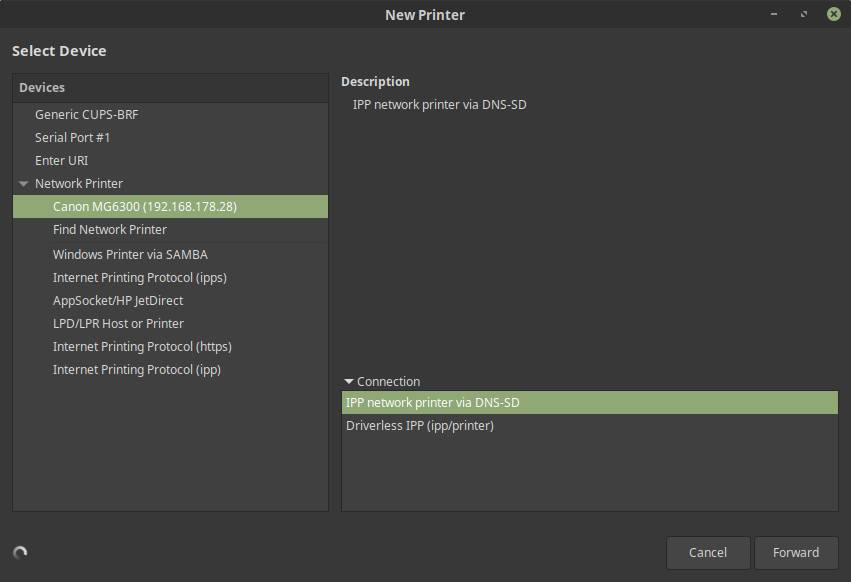
In the Connection section one or more options will be available. Usually the first one is the best option, so in my case IPP network printer via DNS-SD.
5) Select the first option and click Forward.
6) The drivers will be searched for and click on Apply.
The software will search for drivers. After that the following screen will be visible:
Here you can select the generic driver or look for your brand and choose a type that is as close as possible to your printer type.
7) Select your printer brand and click Forward.
8) Search through the models and select your model or the one that closest resembles it and click Forward.
9) In the next screen click on Apply.
Now you can print a test page or cancel and your printer will be visible in the available printers list.
How to setup a wireless network printer in Linux Mint
A lot of new printers have the option to connect the device wirelessly to your network via Wifi instead of using a USB or wired network connection. You probably have to set the right options in the menu of your printer first to enable wireless network printing before taking the next steps.
1) In Linux Mint go to your Application Menu and type Printers in the application search bar.
2) Select Printers.
The following screen will be presented to you:
3) Click on Add.
The New Printer screen will be shown:
There is a great chance that your wireless network printer will be shown here, but let’s say it’s not.
4) Select Find Network Printer and click on Find.
Your printer will be found with the corresponding ip address.
In the Connection section one or more options will be available. Usually the first one is the best option, so in my case IPP network printer via DNS-SD.
5) Select the first option and click Forward.
6) The drivers will be searched for and click on Apply.
The software will search for drivers. After that the following screen will be visible:
Here you can select the generic driver or look for your brand and choose a type that is as close as possible to your printer type.
7) Select your printer brand and click Forward.
8) Search through the models and select your model or the one that closest resembles it and click Forward.
9) In the next screen click on Apply.
Now you can print a test page or cancel and now your printer will be visible in the available printers list.
How to setup a NAS connected USB printer in Linux Mint
When you have a NAS of for example Synology or QNAP then a very convenient way to use your printer in Linux is by connecting it via USB to this NAS instead of directly to your computer. In this way your NAS will become a printer server for your Linux environment. In addition, Apple Wireless Printing and Google Cloud Print support allows you to remotely print using iOS devices or Google products and services.
If you have a Synology NAS with USB port, do the following:
1) Connect the printer to the USB port of the Synolgy NAS.
2) Power on the printer.
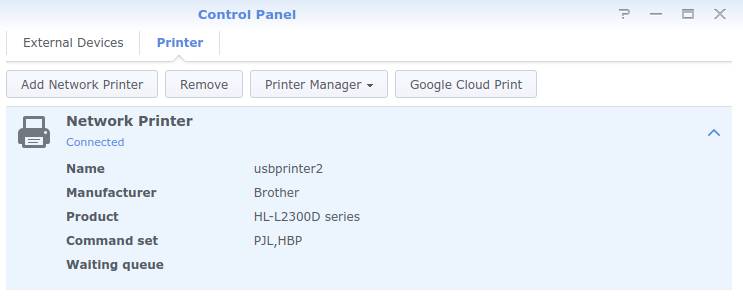
3) Go to the Synology Control Panel
4) In the Synology Control Panel choose advanced mode.
5) Choose External Devices.
6) Choose the tab Printer.
7) Now you probably will see your attached printer under Network MFP.
Now we want to access the printer from our Linux based applications.
8) In Linux Mint go to your Application Menu and type Printers in the application search bar.
9) Select Printers.
10) Click on Add.
The New Printer screen will be shown. There is a great chance that your wired network printer will be shown here, but let’s say it’s not.
11) Select Find Network Printer and click on Find.
Your printer will be found with the corresponding ip address.
In the Connection section one or more options will be available. Usually the first one is the best option, so in my case IPP network printer via DNS-SD.
12) Select the first option and click Forward.
13) The drivers will be searched for and click on Apply.
The software will search for drivers. After that you can select the generic driver or look for your brand and choose a type that is as close as possible to your printer type.
14) Select your printer brand and click Forward.
15) Search through the models and select your model or the one that closest resembles it and click Forward.
16) In the next screen click on Apply.
Now you can print a test page or cancel and your printer will be visible in the available printers list.
How to use the CUPS web interface
CUPS is the standards-based, open source printing system developed by Apple for macOS and other UNIX-like operating systems. CUPS uses the Internet Printing Protocol (IPP) to support printing to local and network printers.We already discussed CUPS as part of the driver setup in Linux Mint. But there is also the possibility to use the CUPS web interface. From this web interface there will be a lot of settings available if your printer can be found of course.
Before we start it is important that you have set up your account so that you need use a password to login. If you have setup your computer to not require a password or have a blank or empty password, then the CUPS web interface will not work for you. CUPS requires a login username and password to allow you to make changes through the web interface.
1) Start up your browser and type http://localhost:631/ in the address bar.
2) In the menu choose Administration.
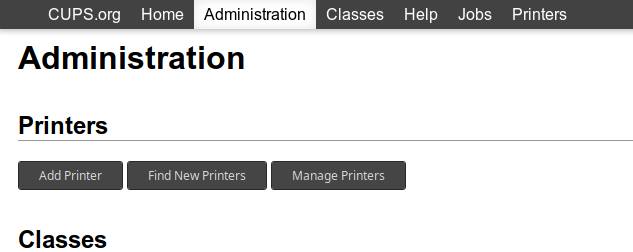
3) Click on Add Printer.

4) Give your Linux Mint user name and password.
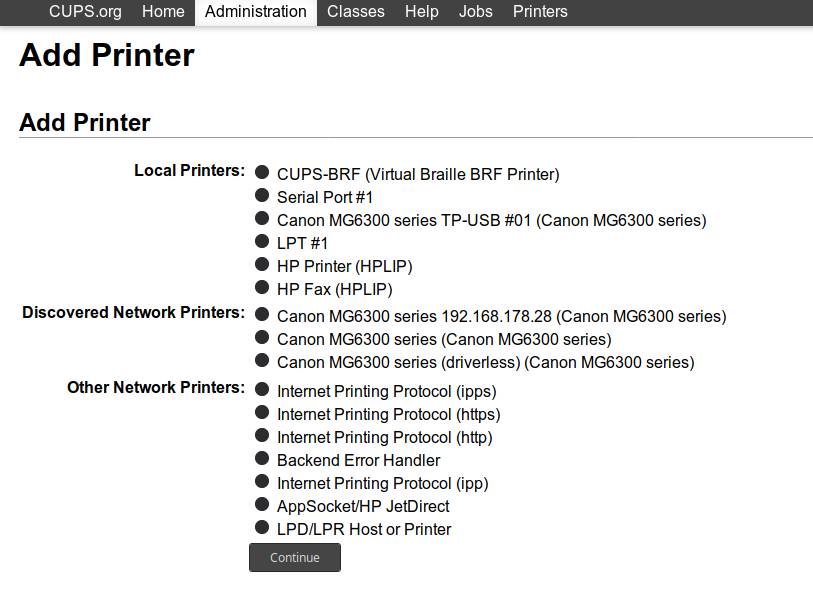
5) In this screen you have a lot of options. Probably your printer has already been recognized. If not and your printer is connected to your computer via USB choose CUPS-BRF and click on Continue.
6) In the next screen you can give a location description and choose if the printer should be shared.
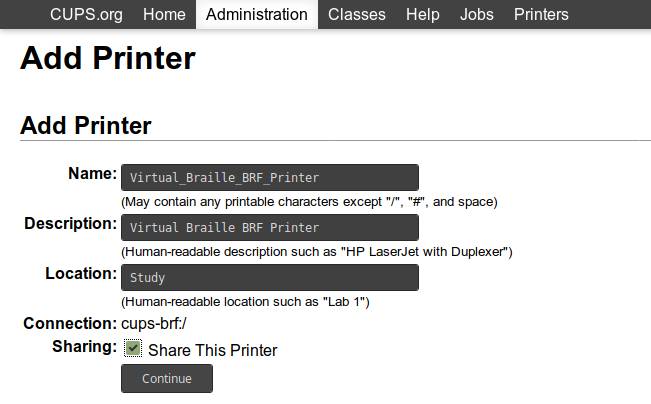
7) Click on Continue.
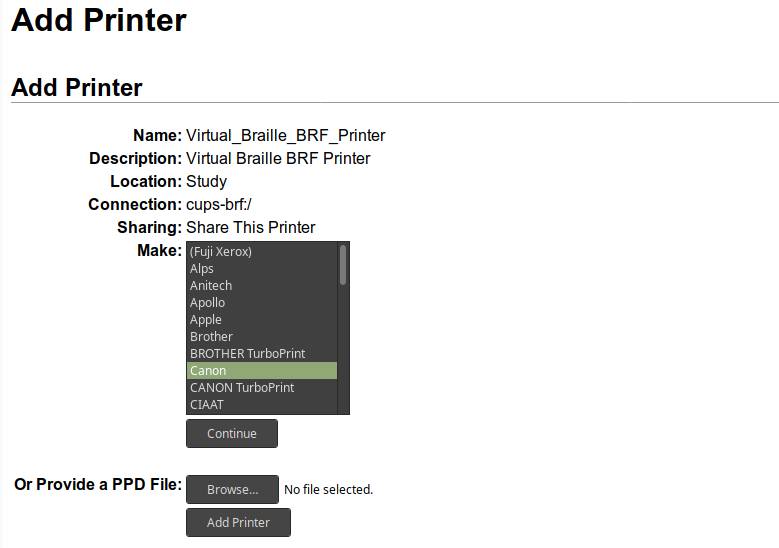
8) Select your brand and click Add Printer.
9) In the next screen select your printer model and click Add Printer.
In the following screen you can set a lot of options.
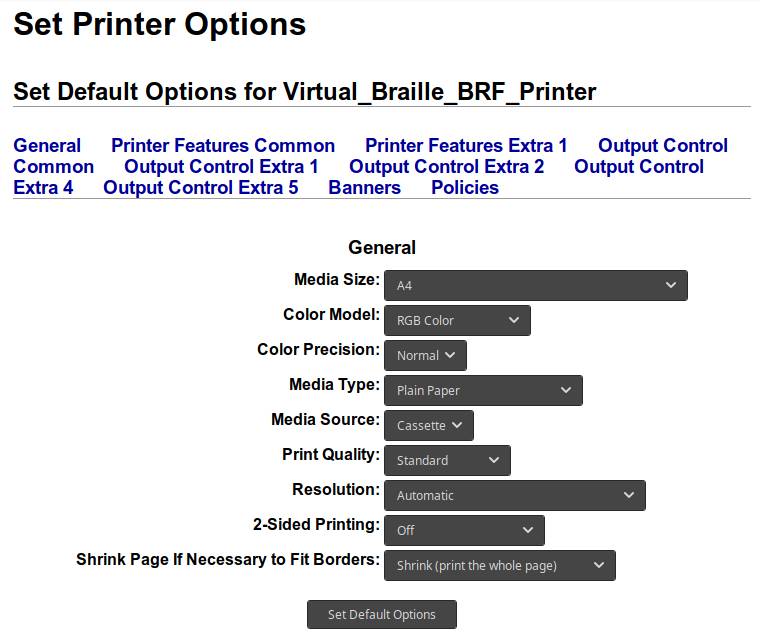
10) Click on Set Default Options.
11) Click in the menu on Printers to show the newly created printer.
Now the printer should be an available option when you choose to print from an application.
How to show the ink levels of your printer in Linux Mint
Great! We have connected our printer now wired or wireless or via your NAS and the driver is active. We can finally print our stuff. But after using it for a while you want to know if your ink levels are still on a sufficient level. Of course not all printers have the option to give information about ink levels, but for those who do most of the times the Linux driver will not give you any information about it and the chances are that you will see the following message: “Marker levels are not reported for this printer”. So how to solve that in Linux Mint? In the first place this can to my knowledge only be done for USB connected printers. And secondly here we come at the level of Linux where I prefer not to come or keep others as much as possible away from. But because there are no real alternatives, I’ll have to show this procedure anyway. We need a little bit of the command line and we need to use the Synaptic Package Manager of Linux Mint.
1) Open your Application Menu and search for Synaptic.

2) Select Synaptic Package Manager.
3) Give your password.
Synaptic Package Manager will open now.
4) Click on search and type “ink”. Click on search again.
5) Select both Ink and Libinklevel (can be Libinklevel5 or higher, which depends on the moment you perform this procedure).
Libinklevel is a special library for checking the ink level of a printer connected to Linux. It supports only printers attached via USB. Currently only printers of HP, Epson and Canon are supported.
6) Click on Apply and Apply again in the summary screen.
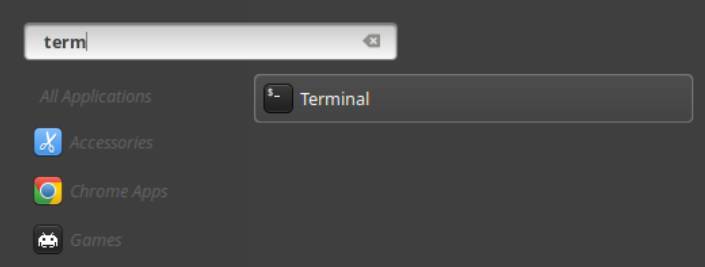
7) Open your Linux Mint Application menu and search for terminal.
8) Start the terminal.
9) Type “cd /usr/bin/” and give enter.
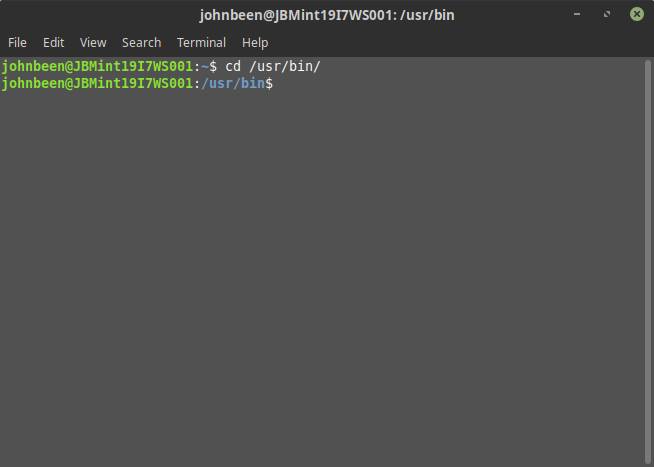
10) Type “ink -p usb”.

10) Give enter.

I know this isn’t a convenient way but at least the ink levels of your printer will be shown to you.
TurboPrint as a commercial alternative
In many cases you only need to print a simple document with perhaps only text and at most some graphs and diagrams. Absolute colour authenticity is not so important here. But what if you are a professional photographer, or photography is just your passion, then you have much higher demands on the output quality and color accuracy delivered by your printer. The problem is that professional printers such as the Canon PIXMA PRO-10s or the high-end desktop printer Canon PIXMA PRO-1 are not well supported in Linux. But there is a commercial alternative available with the name TurboPrint, which I will point out as an option even though it will not please open source purists.
TurboPrint is a very complete printing solution for Linux. According to the manufacturer TurboPrint can get you the highest possible print quality under Linux. The integrated color management settings and functionalities and the support for ICC profiles can result in color perfect results (read more about color management in my article How to color calibrate your monitor in Linux). There are over 600 printer models supported in TurboPrint. An extensive user interface enables you to manage all aspects of your printer, like information on printer activity and remaining ink, choices on photo cartridges and print resolutions, maintenance jobs for cleaning nozzles and alignment of the print head, and choices on special papers.
You can download a 30 days trial version to see if it is something for you. After you downloaded and installed the .deb file you can setup your printer. First turn on your printer.
1) Via the Application menu search for TurboPrint.
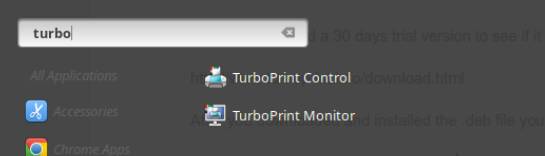
2) Select TurboPrint Control.
The TurboPrint Control Center will be opened.
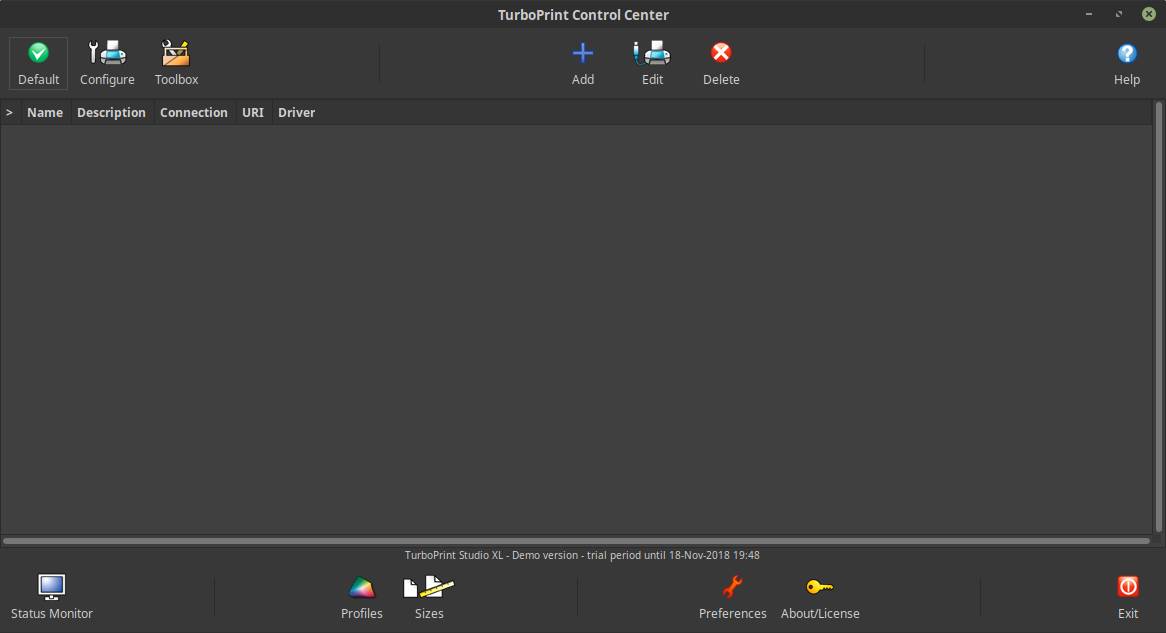
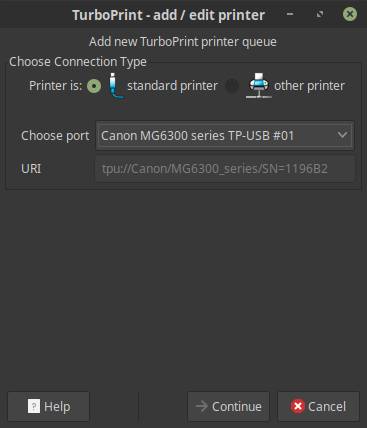
3) Click on the plus sign to add a new printer.
4) Choose Standard printer, select your printer and click Continue.
5) Choose your model.
6) Give your Root password and click OK.
The TurboPrint Monitor will be opened.

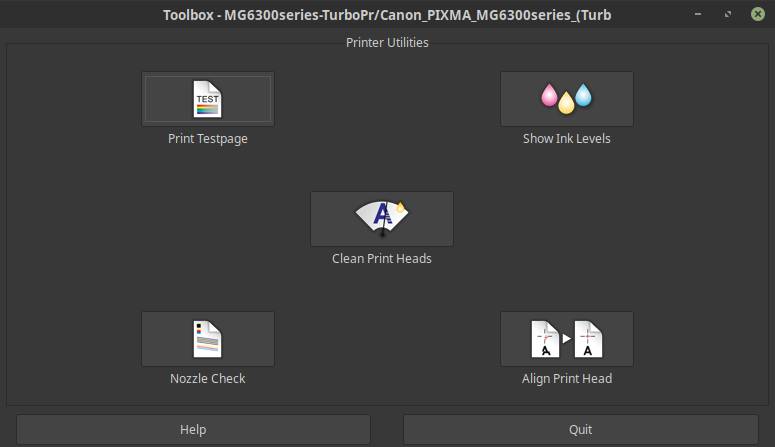
Here you get all kind of information on your printer, like ink levels, settings, jobs and ink statistics. Here you have access to the printer toolbox in which you can print test pages, show ink levels, clean print heads, check nozzles and align the print head.
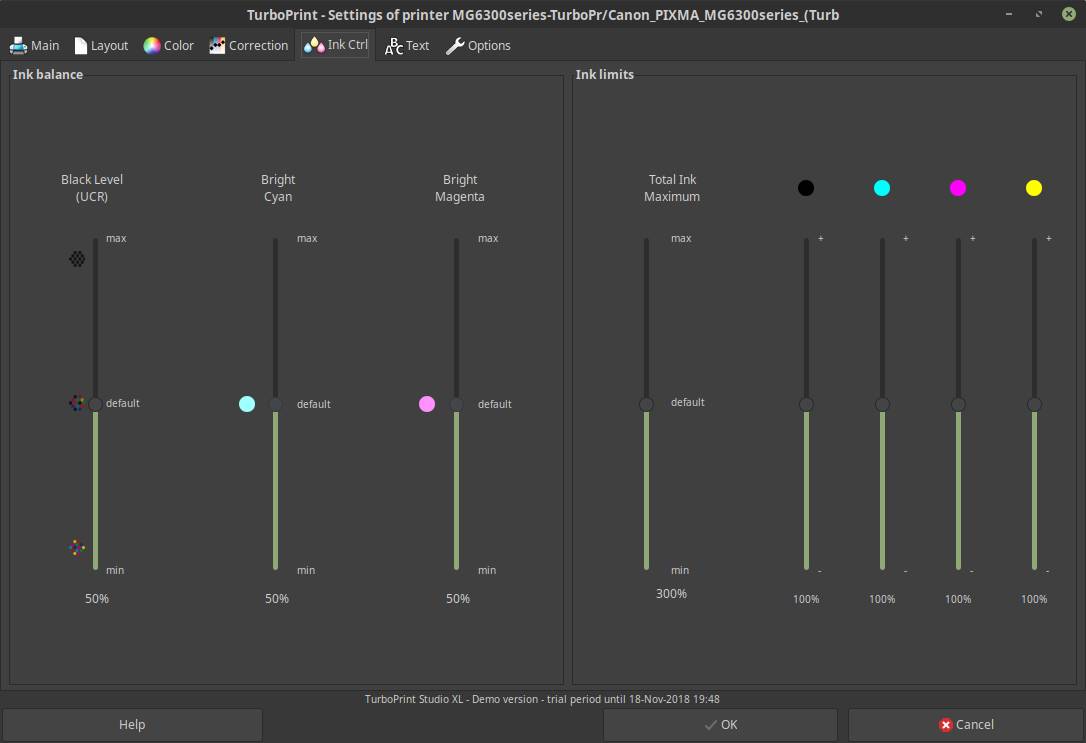
But you can also access the printer settings, where you can select the quality, paper, dithering, brightness, contrast and saturation, layout, reference light, grey tones, color correction on the different inks, etc.
TurboPrint is of course a commercial solution, but for professional purposes where the standard driver is not good enough or even not available at all, this piece of software makes it possible for professional photographers and other use cases to make the switch to Linux as well.
Final words
As I already said at the start of this article, there is a lot to say about printing in Linux and I even only scratched the service on this topic. I hope it helped you to make your printer operational in Linux.