How to convert a video file for DaVinci Resolve with WinFF for Linux
by John Been July 24, 2020 · Apps per category / davinci resolve tutorial series / Latest blog / Tools / Video
In this second article from an intended series on DaVinci Resolve for Linux, I am going to address a question asked by myself as well as many others on the Internet regarding solving a tricky problem when using the free version for Linux. The video formats that a lot of us use or which are used by our cameras and smartphones to capture video material, are not standard accepted by the free version of DaVinci Resolve for Linux. But there are several solutions for this within the Linux world, one of which is via the free WinFF. In this article I am going to explain how to convert a video file for DaVinci Resolve with WinFF for Linux.
What is DaVinci resolve
Before I begin with the actual issue that I want to address for you in this article, many people may want to learn a little more about what DaVinci Resolve is and what it can do. In a previous article that I published on this website (How to install DaVinci Resolve on Ubuntu based Linux distros), I already wrote about this application and how to install it on Debian / Ubuntu based Linux systems, so I will not delve deep into the application itself, since you can go to my previous article to find some more details and I hope to go much more in depth in future follow up article articles.
In short you can say that DaVinci Resolve is a non-linear video editing application for professional purposes, such as Hollywood productions. This does not mean that the application cannot be used for smaller-scale projects and hobby projects. It only says something about the expected learning curve, which is quite steep. Blackmagic Design, a producer of both professional hardware and editing software provides a Linux version of DaVinci Resolve to the Linux community for FREE. And this is not a completely stripped-down version of their commercial product, but offers almost all the functionalities that the paid version contains.
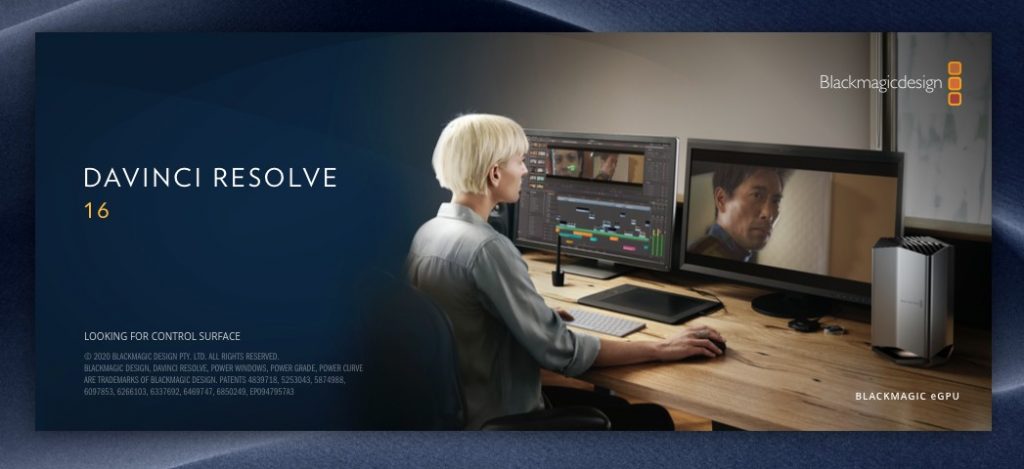
DaVinci Resolve is a professional application with its roots in color correction, but has evolved over the years into a complete high end editing suite and is a serious alternative to Adobe Premiere and Final Cut X. And it is available for Linux, which makes it much more interesting for us Linux lovers. Keep in mind, if you are an open source purist, this application isn’t for you. But if you want to do some serious video editing on your Linux machine, you should at least check it out.
DaVinci Resolve offers a set of powerful tools for video editing, color correction, audio post production and visual effects. These functionalities are offered in a streamlined workflow. With a simple click, you can instantly move between Media, Cut, Edit, Fusion, Color, Fairlight and Deliver. In Media you can manage your raw video footage, with functionality to import, organize marking, syncing, cloning, adding metadata and rendering. In Cut you have a special module that helps you to do fast edits. With Edit you can focus on the real creativity and do the detailed story telling. Fusion gives all the tools to create photo realistic visual effects and do advanced titling. Color is what DaVinci Resolve once started with and offers an extensive toolset to color your projects. Fairlight is all about audio. And finally Deliver helps you to set up a product render and create and export the final product in the format you need it to be.
In hopefully more follow up articles I will go more into depth on what DaVinci Resolve has to offer, but in this article I want to explain how to simply convert your video files in a format that can be consumed by DaVinci Resolve with WinFF for Linux.
What is the issue with Davinci Resolve for Linux
Simply put a lot of devices that can create video footage, store the video data in a format that can’t be used directly in DaVinci resolve without first converting it to a format that DaVinci Resolve can work with. This is a problem that in theory only is the case for the free version for Linux, but I read in a lot of discussions on the internet that these issues also occur for the paid version and even for both versions on macOS and Windows. Personally I was in trouble with both the video files coming from my Fuji X-T1 and Motorola G7 mobile phone. When I tried to import my video files, DaVinci Resolve only showed the container but no actual video or sound was available to work with.

I can go into all kinds of details on file formats, containers, etc., that I only understand half of it myself, but I imagine that you are more interested in a quick solution for your problems. So let’s go directly to the solution.
WinFF to the rescue
DaVinci Resolve likes it when you convert your video material, like MP4, MKV or MOV into a format that can be used by this application. There are different solutions for that. For Linux there is a command line tool available named FFmpeg, which is a cross-platform application to convert all kinds of audio and video. But the problem for a lot of video enthusiasts is that they are visual people and like to edit video and not type complex and lengthy terminal commands each time they need to convert footage. But there is a great graphical solution available called WinFF which uses FFmpeg behind the scenes, but offers a much more friendly interface and a simple platform to drag and drop video files and do batch conversions. The idea is to add a one time FFmpeg command in WinFF and after that you can convert multiple video files in bulk from the graphical user interface.
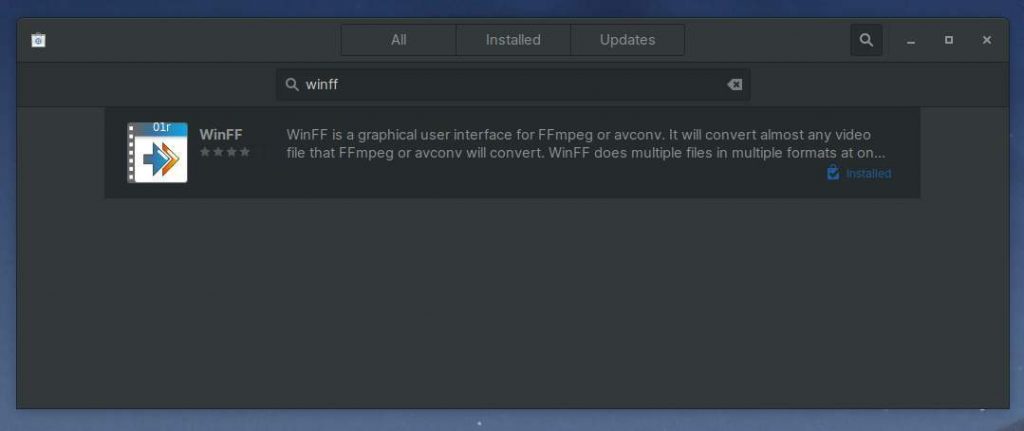
How to install WinFF
If you run a Debian / Ubuntu based Linux distribution, WinFF is probably in your software center. Just start your software center, search for WinFF and install it.
If you want to use the command line, just open your Terminal and type the following command:
sudo apt install winff
That’s all. Now we will do the setup of WinFF.
How to setup WinFF to convert your video files for DaVinci Resolve
Now that you installed WinFF it is time to start this application and do some magic.
1) Start WinFF.
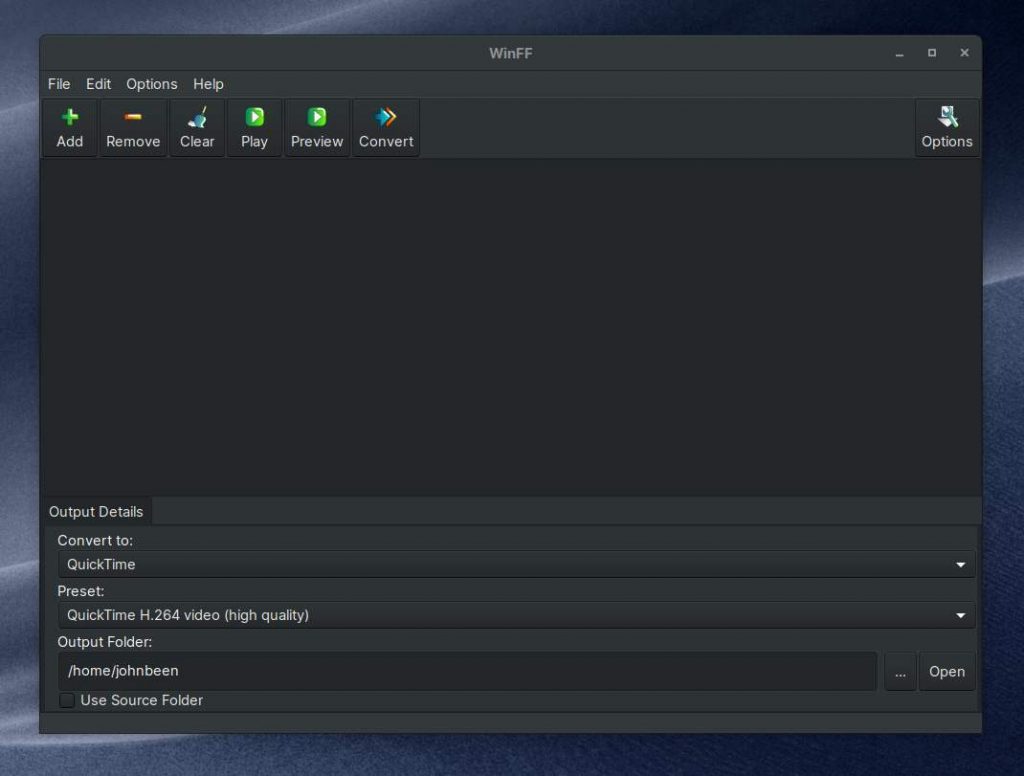
When you start WinFF and it is active, you will see the following screen:
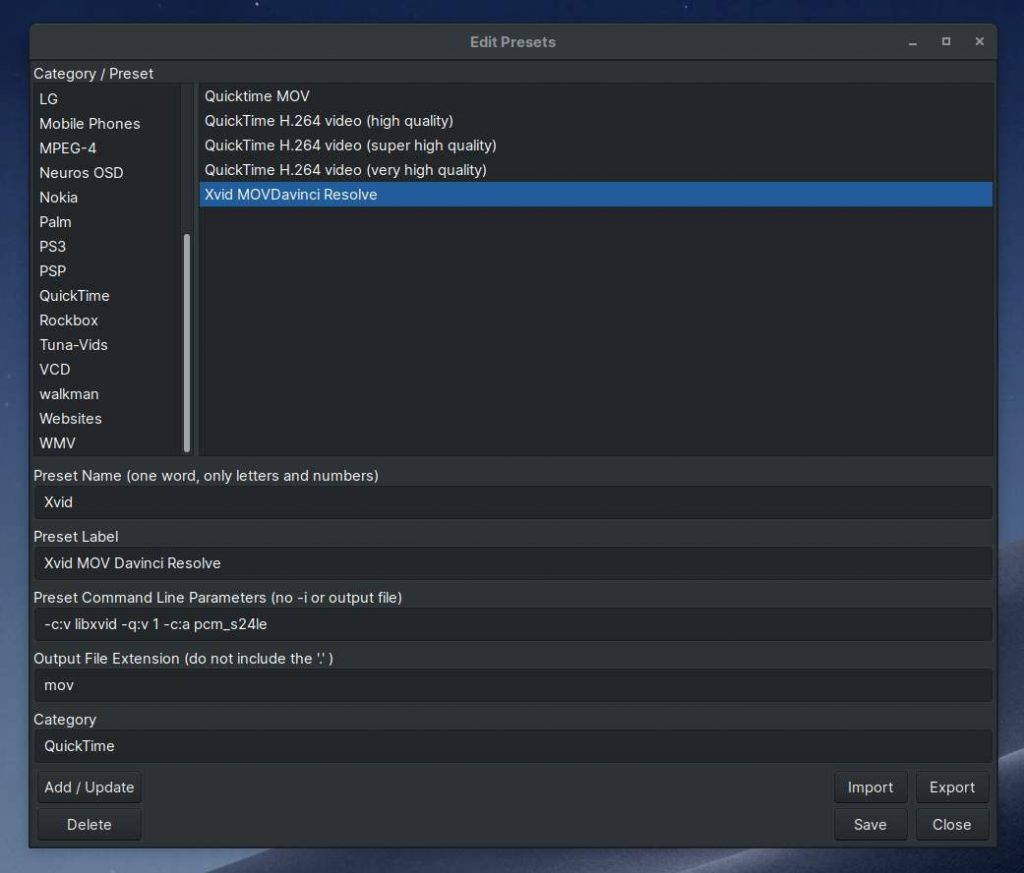
What we are going to do now is create a new preset which is dedicated for DaVinci Resolve.
2) Click in the menu on Edit and select Presets.
3) In the category / Preset list select the option QuickTime.
4) Now type in the section Preset Name “Xvid”.
5) Type in Preset Label “Xvid MOV Davinci Resolve”.
6) Type in Preset Command Line Parameters the following command:
-c:v libxvid -q:v 1 -c:a pcm_s24le
Explanation:
-c:v libxvid >> codec video = libxvid
-q:v 1 >> quality level of the output (1 is highest)
-c:a >> codec audio = pcm_s24le
7) Type in Output File Extension ” mov”.
8) Type in Category “QuickTime”.
9) Now click on Add/Update.
When you did all of the above your WinFF Edit Presets screen should look this:
Now we can do some video conversion.
How to convert your videos for DaVinci Resolve with WinFF
Now that we created a nice preset that we can use over and over again, the next step is to do some conversion and see if the new files will be accepted by DaVinci Resolve.
1) In your WinFF main screen select in “Convert to” the option “QuickTime”.
2) Select the preset you just created “Xvid MOV Davinci Resolve”.
3) Select the Output Folder where you want to save your converted files, or select “Use Source Folder”.
4) Now select one or more of your video files and drag them to the empty area.
5) Select all video files.
Now your screen should look something like this:

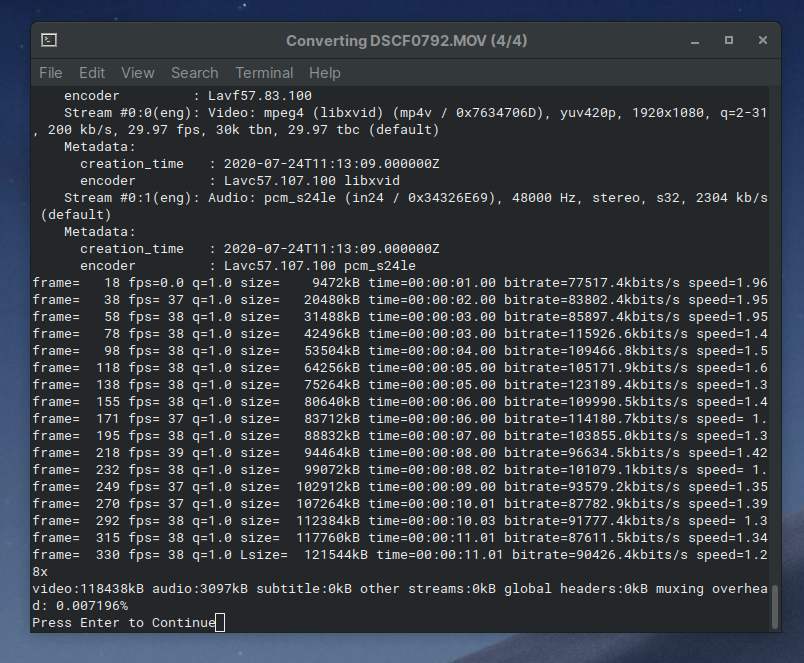
6) Now click on Convert.
Now the conversion process will start.
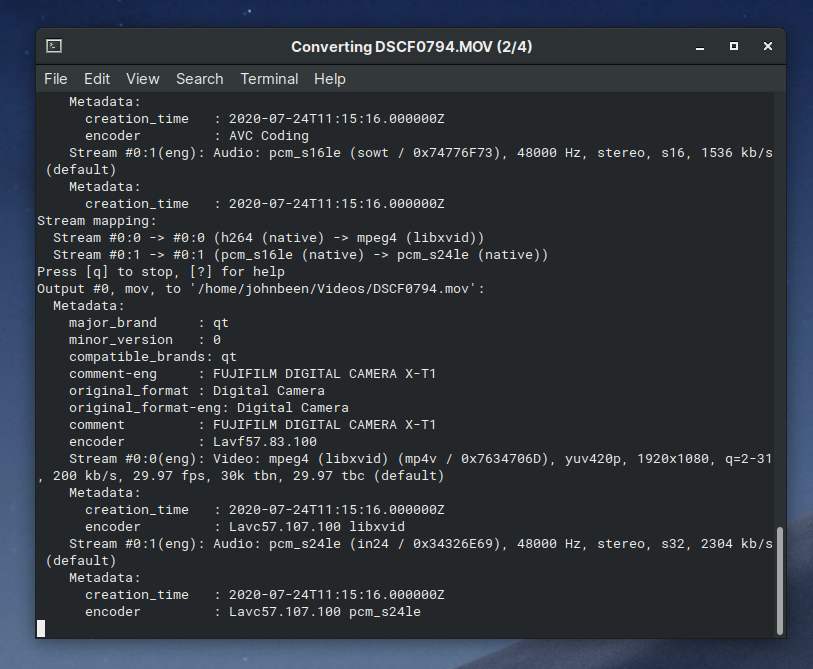
7) When you get the message ” Press Enter to Continue” do just that.
8) Now open your file manager and go to the folder in which your new files should have been stored.
9) Select your new files and drag them into DaVinci Resolve.
And there they are!

That is all you have to do to create video files that you can use in DaVinci Resolve.
Have fun!