Before I made a full switch to Linux a few years ago, I used Adobe Lightroom on the macOS operating system to process my RAW files for both my personal photography and my professional photo work. However, when my interest in Linux was sparked, I started looking for usable open source alternatives to process my RAW photo files. A surprisingly large number of high-quality RAW editors are available for Linux, such as RawTherapee, GTKRawgallery, Lightzone and of course also darktable. I have tried all these applications to determine which software best fits my way of working and my specific requirements. For me personally, darktable surpasses the other software solutions and offers a great photo platform for both serious enthusiasts and professionals who want to switch from Lightroom. And now the team behind darktable has given us a Christmas present in the form of darktable version 3.0 and I am curious if darktable is an even better alternative for former Lightroom users. So let’s have a look at darktable 3.0 for Linux.
What is darktable
Adobe’s Lightroom has been the de facto standard for professional and serious RAW editing for Windows and macOS for years. And we can only say that Lightroom is one of the most robust software solutions to organize and process RAW photo files. But as lovers of Linux and open source software, we do not have Lightroom at our disposal as there is no native installable version of Lightroom for Linux available and probably never will. But that doesn’t mean we don’t have similar needs when it comes to serious processing of RAW photo files and accompanying workflow support. And in my opinion one of the best options for Linux based photographers is the powerful open source solution darktable.
Anyone with an interest in photography will appreciate the clear and professional workflow support of darktable for importing, rating, non-destructive editing, synchronizing, presenting, printing and exporting of photo files. And when we have a look at the enormous range of high-quality processing modules, which are grouped in the categories Basic, Tone, Color, Correction and Effect, then we can hardly ignore darktable. In my opinion darktable is a must have in your Linux based professional photo workflow.
As already mentioned, darktable offers a large amount of very powerful editing modules. At the moment of writing there are 68 modules available, all with their own specific editing scope. There are far more modules in darktable compared to editing functionalities in Lightroom, so in the beginning you are probably a bit overwhelmed by all the options, as it is not immediately clear which modules to use to reach your goals. And sometimes different modules can be used to reach the same end result. But you don’t have to use all modules right from the start. The favorites option makes it possible to only gather these modules that are most important for your way of working.
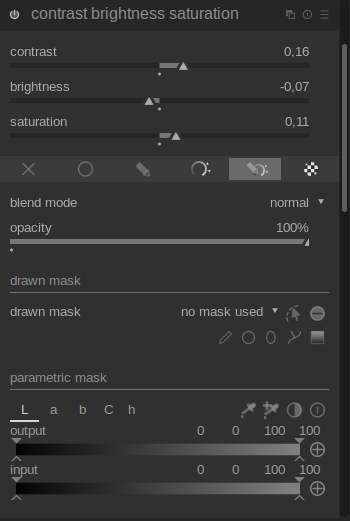
Many modules in darktable can be combined with advanced blending operators. Within most modules you can use the module settings on the complete image or with advanced manually created masks or parametric masks you can use the module effects on only specific parts of the photograph.
Further darktable offers a platform for non-destructive photo editing, which means that your original photo file stays untouched and all your edit values will be stored separate from the original file. As your edit steps are stored as a set of values, these same edit values can be used for other photo files as well. So if you for example created a series of photographs of the same situation or in the same lighting conditions, then you only need to edit one photograph and copy these settings to all the other files within that same series. This can give an enormous time gain for professional wedding shooters, fashion photography, etc.
The darktable software has very strong filtering and search options. In the Collect module you can create and reuse complex search queries to find groups of photos on for example corresponding values for camera, tag, date, time, color label, description, lens, focal length, ISO, aperture value and exposure value.
Next to the extensive workflow management functionalities and the extensive list of processing modules, darktable is what is called a fully “color managed” application, so it fits perfectly into a workflow where color management plays a crucial role from conception to print. For example, darktable supports automatic detection of display profiles, including built-in ICC profile support for sRGB, Adobe RGB and linear RGB color spaces.
Darktable also offers the possibility to work “tethered”, in which a camera is connected directly to the PC and the images are shown directly in darktable. This is especially strong for portrait and product photographers working in a studio.
What is new in darktable 3.0
The team behind darktable decided to jump directly from 2.6 to 3.0, as there is an enormous amount of improvements and new functionalities. You can go to the darktable website to read about all the changes in depth, but in this blog post I will focus on the changes that are most visible for existing users.
User Interface theming
I think the darktable user interface already looked good from a productivity point of view, but the user interface has been reworked completely and is now completely themable by using CSS (Cascading Style Sheet, the same language that is being used to describe how web page elements should be displayed).
High resolution display support
Based on the changes darktable is now optimized to work correctly with 4k and 5k monitors, so that’s great for my recently bought BenQ 32″ EW3270U 4K Monitor.
New themes
There are four themes: darktable, darktable-elegant-darker, darktable-elegant-dark and darktable-elegant-grey. According to the developers “Visual perception is affected by ambient brightness, and a low brightness of the interface causes all kinds of illusions … Using a dark interface to retouch photos can therefore lead to excessive retouching (abuse of contrast and saturation) and to a photo that is too dark once printed. The introduction of the grey theme avoids these illusions and consequences on image processing.”
Search editing modules
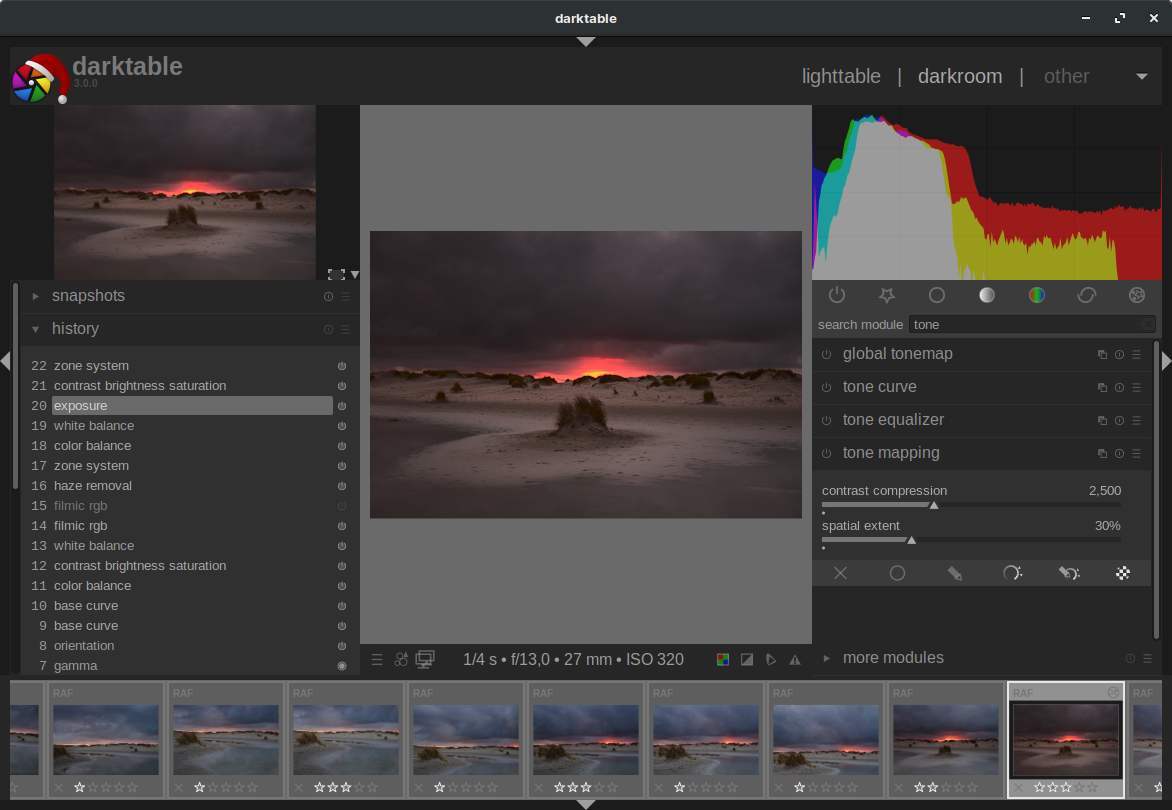
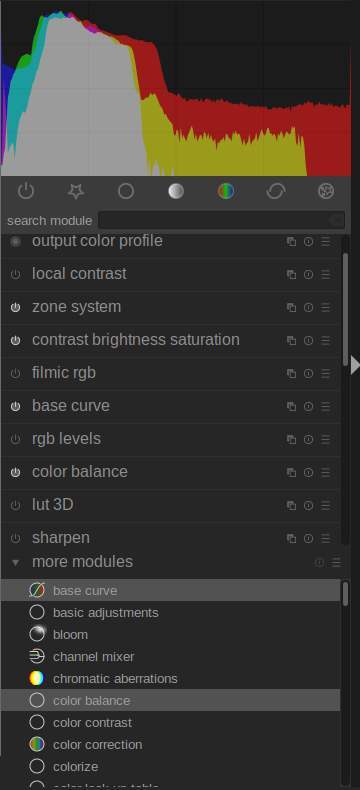
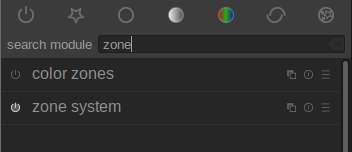
It is now much easier to find the editing modules you need by using the new search module field. With more than 60 modules this search field is a great addition for efficient editing.
Simpler selection of mask options
Previously the available mask options could be selected from a drop-down menu. In darktable 3.0 the selection of a mask type is much more clearer by the introduction of mask icons for visual selection.
![]()
Second image preview window
In darktable 3.0 it is now possible to activate a second image preview window. This image preview window can be opened via the dual screen icon in the darkroom persona. In this second preview window you can select a different display profile, so it has its own color profile.
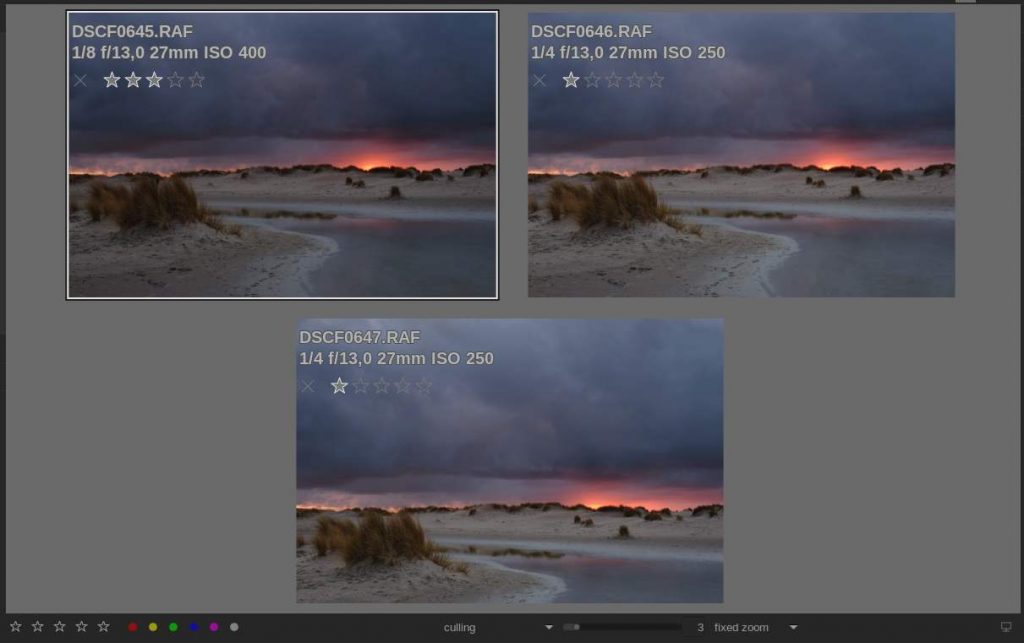
Culling view
In the previous version of darktable there were two viewing modes available in the lighttable mode: zoomable light table and file manager. Now a third option has been added which is in my opinion a great addition: culling. The culling option makes it possible to easily make side by side comparisons of two or more separate images. After you select two or more files you can zoom and move multiple images at the same time from the same point of view.
Timeline view
When you are in the lighttable view and you select the zoomable light table or file manager viewing mode, then at the bottom the new timeline view will be presented. As the name implies you will see a graphical timeline presentation of your images. Within this timeline you can select a specific range to show only a specific set of images within that time frame. When you hover over the timeline you will see the month/year indicator changing accordingly.
Editing modules
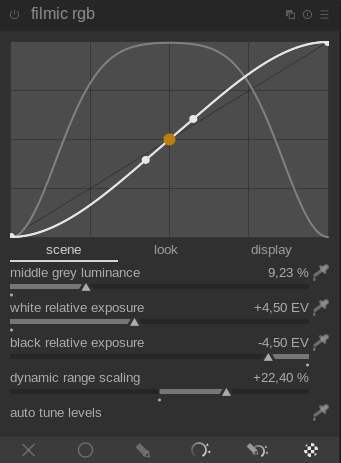
In darktable 2.6 we had the filmic module. This module is still available, but only for images that already had been edited with this module. For new images there is the new filmic RGB module, which replaces base curve, shadows and highlights and other global tone-mapping modules and is easier to use. This module offers extensive improvements over the previous filmic module, both visually and functionally.
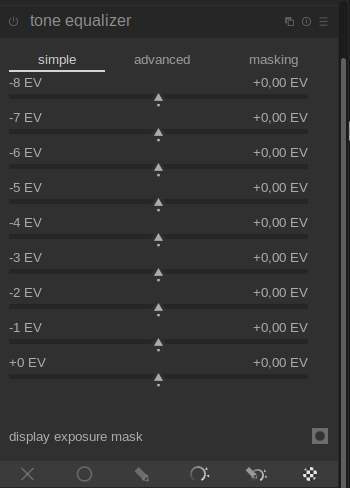
Another new module is tone equalizer, which is built around the well known zone system defined by landscape photographer Ansel Adams. The tone equalizer has been created by merging the features of zone system, shadows and highlights, and (local) tone mapping modules. The tone equalizer offers HDR like editing, but with a far more realistic end result, without the traditionally known halos around high contrast edges.
Additional improvements
Further there are the new modules RGB curve, RGB levels, basic adjustments and 3D lut. The existing modules denoise has been improved. There are important improvements in the noise reduction functionality. The tagging functionality has been completely updated, both in usability, efficiency and extended functionality.
I only scratched the surface with the above description of improvements and new functionalities. You should have a look at the darktable 3.0 blog created by the development team to read all on a very detailed level. It is, as always, an extensive but great read.
How to install darktable 3.0
In this section I assume you want to install darktable on a Debian / Ubuntu based Linux distribution, such as Linux Mint, Zorin OS, Ubuntu Budgie or of course Ubuntu itself. At the time of writing, darktable 3.0 is not yet available in flatpak or snap format and the standard PPA has not yet been updated to the new release. But luckily there is another reliable but unofficial PPA available which is being provided by the great Linux news site ubuntuhandbook.org.
To install darktable 3.0 on your machine do the following:
1) Open your terminal application via the keyboard shortcut Ctrl + Alt + T.
2) Type the following command and hit enter:
sudo add-apt-repository ppa:ubuntuhandbook1/darktable
3) Type the following command and hit enter:
sudo apt update
4) Type the following command and hit enter:
sudo apt install darktable
If you want to uninstall darktable 3.0 do the following:
1) Type the following command to remove the application and hit enter:
sudo apt remove darktable
2) Type the following command to remove the PPA and hit enter:
sudo add-apt-repository -r ppa:ubuntuhandbook1/darktable
Note: It is important to know that if you are already a user of darktable and you are moving to the latest version, the database format has changed. This means that if you have migrated to darktable 3.0 you can’t go back to a previous version. So the developers strongly advice to first backup your 2.6 or earlier based database before doing the actual update.
Final words
For those who have never worked with a photo tool such as Lightroom or darktable, the interface and workflow of such a tool may be somewhat overwhelming at first. If you were already used to Lightroom, I expect that you will soon be able to master darktable as well. But in my opinion, this open source alternative to Adobe Lightroom is so incredibly good that even for a beginner without experience with this type of software, it pays to take some extra time to better understand this wonderful piece of software. It is sometimes said that although Linux applications are functionally very good, they often do not excel in strong user-friendliness or a good user interface. But as far as I am concerned, an application such as darktable proves that there are also Linux applications that are both visually and functionally equal to their commercial competitors. And darktable is no longer an exception to the rule. The last thing I want to say is that I hope you will enjoy this new version of darktable as much as I do. A big compliment for the team behind this incredible piece of free software.