
Being conscious about your actions and decisions that could make your Linux environment more secure, is becoming more and more important. When you download a Linux ISO image file to create a bootable live environment to test a Linux distribution and eventually install it on your production machine, it is important to be sure about its authenticity and integrity. In this article, as part of my Linux Mint tutorial series, I want to explain how to verify the integrity and authenticity of your Linux Mint ISO image file as a good start for your secure Linux Mint journey.
Content
- Why is verification of a Linux Mint ISO image file important?
- How to verify the integrity of your Linux Mint ISO image file in Linux, Windows, and macOS
- How to verify the authenticity of your Linux Mint ISO image file in Linux, Windows, and macOS
- Final words
Article information
- Linux Mint 21 Cinnamon
Note: My current Linux Mint tutorial series is starting to get a bit outdated, as it was based on Linux Mint 19.X with an Ubuntu 18.04 Bionic foundation. The current Linux Mint 21 is based on Ubuntu 22.04 LTS, the latest long-term support release of Ubuntu. So it’s time to completely rewrite the entire series to the new Linux Mint 21 foundation so that you as a reader will be fully equipped with the latest information. So be patient and give me some time to rewrite the 30 articles as part of this series.
Why is verification of a Linux Mint ISO image file important?
Before I explain how to verify a Linux Mint ISO file, I think it is good to briefly explain why you should always do this. In short, it is important to have proper information on both the integrity and authenticity of your ISO image. You need to be sure that the image file was 1) correctly and faultlessly downloaded, and 2) that the image file is the same file the Linux Mint team has created and is not tampered with.
It has been proven in practice that it is possible to download a Linux Mint ISO image file that does not match the file as was created and provided by the developers of Linux Mint. The Linux Mint ISO image file is downloadable from a huge number of servers around the world that allow you to download an image from a location closest to you. In my case, since I live in the Netherlands, these download servers are offered for example via LiteServer, NLUUG and Triple IT. In theory, all these servers could be compromised without knowing it. Several years ago, it was revealed that both the website and a specific server from which Linux Mint could be downloaded, had been hacked and that a non-genuine version, thus a modified version, of Linux Mint was being offered for download instead of the real one. You can read all the details about what happened in the following blog from the Linux Mint team:
Beware of hacked ISOs if you downloaded Linux Mint on February 20th!
And if you want to know more about how the Linux Mint team handled this, read the following blog:
In short, hackers created a modified version of the Linux Mint 17.3 Cinnamon edition ISO image file, which contained a backdoor. And also the website and the underlying database were compromised. After that incident, the Linux Mint team did everything in their power to make sure this will not happen again for future releases.
Verification of the ISO file is one of the things you can do yourself to be sure you downloaded the proper image. This will be done based on (sha256) checksums, which we will discuss in the remainder of this tutorial. This is not only the case for Linux Mint, but in fact, for all Linux distros, you want to try out or install.
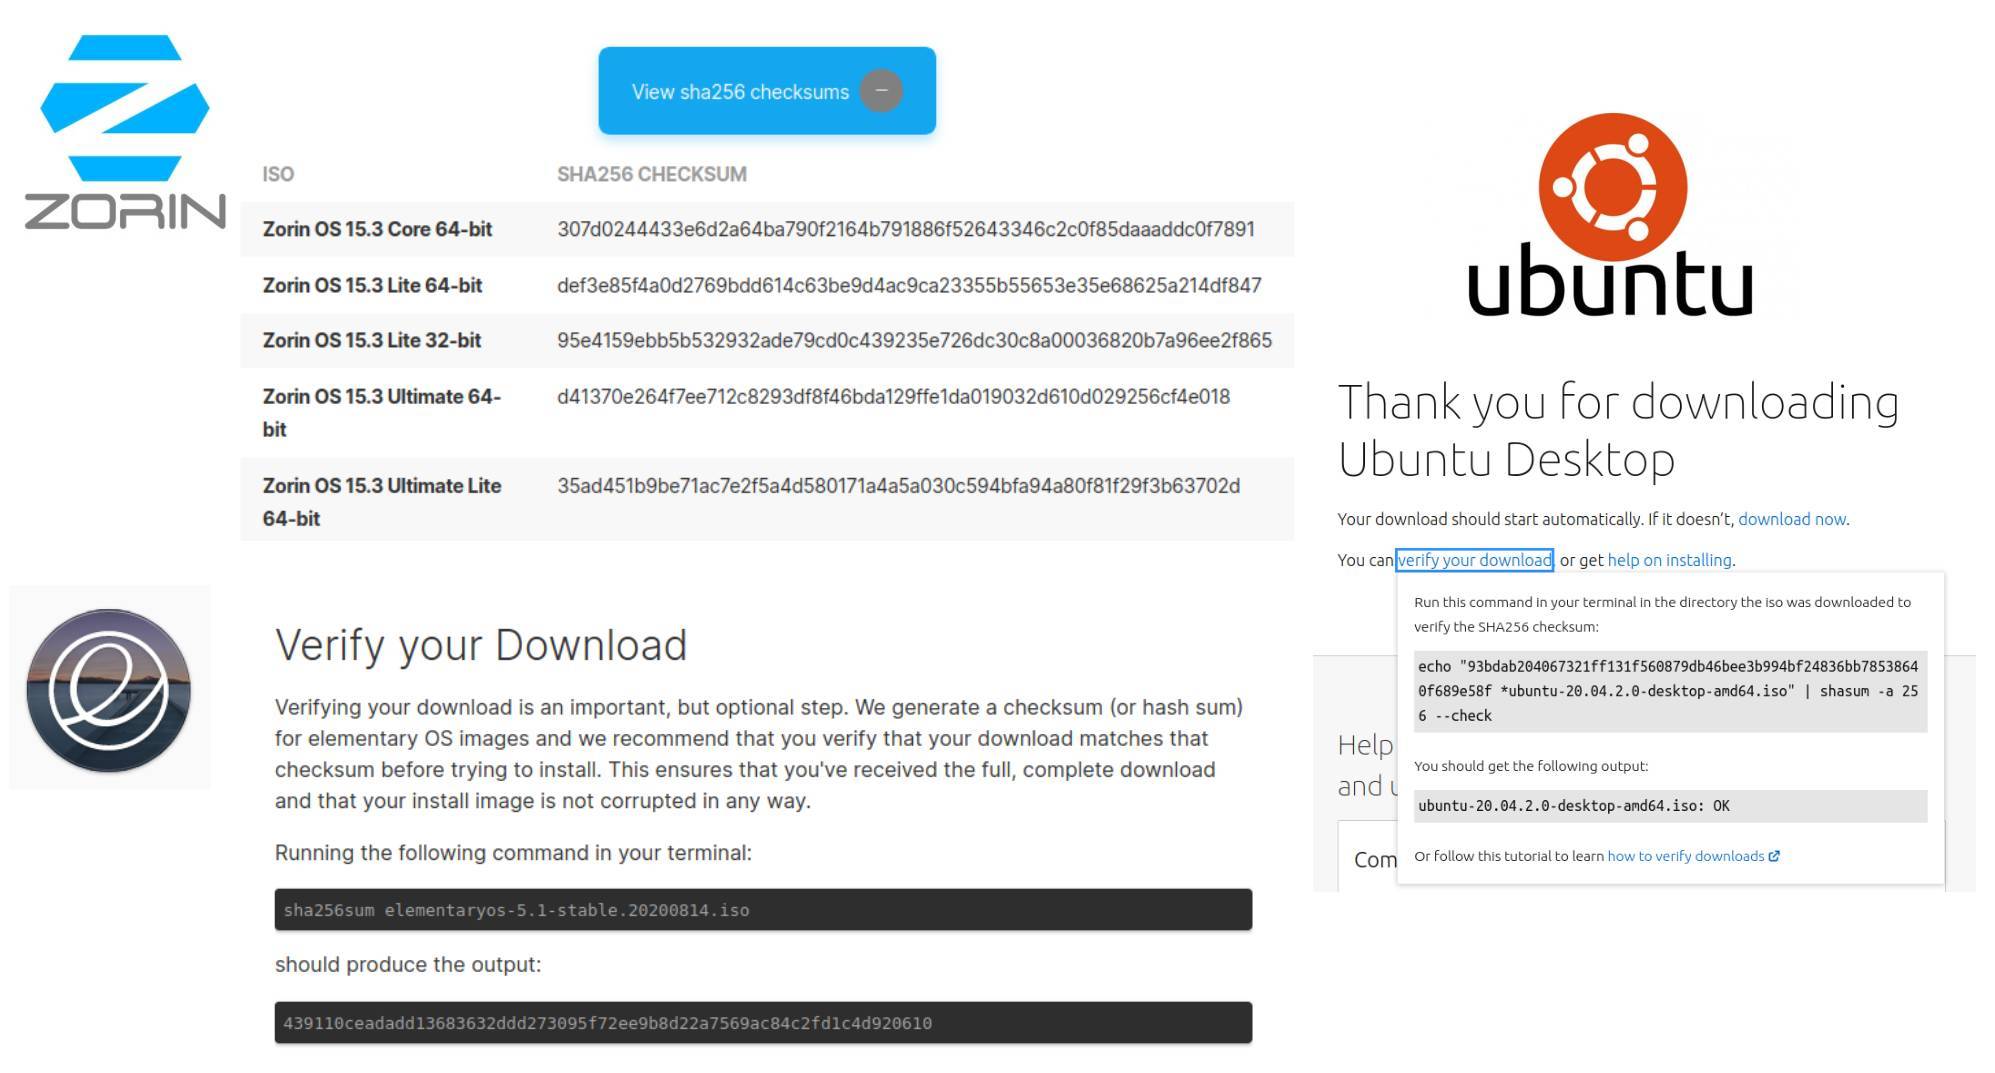
How to verify the integrity of your Linux Mint ISO image file in Linux, Windows, and macOS
To be able to verify the integrity of your recently downloaded Linux Mint ISO image file before you try out or install this distribution, we need both the ISO image file and a SHA256 checksum to compare with. You can follow the below steps:
Download the required Linux Mint ISO image file
Of course, you first need to download the Linux distribution you want to use. In my tutorial “How to download Linux Mint” you can read more on how to download Linux Mint.
But in short, just go to https://linuxmint.com/download.php and download your preferred Linux Mint variant. In this tutorial, we use Linux Mint 21 Cinnamon.
Download and install QuickHash GUI
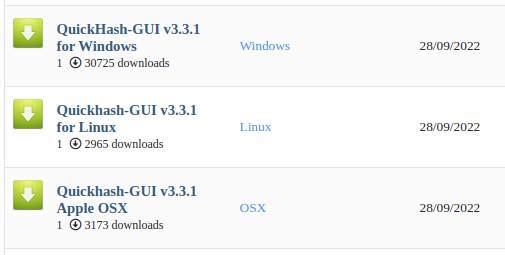
We need a tool to be able to do the verification. When you are a regular visitor to my website you probably know that whenever it is possible, I prefer to use solutions with a graphical user interface, instead of directly jumping on the command line. For this purpose, we can use the graphical application QuickHash GUI. You can download QuickHash GUI for Linux, Windows, and macOS via the link below, and then select the version you need for your specific operating system.
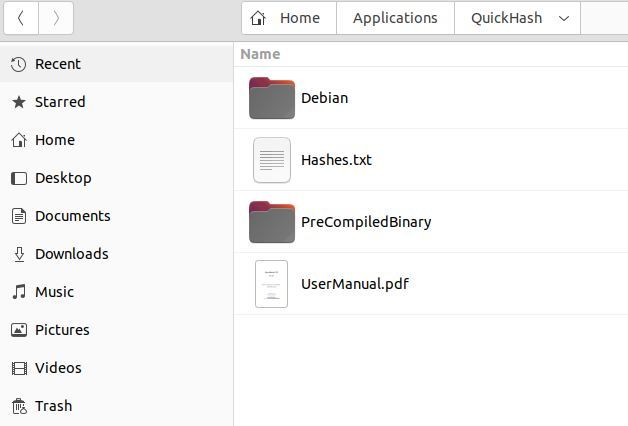
When the download is finished, go to your Downloads folder, and extract the zip file in for example a folder on your Desktop or an Application folder.
Checking the integrity of your Linux Mint ISO file
To be able to verify the integrity of the ISO file, you must generate its SHA256 checksum and compare it to the one that fits your variant of Linux Mint.
Now that you have downloaded and installed QuickHash GUI, we can begin with checking your ISO file.
1) Start QuickHash GUI (find .deb (Linux), .app (macOS), or .exe (Windows) in your extraction folder).
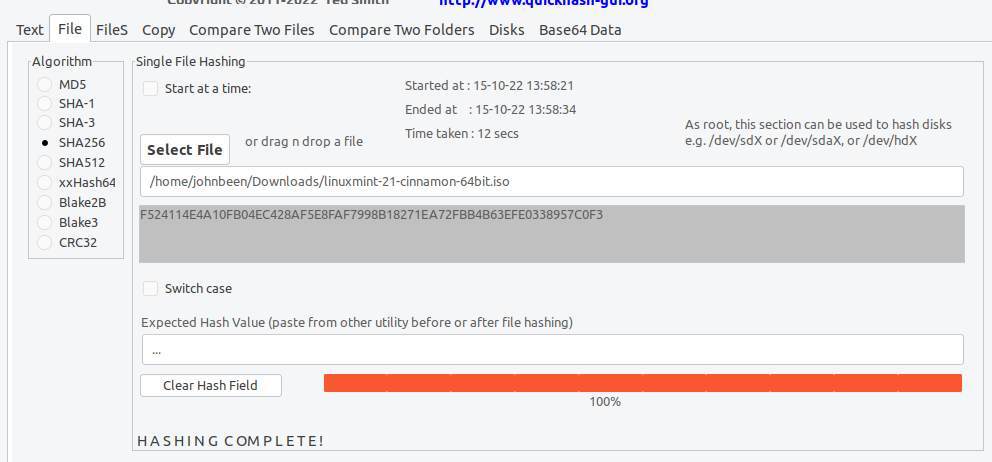
2) select the File tab.
3) Select Algorithm type SHA256.
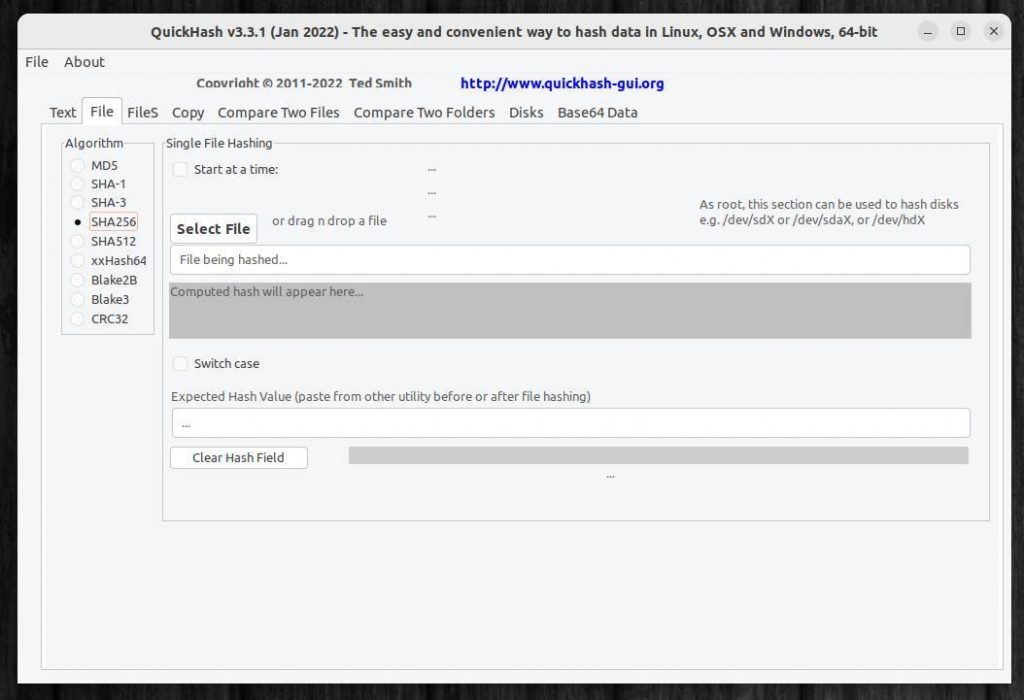
4) Click on Select File.
5) Find the Linux Mint ISO file you just downloaded and select it.
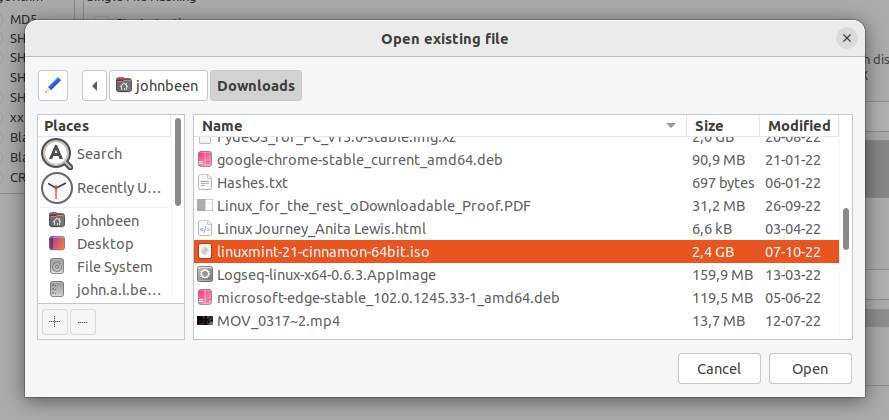
6) Click on Open.
Now automatically the hash will be generated. After a short while, Quickhash says HASHING COMPLETE and gives 100% progress.
To be able to verify the integrity of the ISO file, you must compare the generated SHA256 checksum with the one that fits your variant of Linux Mint.
7) Go to the Linux Mint download page of your specific downloaded version. In my case, I go to the Linux Mint 21 Cinnamon Edition page.
Here you see the following:
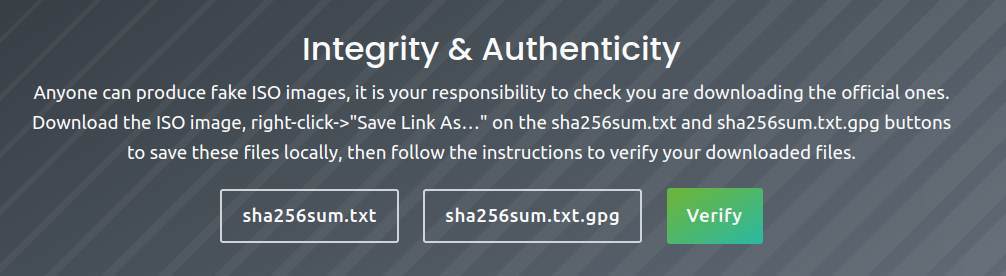
8) Right-click on sha256sum.txt, select “Save link as…” and save the file in your Downloads folder. Do the same for the sha256sum.txt.gpg file, because you need it later for the authenticity section.
Note: Do not change the names of the files.
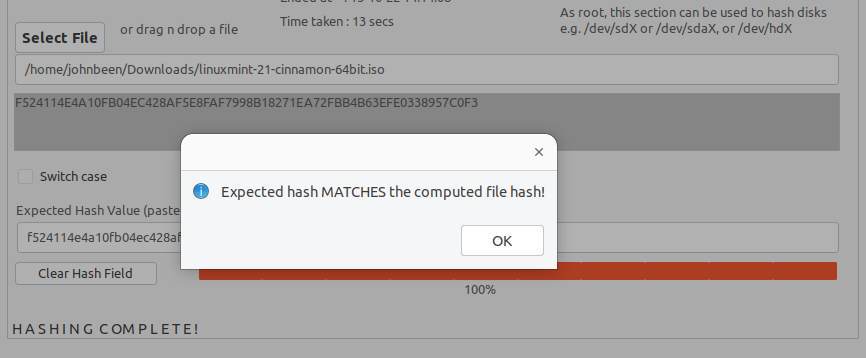
9) Go to your Downloads folder, open the sha256sum.txt file, and copy the correct hash value in the ”Expected Hash Value” section in Quickhash.
Now you will hopefully get the message “Expected hash MATCHES the computed File hash”.
How to verify the authenticity of your Linux Mint ISO image file in Linux, Windows, and macOS
To be able to verify the authenticity of your recently downloaded Linux Mint ISO image file before you try it out or install it, we don’t have (well, at least to my knowledge, so let me know if you found something) a generic tool with a simple user interface available. So we need to use the command line in Linux, macOS, or Windows.
In the previous section, you downloaded both the sha256sum.txt file and the sha256sum.txt.gpg file. To be able to verify the authenticity of the sha256sum.txt file we just downloaded, we need to check the signature of the sha256sum.txt.gpg file. We can do that via the following steps.
1) Make sure you are in the Downloads folder where the sha256sum.txt file and the sha256sum.txt.gpg files are. To do that open the Downloads folder in your Terminal application:
- Linux: Use the keyboard combination Ctrl + Alt + T to open the Terminal. Type ” cd Downloads” to go to the Downloads folder. You can also open your file manager, click on Home, right-click on Downloads and choose Open in Terminal.
- Windows: Press Windows + R, type “cmd”, and then click “OK”. Go to the root by typing “cd /” in the Command prompt. Now type “cd\users\[your name]\Downloads\”.
- macOS: Open your Finder and select via the Favourites your home folder (the folder with probably your name). Now right-click the Downloads folder and choose New Terminal at Finder from the menu.
Now we need to import the signing key.
2) Copy the below command, paste it on the command prompt, and hit Enter:
Command

gpg --keyserver hkp://keyserver.ubuntu.com:80 --recv-key "27DE B156 44C6 B3CF 3BD7  D291 300F 846B A25B AE09"
3) Wait till you see a message that the public key has been imported, which looks something like this:
Result

gpg: key 300F846BA25BAE09: public key "Linux Mint ISO Signing Key root@linuxmint.com" imported
gpg: Total number processed: 1
gpg: imported: 1
4) Copy the below command, paste it on the command prompt, and hit Enter:
Command

gpg --verify sha256sum.txt.gpg sha256sum.txt
You will get a response like below:
Result

gpg: Signature made vr 29 jul 2022 13:26:29 CEST
gpg: using RSA key 27DEB15644C6B3CF3BD7D291300F846BA25BAE09
gpg: Good signature from "Linux Mint ISO Signing Key root@linuxmint.com" [unknown]
gpg: WARNING: This key is not certified with a trusted signature!
gpg: There is no indication that the signature belongs to the owner.
Primary key fingerprint: 27DE B156 44C6 B3CF 3BD7 D291 300F 846B A25B AE09
You can ignore the warning.
5) You need to check that the output of the second command is equal to the input of the first command.
Compare

27DE B156 44C6 B3CF 3BD7 D291 300F 846B A25B AE09
27DE B156 44C6 B3CF 3BD7 D291 300F 846B A25B AE09
We can see that they are the same, so the verification for authenticity was successful.
Note: In some cases, the above is not working and you get a message saying the key is not changed.
Result

gpg: key 300F846BA25BAE09: "Linux Mint ISO Signing Key root@linuxmint.com" not changed
gpg: Total number processed: 1
gpg: unchanged: 1
In that case, you can try the following:
1) Execute the following command:
Command

gpg --keyserver hkp://keyserver.ubuntu.com:80 --recv-key A25BAE09
Now you will see:
Result

gpg: key 6ABA455AA25BAE09: public key "Totally Legit Signing Key mallory@example.org" imported
gpg: Total number processed: 1
gpg: imported: 1
2) Execute the following command:
Command

gpg --list-key --with-fingerprint A25BAE09
Now you will see:
Result

pub rsa4096 2016-06-07 [SC]
27DE B156 44C6 B3CF 3BD7 D291 300F 846B A25B AE09
uid [ unknown] Linux Mint ISO Signing Key root@linuxmint.com
pub rsa1024 2014-01-26 [C]
1828 C98D 1C52 E20C 95DF B632 6ABA 455A A25B AE09
uid [ unknown] Totally Legit Signing Key mallory@example.org
3) Also here you need to compare the output of the second command with the input of the initial command that was not working:
Compare

27DE B156 44C6 B3CF 3BD7 D291 300F 846B A25B AE09
27DE B156 44C6 B3CF 3BD7 D291 300F 846B A25B AE09
We can see that they are the same, so the verification for authenticity was successful.
(source: https://linuxmint-installation-guide.readthedocs.io/en/latest/verify.html)
Final words
That was it. Now that we know we have downloaded a proper Linux Mint ISO image file, in the following tutorial, I explain how you can create from the newly imported ISO file a bootable USB stick so that you can use it as an installation medium or as a live USB drive.
About the free Linux Mint tutorial series
Through a number of short Linux beginner tutorials, I want to offer a simple starter guide for those who have never done anything with Linux Mint and do not know exactly where to start and where to find the necessary information. In an accessible way, it guides you through among others the principles of Linux, finding and downloading a Linux distribution, creating a live medium, finding software, installing software, executing updates, and making sure your internal and external devices work properly. This article is part of my Linux Mint tutorial series. You can find an overview of the complete tutorial series via the link below:
Linux beginner tutorials – an overview