Linux Mint is aimed at providing a great experience for both beginners and experienced Linux users. For beginners and people who just want their system to work and that not gets in the way of their daily processes, Linux Mint offers several functionalities that make life easier. One of those components is the Update Manager. As with any operating system, it is necessary for developers to regularly come up with updates to keep the system reliable, to grow with technological developments, to optimize your system, to refresh available software packages and to remain secure for various forms of cyber crime. In this tutorial I will explain how to use the Linux Mint Update Manager and have a look at other ways of updating your system.
Be in control of your system
As a fan of everything that has to do with software and computer technology, I follow all that happens in this technology-driven world on a daily basis. My primary interest is of course with Linux and Open Source, but I always keep an eye on what happens with other platforms such as macOS and Windows. What strikes me is the large number of complaints from users regarding the way in which the Windows 10 platform forces its users to accept updates. And these updates appear at the most unexpected moments. I personally had to deal with this issue at work. During a presentation that I was giving to a large group of colleagues, I suddenly received an update message from Windows that could not be suppressed. So this happened at a very inconvenient moment and seriously disrupted my presentation. At such a moment you get the feeling that you are not in control, but that you have to bend to the wishes and requirements of your operating system. And in my opinion it is not the operating system that should be in charge of you, but that you as a user should always be in control of how your computer and software works and in what way and at what time. And the developers of Linux in general and Linux Mint in particular have listened carefully to this universal wish. With Linux you are in control and you decide when you think something should happen. And of course the system helps you to think about those decisions, but does not force you to do things. So let’s see how the update manager works and how we can implement updates in Linux Mint.
How to use the Update Manager
As already mentioned all operating systems need regular updates to stay safe and stay in sync with technological advances. In Linux Mint there are multiple ways to update your system, but as a beginner you should use the great update system called the Update Manager. You as the owner of your system are completely in control with respect to the moment you want to update your system, what you want to update and what not. And the update manager informs you when updates are available and gives you all the required information and options to determine yourself what you want to update. And most updates are done very quickly while you can continue your work. Oh, and before I forget, these updates not only relate to the operating system itself, but also to a large number of installed applications. So many of your applications will also be neatly updated.
When you start Linux Mint you will find a small shield icon on the right hand side of your panel in what we call the system indicator area. This Update Manager shield can have three different looks, each with its own specific meaning. A shield having a green marked ok sign indicates that your system is up-to-date. A shield having a blue marked “i” indicates that there are updates available. A shield having a red marked “x” indicates that there is an issue, for example because a specific update server can not be reached.
When there are updates available you click on the blue marked shield to open the Update Manager of Linux Mint.

The Update Manager will open and you see something that looks like the next screen.
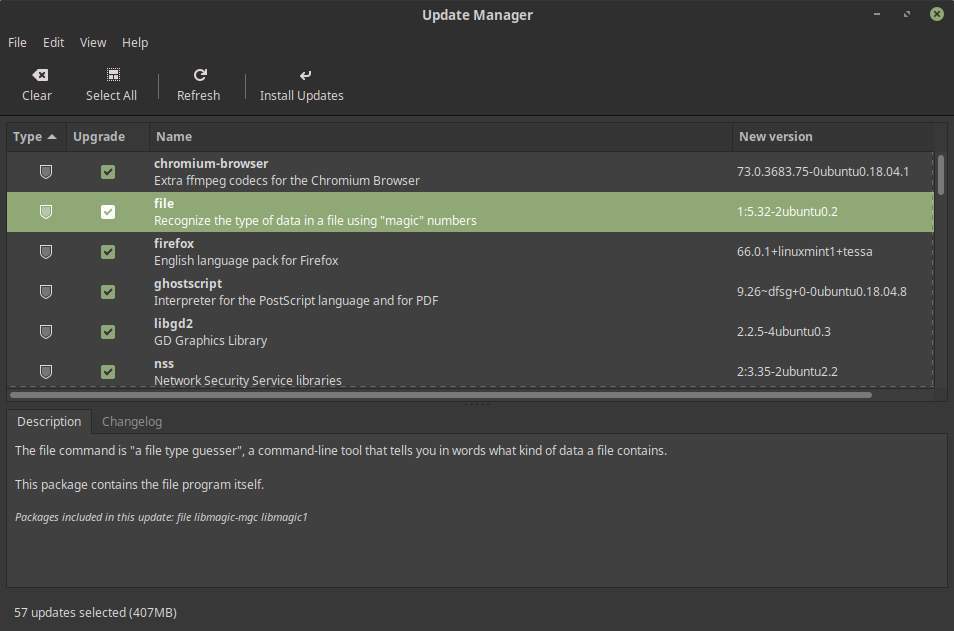
In the older versions before Linux Mint 19 the Update Manager showed updates into various levels of recommendation, like certified updates, recommended updates, safe updates, unsafe updates and dangerous updates and advised not to install unsafe and dangerous categories if you were not an advanced Linux Mint user. But Linux Mint 19 and higher comes standard with the Timeshift backup mechanism, making it less of a problem to simply install every update of every category. If something is wrong and your system is acting strangely as a result of a last update, then you have your Timeshift backup to quickly return to the previous situation. Therefor the Update Manager now pre selects all updates and shows updates categorized into types, like security, kernel and software updates.
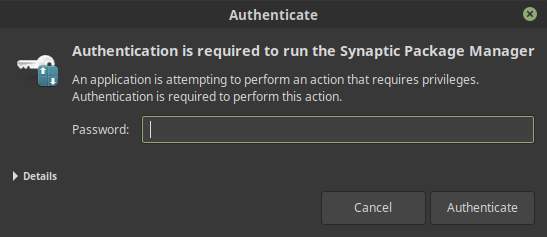
In the previous example you see that there are 57 updates available. They are all pre selected so the only thing you need to do is to click on Install Updates. The system will ask you first to authenticate by providing your password.
Now the updates will be installed while you just continue the work you were doing. Updates in Linux Mint will be very fast, so it may be a bit of a surprise after coming from the Windows platform. After the update is finished you can close the update manager. Now you will see that the shield looks different, having a green “ok” marking.
How to setup the Linux Mint Update Manager
The above explanations and actions were based on standard settings of Linux Mint, but it is possible to change the settings to your preferences. As already explained in the versions before Linux Mint 19 the settings were a bit more conservative, so more dangerous updates were not standard marked for installation. But if you still like to be on the safe side, this is still possible in Linux Mint 19 and higher. But there are other possible changes to be made as well, like the kernel you want to have as the base for your installation.
When you open the Update Manager you see the following main menu with the options File, Edit, View and Help.

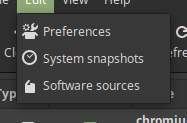
The menu item File is not exciting as you have only the option to close the application. The menu item Edit contains the options Preferences, System snapshots and Software sources.
Software sources will be explained in a separate section in this course about the installation of applications, but in short it will open the software sources application where you can maintain all the links to official repositories and PPAs that are being used as a source for updates of many of your installed applications.
System snapshots will open the before mentioned Timeshift backup application, so you can see the backup history and enables you to change backup settings.
Preferences enables you to change quite some settings for the Update Manager. So select Preferences and let’s see what is possible.
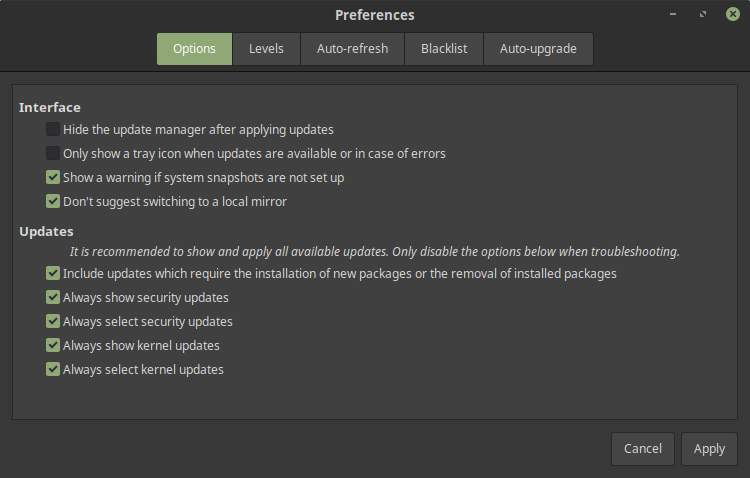
In the Preferences screen we have five options: Options, levels, Auto-refresh, Blacklist and Auto-upgrade. Options offers some choices with respect to the Interface and Updates. We can choose to show or not show the Update Manager icon, show warnings and suggestions to switch to local mirrors to speed up the update process. In the Updates section it is best to have all options selected as they include options to show and select security and kernel updates. But as said before, if you want to be more in control, you can deselect these options.
In the sections Levels you can determine which impact level you want to see in the updates list and which type of items you want to have pre selected. As already explained because of Timeshift the team of Linux Mint thinks that it is no problem anymore to always install all updates of all impact levels. But you are free te decide otherwise, but at least select impact level 1-Minimal, 2-Normal and 3-Large.
In the Auto-refresh section it is possible to change your preferences with respect to the frequency that the Update Manager looks for new updates. Standard values are first refresh after 10 minutes and after that each 2 hours.
In the option Blacklist it is possible to exclude applications that you do not want to include in the update refresh and therefore no new updates with regard to these specific applications will be shown.
Auto-upgrade speaks for itself, as it gives you the option to always let the operating system decide what will be updated and when that will happen. Standard this option is disabled.
Update Linux Mint via the command line
This course mainly focuses on using the graphical user interface as it is most convenient for beginners. But if you are interested in the power of the command line, it is possible to use that for updating your system as well. But keep in mind that these commands do not take into account the aforementioned impact levels, so everything will always be updated.
1) Open the Terminal with the keyboard shortcut Ctrl + Alt + T.
2) Now type the following to update the sources list:
sudo apt-get update
3) Type the following to update your system and applications:
sudo apt-get upgrade


