Have you ever had a passion for the products of Apple and now there is an old MacBook Aluminum Late 2008 dusted up in your closet because no updates and upgrades are possible. Why not install Linux Mint or Ubuntu and bring this still quality hardware back to life?
The switch
I only “switched” a few years ago to using Linux as my daily driver. Before that, I had been a very satisfied user of the OS X operating system (now macOS) for more than 10 years. But due to increasing hardware issues (graphic card failure, cooling down, etc.) of my iMac 27 inch and the fact that my loyal MacBook Aluminum Late 2008 was no longer supported by Apple (so I could not upgrade to the most recent macOS and as a result I could not install for example the latest version of Android Studio), I looked for something different. As a replacement for my iMac I built a new powerful Intel i7 16GB Linux workstation and I also swapped OS X on my still working MacBook with Linux. Both systems are running Linux Mint now and I couldn’t be happier. That migration to linux on my MacBook and my new workstation was a fantastic choice.
Not ready to throw away
With the highest possible but not latest installable version of the older version of OS X El Capitan, I noticed very clearly that my old Intel Mobile Core 2 Duo 2GHz MacBook was getting really slow. Even unworkable slow. Even after an upgrade from the old hard disk to a fast SSD and an expansion of the memory to 4GB, everything became far too slow for my requirements and needs. And on top of that some software only worked with a higher macOS version. But for a machine that I bought in 2008 that speed loss was not strange in itself. Many people opt for a new machine every 3 years or so, but I am a bit different so throwing away a still working device was not an option for me. However, when I installed Linux Mint on this MacBook, I suddenly felt like having a new machine again. Not kidding. The difference in speed was enormous. Starting up applications, using applications, browsing, file management, even video editing with for example Openshot, or photo editing with Darktable, everything suddenly felt very snappy. And I could install Android Studio again. Amazing what Linux can achieve with old hardware and therefore offer a second life. From that moment on, this laptop was in my bag every day again to use on the train or at the kitchen table. So besides being a happy user of Linux Mint on my new I7 workstation, I became also a satisfied mobile user of Linux Mint.
The installation issues
Linux, no matter what distribution, can not just be installed simply on every laptop without going through some hoops and loops. It is mainly the Lenovo’s and Dell’s that work very well with Linux as standard and mostly do not cause any problems during the installation. Therefore it surprised me that the installation of Linux Mint on the MacBook went almost flawlessly as well, with just one little (solvable) issue…WiFi. But this is not only an issue with Linux on an Apple machine as a lot of WiFi components in other brands are not recognized during the Linux installation process out of the box as well. In my case Linux Mint did not recognize the Broadcom BCM4322 Wireless Controller by default. But if you have the opportunity to temporarily make a wired internet connection, then this issue can be solved within a few minutes.
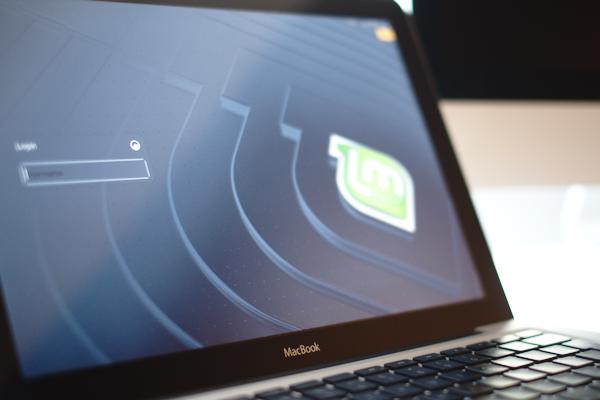
Start a Linux Mint live session
Before actually installing Linux Mint on the macBook it is also possible to play around and test from a live session. To install Linux Mint or start a live session on this type of macBook I assume you already have a bootable usb with Linux Mint on it. If that is not the case go to the tutorial to create a bootable Linux Mint usb device.
OK, so you have a bootable Linux Mint usb drive now.
To be able to boot into the usb drive, you’ll need to hold the option (alt) key while you boot your macBook. So shut down the machine, hold the option key, start the machine while holding the option key, and wait. If everything went well you see a screen with your internal drive, and the Linux Mint usb drive (presented as EFI boot. You can let go of your option key now. If you don’t see the usb drive, unplug it and plug it in again. Now the usb drive should pop up in this same screen.
Select the usb drive (EFI boot). Now a menu with some options will be presented. Choose the option “Try Linux Mint without installing”. A live session of Linux Mint will be created, ready for you to use and test without actually wiping your hard drive.
Install linux Mint
You can install Linux Mint from the active live session as described before, or directly after booting the usb drive. When you opted for a live session first, you find an icon on your desktop to start the installation process. If you want to install Linux Mint directly from the usb drive do the following.
To be able to boot into the usb drive, you’ll need to hold the option (alt) key while you boot your macBook. So shut down the machine, hold the option key, start the machine while holding the option key, and wait. If everything went well you see a screen with your internal drive, and the Linux Mint usb drive (presented as EFI boot. You can let go of your option key now. If you don’t see the usb drive, unplug it and plug it in again. Now the usb drive should pop up in this same screen.
Select the usb drive (EFI boot). Now a menu with some options will be presented. Choose the option “Install Linux Mint”.
Read the tutorial on the actual installation of Linux Mint if you need some guidance there.
Solve the WiFi issue
To solve the earlier mentioned WiFi issue go through the following steps in Linux Mint:
1) Open the main menu.
2) Choose Driver Manager under the Administration category and enter your password.
After a standard cache update takes place, Driver Manager displays an overview of device components that require a driver.
3) Under Broadcom Corporation, select bcmwl-kernel-source for the recommended option.
4) Select the right graphics driver nvidia-340 directly. Then that is immediately well arranged.
5) The operating system should now be restarted and Wi-Fi on this machine will then also work perfectly.
Final words
So for those who have an old MacBook and are not yet willing to put them in the trash, try to install a Linux distribution and who knows you will be pleasantly surprised and can use your trusted device for years to come.