Birdtray is an effective email notification tray app for Linux
by John Been December 6, 2018 · Apps per category / How to / Latest blog / Tools
It surprises me every day how many good and useful tools are being built for Linux. In my search for interesting material for my website, not a day goes by that I do not find something that I did not yet know before. And a huge amount of these applications, some small, and simple and some extensive and feature rich, are actually useful for everyday use or specific use cases. Today I came across the Birdtray application. Birdtray is an effective email notification tray app for Linux. So let’s have a look at how to install it, how to set it up and what it can do.
What has Birdtray to offer
Birdtray is a nice little app that has just one dedicated specialized function: showing a notification for new unread email for Thunderbird in your system tray.

This indicator can be setup to be static or blinking with a certain frequency. If you are distracted by the blinking you can snooze it for a specific time period. You can add multiple accounts or subfolders and give them different colors, so you see different values in a recognizable presentation.
How to download and install Birdtray
Birdtray is written by George Yunaev and offers via GitHub the option to build it from source. But there is a more convenient way to install this application. The great website Linux Uprising created a PPA (Personal Package Archive) to offer an easy way to install Birdtray and to receive updates when available. The PPA supports Ubuntu 19.04, 18.X and 16.04 and Linux Mint 19 and 18.X.
1) Open a terminal session with the keyboard combination Ctrl + Alt + T.
2) Type “sudo add-apt-repository ppa:linuxuprising/apps” and give enter.
3) Type “sudo apt-get update” and give enter.
4) Type “sudo apt install birdtray” and give enter.
Now Birdtray has been installed. Let’s go to the setup process.
How to setup Birdtray
1) Start Birdtray via the Application menu. You can search for “Birdtray” via the Application Menu search bar.
The first time you will get the following screen.
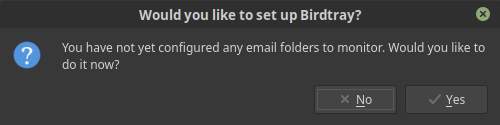
2) Click on Yes.
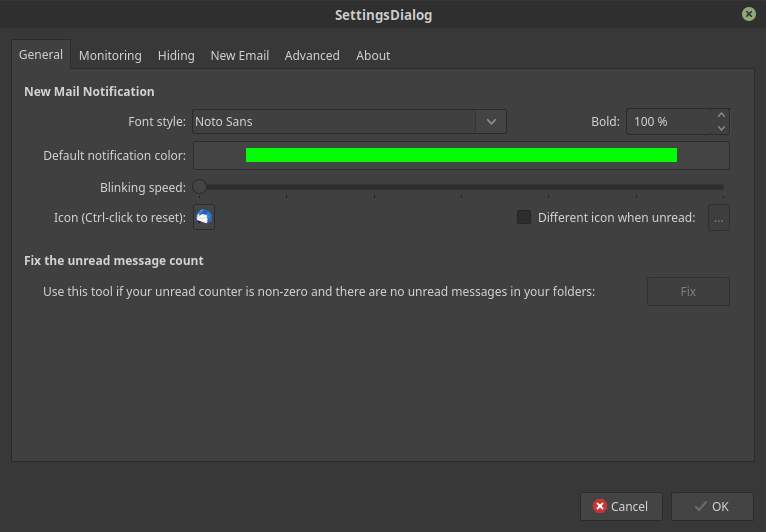
Now the SettingsDialog will show up. Here we can do all the settings so it works to your likings.
The General tab makes it possible to change the font style and the color of the font in which the unread counter is being presented. Here you can also change the blinking speed. If you move it completely to the left than a Thunderbird icon will be shown with on top of that the unread count. If you move it to the right the counter will blink. A bit strange is that left is faster and right is slower, but not blinking at all is at the most left. I would expect that that is the slowest position possible and should be on the right. But that is just mine opinion.
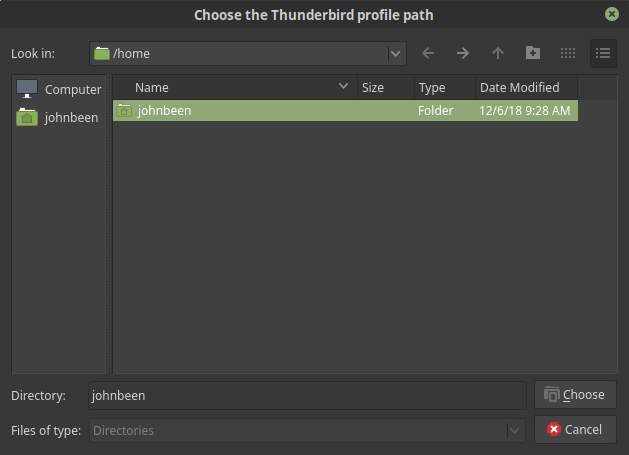
The Monitoring tab enables you to point the setup software to the right location of the Thunderbird file it needs to read out the number of mails that have not been opened yet.

3) Change the value for “Method to parser unread notifications” to “using global search database”.
4) Now click on Browse to search for the Thunderbird profile database.
5) Look up your home folder and right click on it.
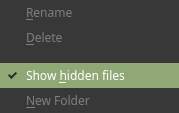
6) Select “Show hidden files”.
7) Look up the folder /home/[your name]/.thunderbird/ and look for the .default folder, like shown in the next screenshot.
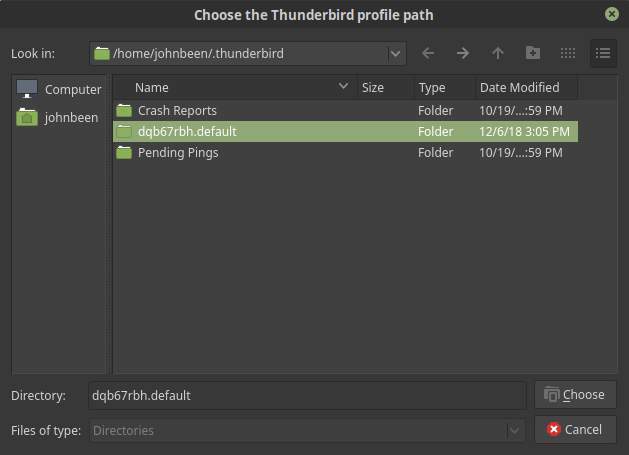
8) Select the .default folder and click on Choose.
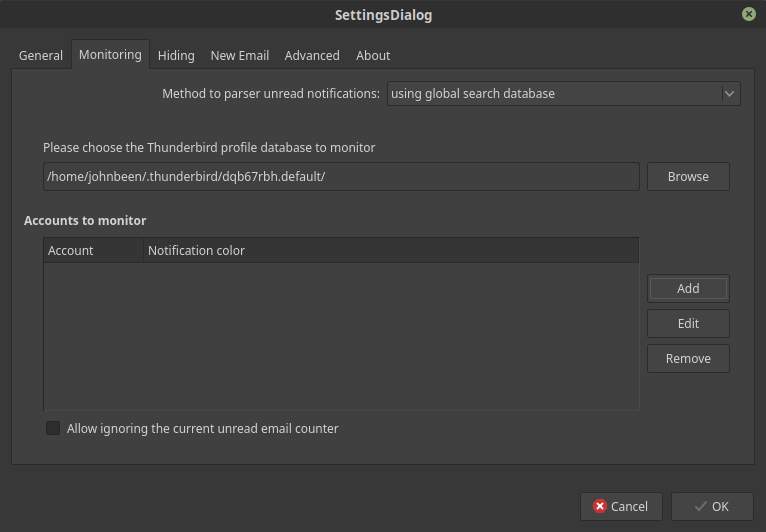
9) Now click on the Add button in the Accounts to monitor section.
In the next screen you can lookup the folder that you want to monitor.
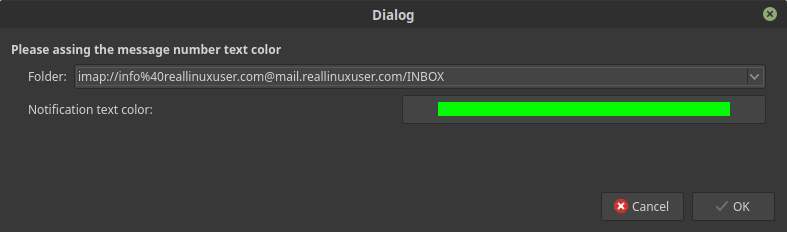
You can repeat this process if you want to add more accounts or subfolders within an account to monitor. You can choose different font colors to make a clear difference between different email accounts.
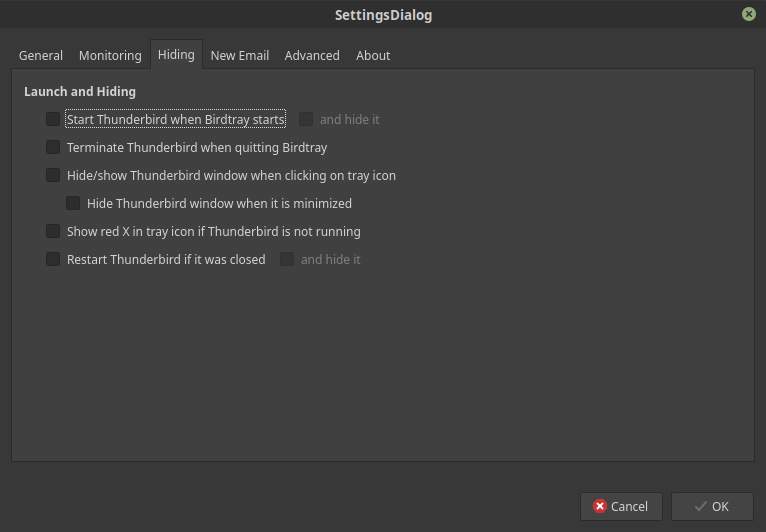
The Hiding tab gives you options for launch and hiding.
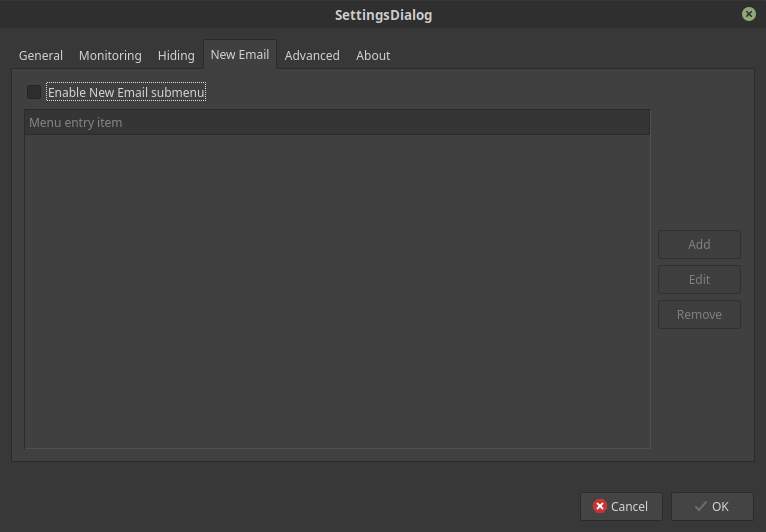
The New Email tab gives you options to configure a new email, which allows you to use pre-configured email templates.
The Advanced tab gives you among others the option to activate faded transitions of the blinking indicator.

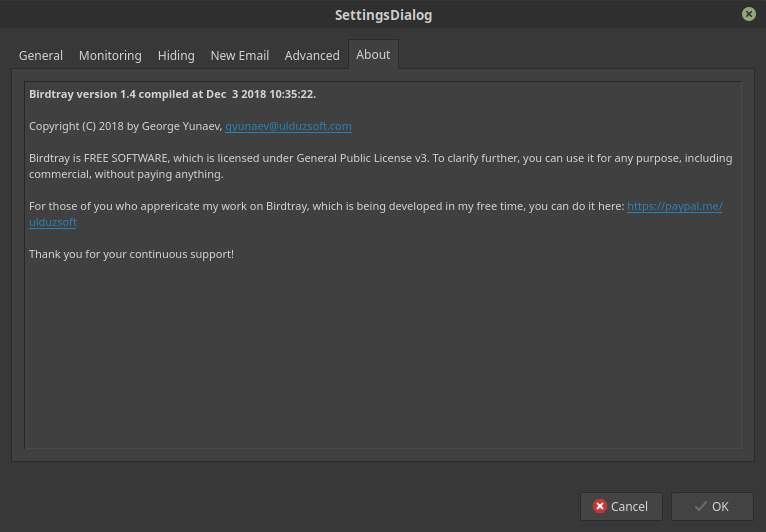
The About tab gives you information about this nice little app.
How to use Birdtray
Now that the setup has been finished the tray icon should work.
Blink off…

Blink on…
If you right click on the icon you will get a small menu.
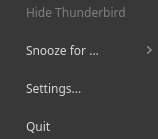
Settings will bring you back to the screen with tabs as I already showed during the setup process, so you can change things to your liking. The snooze option stops the notification blinking for a given timespan.
Enjoy!