New effects for the Olive video editing application for Linux
by John Been April 15, 2019 · Apps per category / How to / Latest blog / New release / News / Persona / Video / Videographer
In a recent blog I already paid attention to Olive, a new open source non-linear video editing application for Linux. Even though this application is only in alpha status and there is still a lot to do to come to a first production ready application, what I have seen so far and have been able to try is very promising and above all very stable. And now the community has picked up this application as well by writing additional effects. With passionate people like Fahad Hasan Pathik, who has spent his time creating plugins for the open source application Natron, the first community effects are now available for Olive. Let’s see what effects have become available for Olive.
What is Olive
I already wrote in a previous blog that in my opinion the new Olive video editor is very promising. According to the Olive team “Olive is a free and open-source project to deliver high quality video editing and compositing to everyone. Olive aims to provide a fully-featured alternative to Adobe Premiere Pro, Apple Final Cut Pro, and Sony Vegas Pro without compromise. A powerful, yet user-friendly, solution for creatives everywhere”.
Although Olive is not even in beta, there is already a lot to try, as it offers hardware accelerated playback, video and audio effects, keyframe functionalities, a serious set of editing tools, a transition tool, dragging and dropping clips, fast and smooth video scrubbing, speed manipulation, timeline autoscrolling, audio scrubbing, fast exporting, zooming and scrolling in the viewer, full screen mode and support for Unicode filenames. And in the most recent version support has been added for a local effects folder. And that is perfectly timed with some new community created effects for Olive.
About the new effects for Olive
The following effects have been created and released for Olive:
- Barrel Distortion
- Bloom
- Bokeh Blur
- Denoise
- Edge Find
- Glitch
- Halftone
- Kaleidoscope
- Sharpen
So let’s have a look at these new effects.
Barrel Distortion
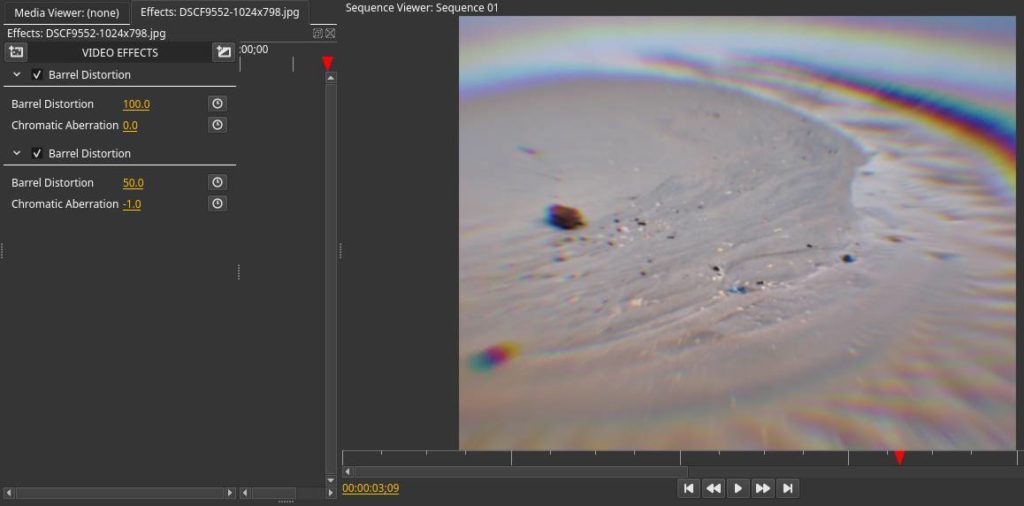
In the Barrel Distortion effect it is possible to adapt the values for Barrel Distortion and Chromatic Aberration. For photo purist Barrel Distortion is something you don’t want as you need your lenses to distort as less as possible. But in video editing we like to use this effect to create cinematic effects in which we can exaggerate the view of vision. With Barrel Distortion your video footage can be curved as it was mapped around a round or barrel shaped object. Chromatic Aberration is normally an optical that happens when you use a large aperture. This creates a problem when a lens isn’t able to bring all wavelengths of color to the same focal plane, and/or when wavelengths of color are focused at different positions in the focal plane.
(sources: https://en.wikipedia.org/wiki/Distortion_(optics) and https://photographylife.com/what-is-chromatic-aberration)
Bloom
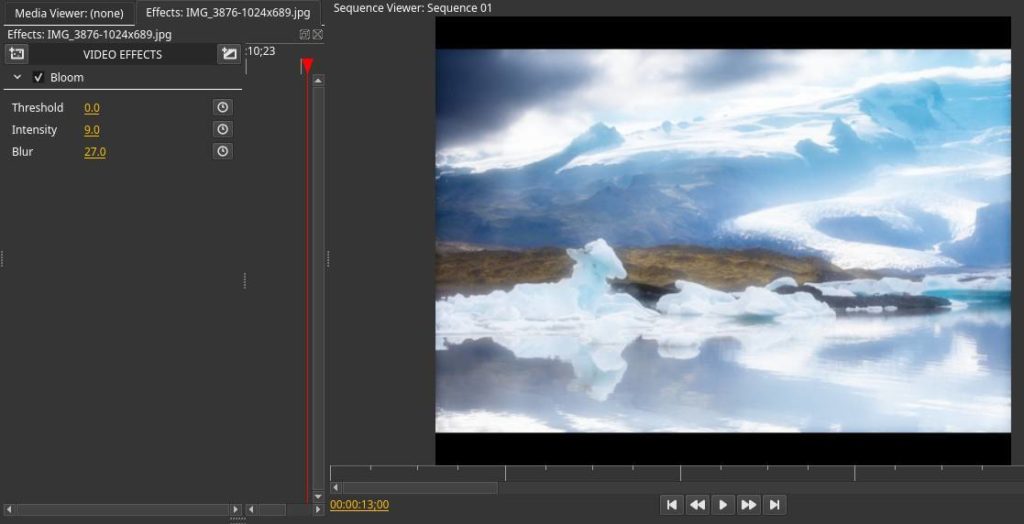
Bloom is an effect that is based on the effect an intense light source that overpowers the basic light in a scene so it produces fringes of light extending from the borders of bright areas in an image. The final effect is a kind of an aura around the edges of your main topic. The Bloom effect for Olive gives the options to change values for Threshold, Intensity and Blur.
(source: https://en.wikipedia.org/wiki/Bloom_(shader_effect))
Bokeh Blur
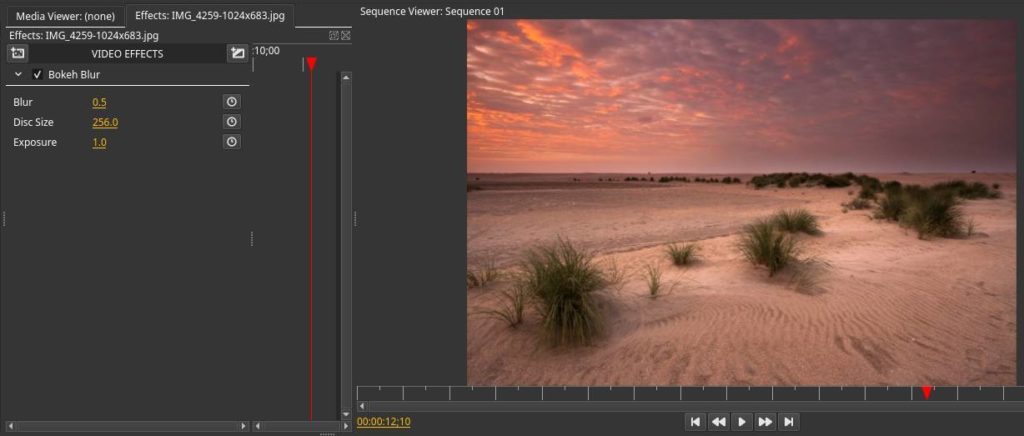
In photography and videography bokeh is a subjective measure of the quality of the softness in the background that happens when you use a large aperture. The bigger the aperture the less the depth of field and the greater the effect of detaching the subject from the background. In Olive you have the options to change values for Blur, Disc Size and Exposure.
Note: While writing this blog post I didn’t get this effect working. I’m going to do some more research here and hope to be able to provide more information about this effect later.
Denoise
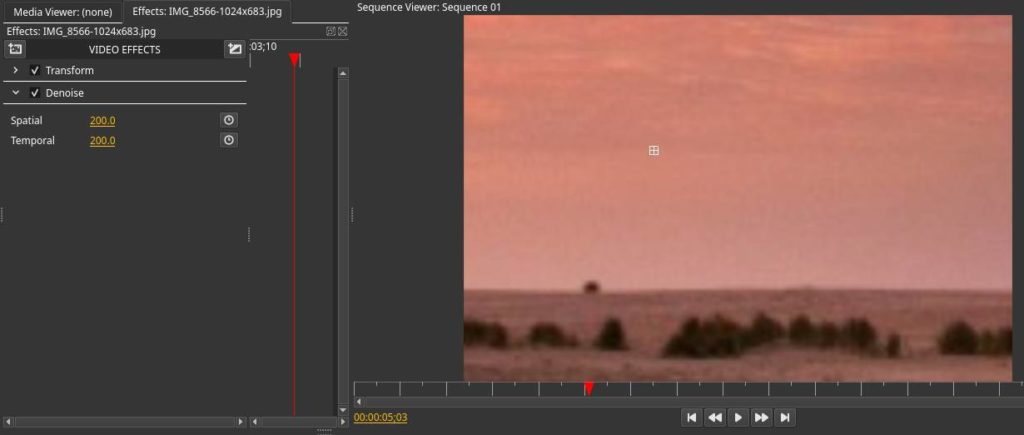
With Denoise you can remove noise from your video footage. Noise happens when you use high ISO values for example when you want to make footage in the dark to compensate for the lack of light. In this effect you have the option to adapt values for Spatial and Temporal.
Edge Find
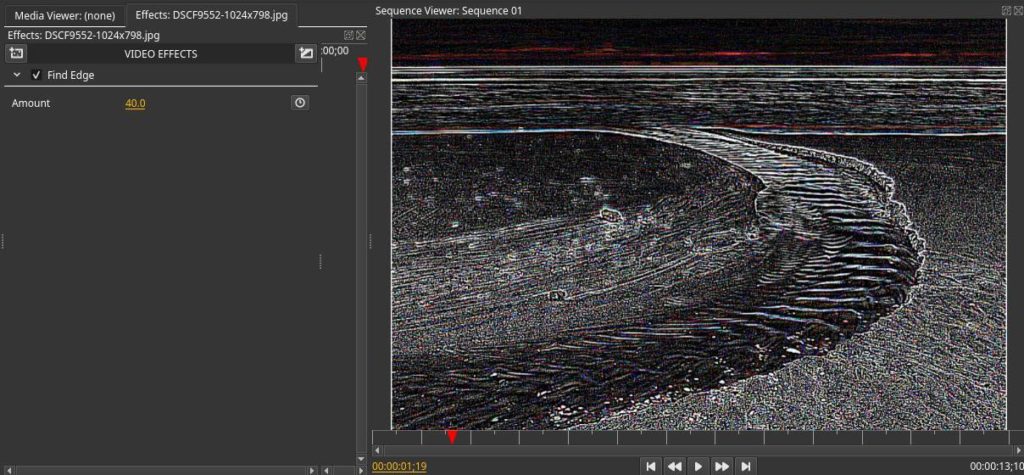
Edge detection filters in photo manipulation tools like Photoshop and GIMP normally search for borders between different colors so the contours of objects can more easily be determined for further processing. But it can be used to create more artistic results as well. In Olive you have only control of the Amount of the effect.
Glitch
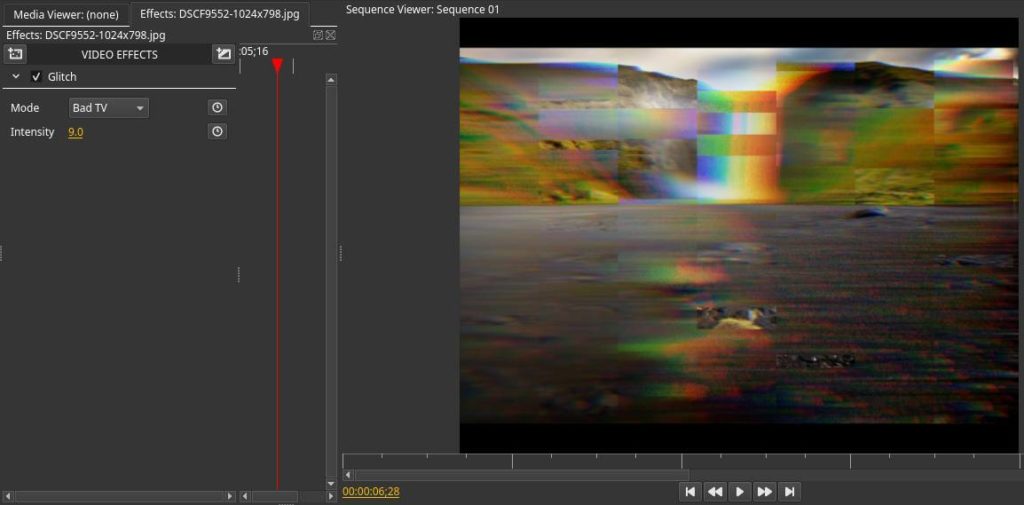
With this effect it is possible to mimic a bad tv signal. You have three different modes: Signal Loss, Bad TV and Worse TV and for all of them you can change the Intensity.
Halftone
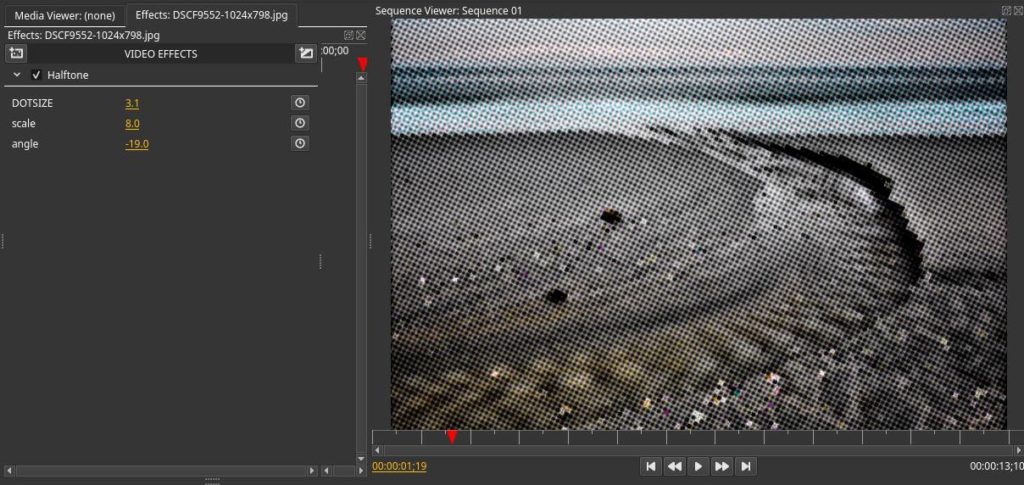
Halftone is an artistic graphic effect in which an image is being presented based on diversity in dot sizes and spacing between the dots. In the past this effect arose because we knew nothing else due to the poor technology in, for example, newspaper printing and the grid-like pattern in which images were printed. But now this way of making images is used as an artistic way. In this Olive effect you can change values for Dotsize, Scale and Angle.
Kaleidoscope
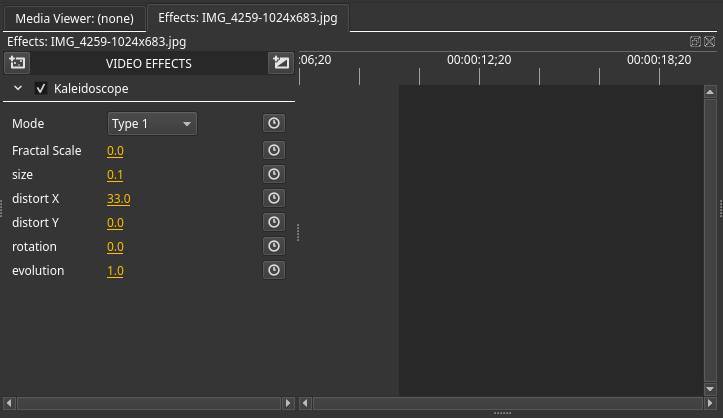
The Kaleidoscope effect is a complex effect in which two or more objects or surfaces with a reflecting capacity are tilting in a specific angle which creates artistic reflecting repeating forms. In this effect you can change values for Mode, Fractal Scale, Size, Ditort X, Distort Y, Rotation and Evolution.
Note: While writing this blog post I didn’t get this effect working. I’m going to do some more research here and hope to be able to provide more information about this effect later.
Sharpen
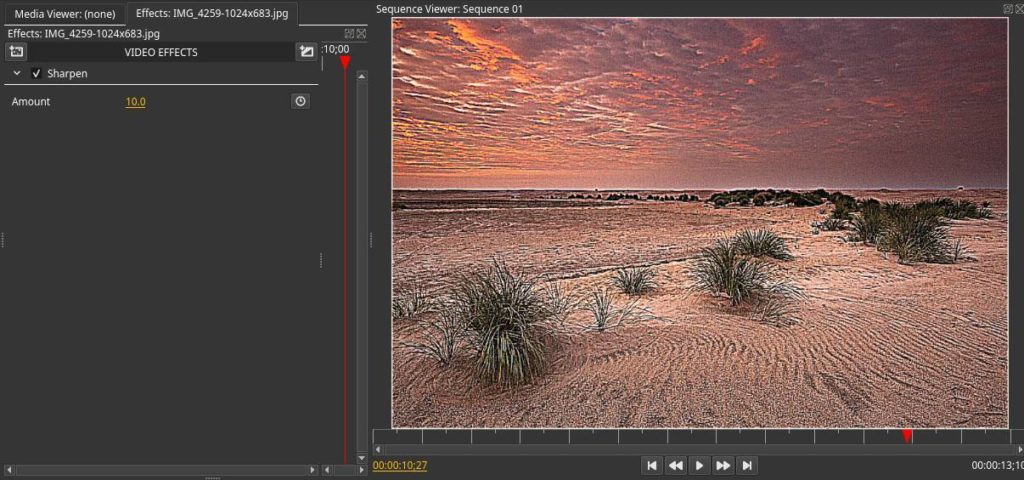
The Sharpen effects does what it says, it sharpens an image or video footage. In some situations sharpening is necessary to restore the out of camera softness, but it can also be used artistically to greatly exaggerate various image properties, such as wrinkles and stubble in faces. The Olive effect gives the option to change the Amount of sharpness.
How to download and install the effects for Olive
I assume that you have already installed Olive. If not, go a bit lower in this article where I briefly explain how you can install the Olive application. So how can you install the effects?
1) Click on the following link to download the zip file containing all the effects:
https://github.com/cgvirus/Olive-Editor-Community-Effects/archive/master.zip
2) Go to your Downloads folder and search for the file Olive-Editor-Community-Effects-master.zip.
3) Double click the file and choose Extract.
4) Copy the just created folder Olive-Editor-Community-Effects-master.
5) Open a new file manager session and click on Home.
6) Make sure that hidden files are visible (via menu option View/Show hidden files.
7) Go to the following location
.local/share/olivevideoeditor.org/Olive
8) In this location create a new folder named “effects”.
9) Paste the folder Olive-Editor-Community-Effects-master that you copied in step 4 in the new “effects” folder.
How to download and install Olive
There are different ways to install Olive on Linux Mint.
Olive can be installed with the following commands:
sudo add-apt-repository ppa:olive-editor/olive-editor
sudo apt-get update
sudo apt-get install olive-editor
Olive can be downloaded as Snap:
sudo snap install –edge olive-editor
Olive can be downloaded as AppImage:
https://github.com/olive-editor/olive/releases/tag/continuous
Olive can be downloaded as Flatpak
https://flathub.org/apps/details/org.olivevideoeditor.Olive
Final words
The more I use the Olive video editor for Linux, the more enthusiastic I become. Even though the application is still in alpha status and a great deal still needs to be done, on the other hand it already feels very complete and it is hopefully a good indication of what this application can become in the near future. And the Linux and Open Source community is gradually starting to notice the efforts around Olive. More and more is being written about it and more and more tutorials are appearing on YouTube. And now also a community driven set of effects.