AI tools are currently the talk of the town, both positively and negatively. AI technology is still in its baby shoes, so it is difficult to estimate what the future will bring in this area, and it is not always clear if it only brings good. But what is clear is that extraordinary results can already be achieved with AI, and can cause possible disruption of established technologies. One of the possible purposes of AI is the more effective improvement of images. In this article, I want to find out how to use the AI image upscaling open-source application Upscayl on Linux.
Content of this article
- What is Artificial Intelligence
- What is Upscayl
- How to use Upscayl
- How to download and install Upscayl
What is Artificial Intelligence
There is a lot to explain about Artificial Intelligence, but I won’t do that here, because the scope is to have a look a what Upscayl has to offer. So for now let’s keep it simple. In short, Artificial Intelligence tries to mimic the capabilities of the intelligence of a human brain with the help of smart software and computer hardware. Based on Artificial Intelligence, developers try to not only process decisions based on pre-determined logic but are now trying to create self-learning solutions.
AI programming focuses on three cognitive skills: learning, reasoning, and self-correction (source: https://www.techtarget.com/searchenterpriseai/definition/AI-Artificial-Intelligence). To be self-learning, AI software must be fed with real-life situations. Based on large amounts of actual use cases, the prediction rate keeps getting better. And that is what human intelligence does, of course. We are able to respond to unknown stimuli based on previous experience. And Artificial intelligence is rapidly improving in that area.
What is Upscayl
You can roughly divide digital images into raster-based images and vector-based images. A vector-based image, such as the result you get from the open-source application Inscape, can in principle be enlarged indefinitely. After all, vector images do not consist of individual pixels, but are based on mathematical concepts in relation to lines, curves, etc, so that all objects in an image can be enlarged indefinitely. In contrast, a raster image, such as a digital photo, cannot simply be enlarged. The available pixels determine the native resolution since when enlarging you do not have extra pixels somewhere available. Additional pixels must be created by creating an extra pixel based on the average of the surrounding pixels. The result of that process is not always convincing. But that now seems to be changing with the introduction of AI technology.
Upscayl is a relatively new open-source Artificial Intelligence (AI) image upscaling and enhancement application. Although Upscayl is also available for Windows and macOS, according to the developers the application is built with a Linux-first philosophy. Upscayl offers different upscaling types for different use cases. In standard mode, it upscales 4x, but it also offers a double upscale option to get 8 times upscaling. In the latest version, the developers added new functionality to compare the original and upscaled versions of the image.
How to use Upscayl
Upscayl is really simple to work with because it has limited options (which is in this case a good thing). You select an image or a batch of images, select the upscaling type, choose the output folder, and hit the UPSCAYL button. Then the magic happens. So let’s have a look.
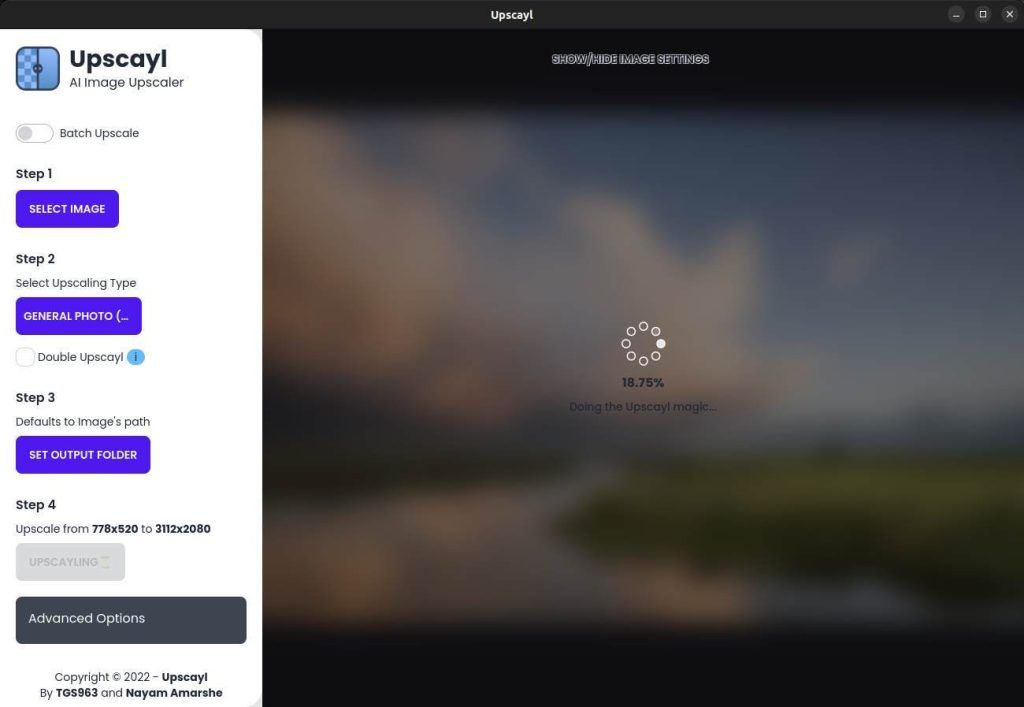
When you open Upscayl you first see the following screen:
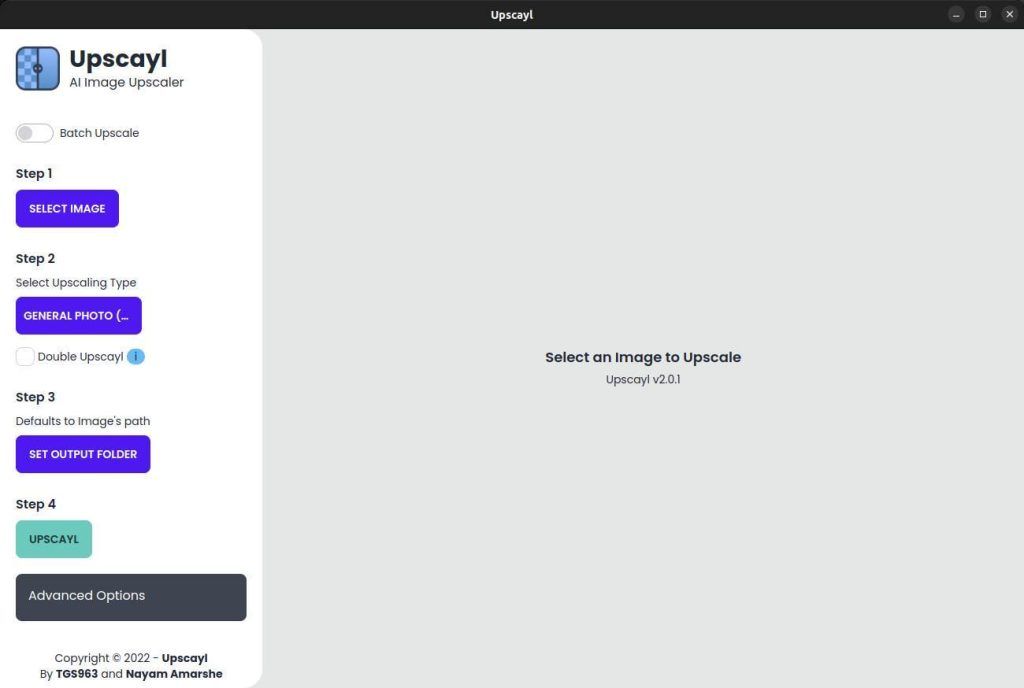
At the left you see 4 simple steps: 1) Select image, 2) Select Upscaling Type, 3) Set output folder, and 4) UPSCAYL. Further, you have the option to do batch upscaling for multiple images. In step 2 you can also choose to upscale even further via Double Upscayl. At the bottom, we see the Advanced options. Here you can choose to save as PNG, JPG, or WEBP. You can also choose between 30 different themes to personalize your Upscayl app. You can also set the GPU ID if you have multiple GPU’s in your system. And you can Donate to help the developers.
Step 1: Select image
Here you can drag and drop an image on the gray area, or click on the button “Select image”. I like to see what Upscayl can do with a very pixelated image, so I have created a very low-resolution image from one of my photographs, to see if it can “bring back” some details.
Step 2: Select Upscaling Type
Here we can choose between the options General photo (real-esrgan), General photo (remacri), General photo (ultramix balanced), General photo (ultrasharp), digital art, and sharpen image.
Below you find some information about the different AI models. Because I don’t have the required knowledge yet on these AI models, I use available definitions with their sources for now. Hopefully, in the future, I can update this article with more information.
- General photo (real-esrgan): “Real-ESRGAN aims at developing Practical Algorithms for General Image/Video Restoration. We extend the powerful ESRGAN to a practical restoration application (namely, Real-ESRGAN), which is trained with pure synthetic data.“. (Source: https://github.com/xinntao/Real-ESRGAN).
- General photo (remacri): “A creation of BSRGAN with more details and less smoothing, made by interpolating IRL models such as Siax, Superscale, Superscale Artisoft, Pixel Perfect, etc. This was, things like skin and other details don’t become mushy and blurry.“. (Source: https://upscale.wiki/wiki/Model_Database).
- General photo (ultramix balanced): UltraMix balanced is part of the UltraMix Collection. “This is a mixture of models based around UltraSharp and my other available models. These are usually interpolations that have separate but very helpful uses. As an example, UltraMix_Restore is a combination of UltraSharp and UniScale_Restore, and is great for video game textures.“. (Source: https://upscale.wiki/wiki/Model_Database).
- General photo (ultrasharp): “This is my best model yet! It generates lots and lots of detail and leaves a nice texture on images. It works on most images, whether compressed or not. It does work best on JPEG compression though, as that’s mostly what it was trained on. It has the ability to restore highly compressed images as well!”. (Source: https://upscale.wiki/wiki/Model_Database).
- digital art: I couldn’t find background information on how this option works. I will add it when I find more later. But I read in different articles that this works well for AI-generated art.
- sharpen image: I couldn’t find background information on how this option works. I will add it when I find more later.
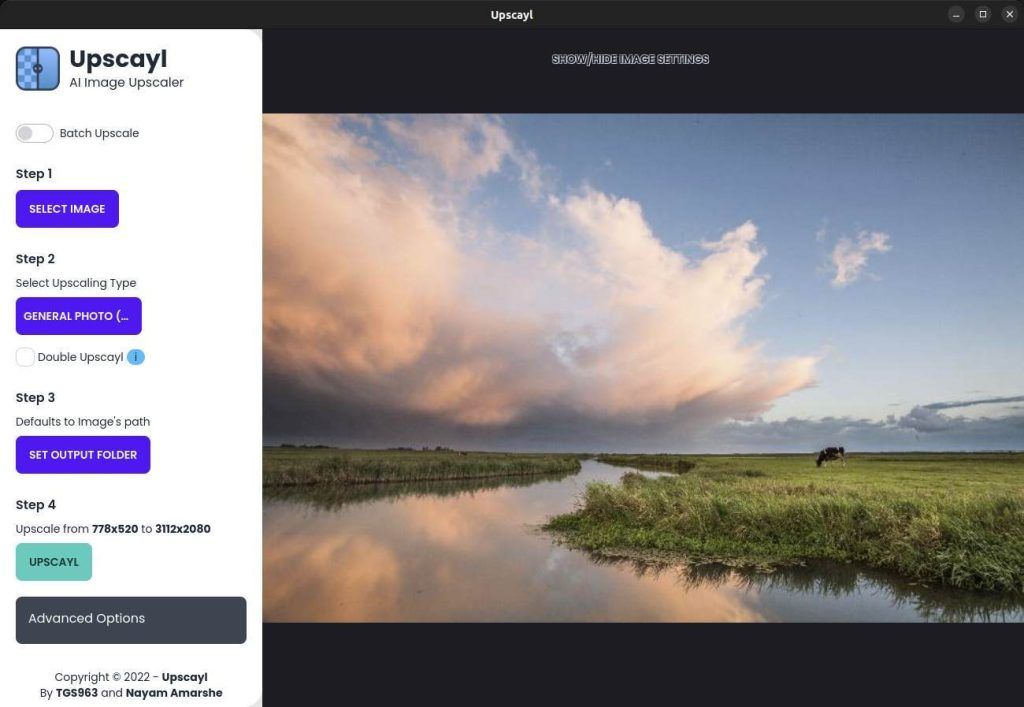
Step 3: Set output folder
Here we set the location where you want the end result to be stored.
Step 4: UPSCAYL
Now it is time to see what Upscayl can do, so hit the UPSCAYL button.
Depending on your file size and the upscaling type it can take a while.
Here is the area that I use to see what Upscayl can do for us.
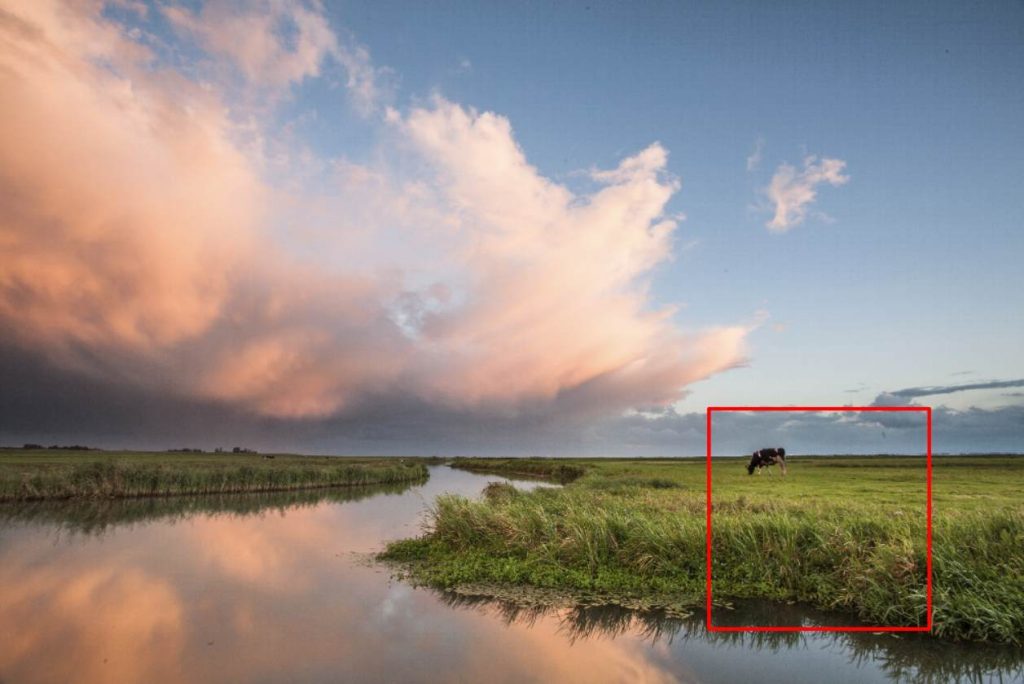
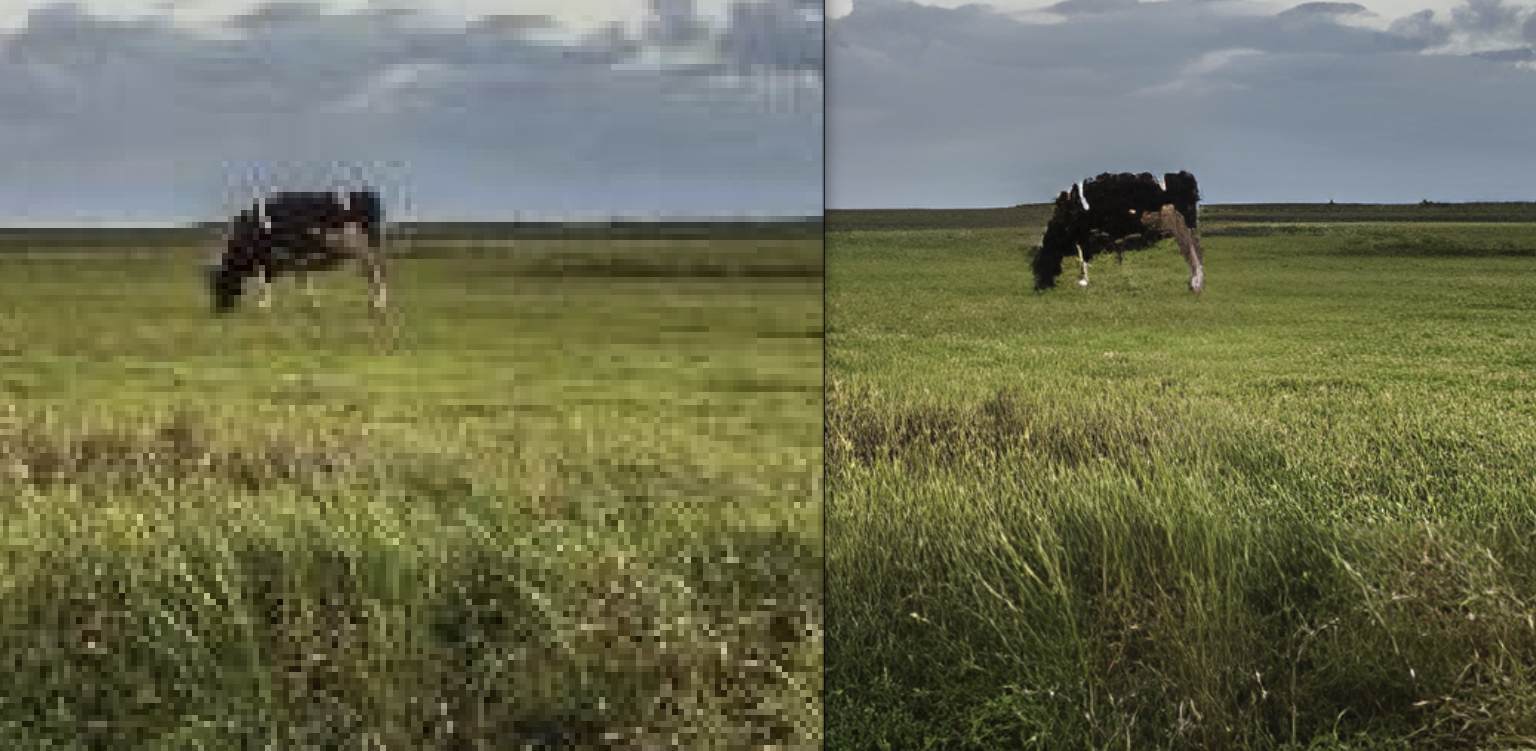
So let’s compare the before and the after situation of a part of the image.
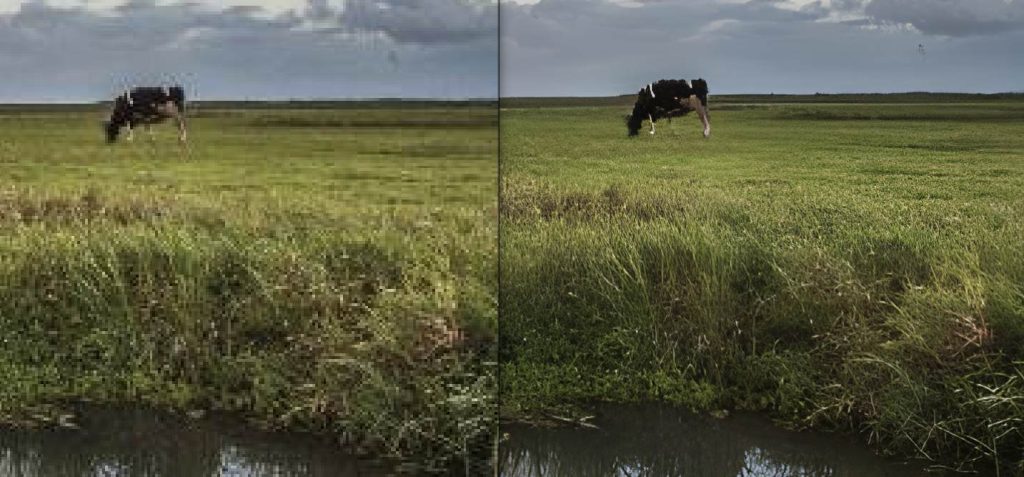
Let’s zoom in a bit more.

In my opinion, it is clear how much more detail the right-hand version suddenly has compared to the original on the left side. On the left-hand side, the grass is pixelated and almost not recognizable, but on the right-hand side there is the impression of sharp grass again. The result is in my opinion much better and more realistic compared to what I was used to in classic upscaling technology.
Keep in mind that the main goal of Upscayl is to enlarge your current images 4 times horizontally and 4 times vertically. So the end result will be a 16 times higher resolution. In my example file, the resolution of the original will be upscaled from 5000×3333 (16MP) to a whopping 20000×13332 (266MP), while keeping the illusion of similar sharpness.
Say, I want to print my photo file on paper on 300 PPI. In my case, the before native print size would be 5000/300 inches x 3333/300 inches, which results in a print of 16.7 inches x 11.1 inches (42.4 cm x 27.2 cm). After Upscayl did its work, in theory, I can print the same photo in size 66.7 inches x 44.4 inches (169.3 cm x 112.9 cm). With the result above I think it is indeed possible to print on a much larger size without directly noticing you are looking at an upscaled photograph.
Note: If you are interested in other articles I wrote for reallinuxuser.com on photography, have a look via the link below:
https://www.reallinuxuser.com/category/apps-per-category/photography/
How to download and install Upscayl for Linux
To download Upscayl for Linux follow the below steps:
1) Go to the Upscayl GitHub release page.
Button: Upscayl on GitHub
https://github.com/upscayl/upscayl/releases
2) Now scroll down till you see the Assets section:
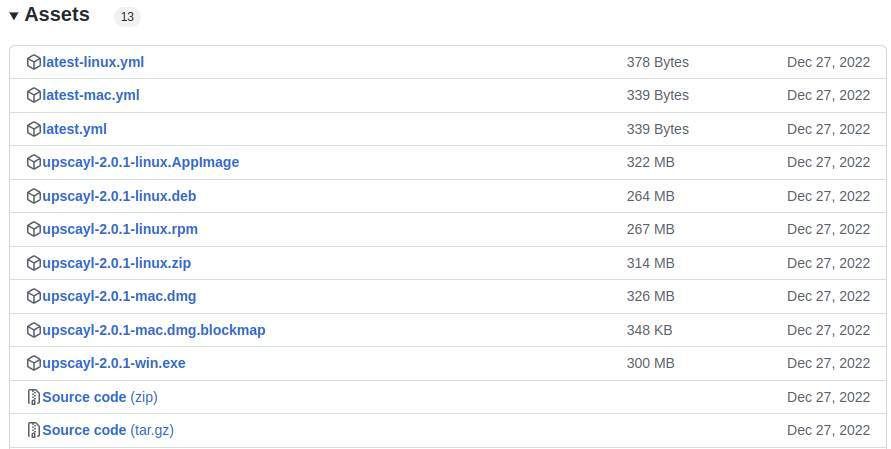
3) Select the type you want to use for your Linux distribution, .Appimage, .deb, or .rpm. In my case, because I use a Debian / Ubuntu based distro, I choose the .deb file.
4) When the file is downloaded, double-click it to start the installation process.
Have a look at my article “How to install applications in Linux Mint” if you want to learn more about the ins and outs of installing Deb, AppImage, Snap, or Flaptpak files.
Now that the file is downloaded, look for Upscayl between your Applications to start it up and try it out yourself.
Final words
I can be brief about it. I was pleasantly surprised by what Upscayl can offer for upscaling image files. I want to explore this further, this was just a first look at what this open-source technology has to offer, but my first feeling is positive. Try it yourself.
Have a look at my latest book on Linux, in Paperback or Kindle format.
For more info on my book click here.
When you want to buy the book click on the image below.
If you appreciate what I do on this website…,

If you appreciate what I do on this website…,