First Look at RapidRAW: A Promising RAW Photo Editor for Linux
by John Been August 8, 2025 · Generic news / Latest blog / Photography
Anyone interested in photography and also likes to use Linux and open-source software has probably encountered a familiar dilemma: the open-source world is great, but when it comes to photo editing applications, things become a bit scattered and unclear. There are certainly some nice and powerful tools out there, such as the complex and almost scientific RAW editing solution found in darktable, or at the other extreme, the simpler apps like GNOME Photos. Some can do a lot, but can also be overwhelming for many people, while others are simple to use but not powerful enough for serious photo editing. But recently I found something new, fresh, beautiful, and promising that has the potential to grow into a both powerful and useful photo editing tool with a relatively flat learning curve. In this article, I will have a first Look at RapidRAW: A Promising RAW Photo Editor for Linux.
Content of the article
- Introduction
- About RAW
- Key features of RapidRaw
- Installation and setup of RapidRaw
- A first look at RapidRaw
- Bugs and missing features
- Final words
Introduction
Anyone even remotely interested in photography—whether digital or analog—has probably spent some time exploring photo editing tools on Linux. Personally, I’ve been using darktable for years. It’s powerful, feature-rich, and once you get the hang of it, it can handle pretty much anything you throw at it. Back when I was still using macOS, Lightroom was my go-to photo editor, both for semi-professional work (wedding gigs) and for personal projects like landscape photography. But after switching to Linux, Lightroom was no longer an option, and after some analysis, darktable was for me the obvious choice.
That said, darktable isn’t exactly beginner-friendly. It has a steep learning curve, and while I didn’t mind diving deep into RAW editing and the underlying theories, I’ve always felt it’s not the ideal tool for more casual photo enthusiasts who like to do some more straightforward RAW editing. Over time, I’ve kept an eye out for something simpler—something I could recommend to people who want solid editing capabilities without the complexity of darktable.
Recently, I came across RapidRAW, a new RAW photo editor built for Linux, but also for Windows and macOS. The developer, Timon Käch, started this project as a personal challenge at the age of 18.
It’s still early in development, but it already looks really promising. It’s clean, modern, and surprisingly capable for such a young project. I think RapidRAW is truly promising, modern, user-friendly, and easy to use, yet powerful at the same time. RapidRAW is still in its infancy, but it offers a good glimpse into what a RAW editing app can look like, one that seeks to find the middle ground between simple and complex, yet is simultaneously powerful based on modern editing capabilities, a user-friendly combination that’s been missing in the Linux photo editing space. So, let’s take a first look at what RapidRAW has to offer.
About RAW
Before we have a look at RapidRAW, there is one thing that I want to explain a bit more for those not that familiar with RAW photo files. It is good to first understand what the RAW file format means and what the advantages are compared to shooting in JPEG format. Technically, every digital camera always first captures a picture in RAW format. RAW is a file format in which all image data that a camera sensor registers is stored in a … well … raw format. The core problem is that a camera sensor actually can’t see color. It can only see differences in light intensity. So it is basically a black and white sensor, and without additional technologies, we would get a grayscale picture. To solve this problem, a method has been introduced to place individual color filters over every single pixel on the sensor. These minuscule color filters, being red, green, or blue filters, are placed in a specific pattern.
One of the most commonly used patterns is called the Bayer pattern, but there are other patterns as well. For example, Fujifilm uses, for specific reasons which I won’t discuss here, its own pattern called X-Trans. The Bayer pattern is based on a distribution of 50% green, 25% red, and 25% blue filters over the surface of a camera sensor.

Image based on https://en.wikipedia.org/wiki/Bayer_filter
For example, if a specific pixel has been assigned a red filter, this filter blocks the colors green and blue. This is the information that is actually the foundation for the RAW file. So, per pixel, the RAW file contains the intensity of the light that was registered, and because of the individual color filters on each pixel, it contains the light intensity of a specific color per pixel.

Image based on https://en.wikipedia.org/wiki/Bayer_filter
So you will probably think, how can every pixel on a sensor capture all the colors if each pixel is assigned a specific color filter and can only register the intensity of one of these three basic colors? So, how is it handling the two missing colors?
When you don’t choose to create your photos in RAW format but directly create image files in the JPEG format, the processor in your camera first tries to guess the missing color values, then uses the settings in your camera, such as sharpening, noise reduction, contrast and white balance, and next also a compression algorithm is executed on the image information to reduce the file size. Based on these processing steps, the JPEG file is finally being stored. So, the difference is that with JPEG, the camera itself performs the image processing, and when you choose to store it in RAW, you have to do all the post-processing yourself on your own workstation. That is why a RAW file is also often called a digital negative.
The greater flexibility within a RAW file compared to a JPEG file, should be seen in the availability of tonal or brightness levels, where JPEG can only distinguish 256 (8-bit) brightness levels between black and white, while with RAW there are at least 4,096 (12-bit) levels, making the tonal transition from dark to light much more gradual. Further, you can select which color space you want to use in a later stage, you can do far better sharpening, and as said before, the RAW file is uncompressed, so no data loss due to JPEG compression. RAW also has a greater dynamic range, so that much more is possible when it comes to (without negative side effects) pulling up underexposed (parts of) photos in case of high contrast scenes. For example, a scene with rocks in a shadowy foreground and the sun shining bright on the reflecting mountains in the background will demand a larger dynamic range than the same scene on an overcast day.

But incorrectly recorded white balance information can also be adjusted without problems at RAW, to a certain extent. And as already mentioned, when the RAW file was stored by the camera, no image compression was done with the RAW format, so unlike JPEG, you still have all the original pixel information available for post-processing.
For simple snapshots that you want to share quickly with others, it may seem a bit too much to have to do all the editing yourself, and then it is probably more practical to have this done by the camera’s processor. But for serious post-processing, where image quality is of great importance, the enormous editing flexibility that RAW offers makes self-editing on the RAW file highly preferable.
There is much more to tell about the RAW format, but the foundation has been laid to go deeper into RapidRAW.
Key features of RapidRaw
Although RapidRAW is still a very young project, in a very short time, the developer has already laid a promising foundation that simultaneously looks modern, already has powerful features, and demonstrates the potential of an even more powerful tool in the future. Below is an overview of RapidRAW’s key features (source: directly copied from https://github.com/CyberTimon/RapidRAW).
Core Editing Engine
- GPU-Accelerated Processing: All image adjustments are processed on the GPU using a custom WGSL shader for rapid feedback.
- Masking: Create masks with AI subject and foreground detection. Combine with traditional Brush, Linear, and Radial masks for great control.
- Generative Edits: Remove objects or add new elements with text prompts. Each edit creates a non-destructive patch layer, powered by an optional ComfyUI backend.
- Full RAW Support: Supports a wide range of RAW camera formats thanks to rawler.
- Non-Destructive Workflow: All edits are stored in a .rrdata sidecar file, leaving your original images untouched.
- 32-bit Precision: Ensures high-quality adjustments without banding or data loss.
Professional Grade Adjustments
- Tonal Controls: Exposure, Contrast, Highlights, Shadows, Whites, and Blacks.
- Tone Curves: Full control over Luma, Red, Green, and Blue channels.
- Color Grading: Temperature, Tint, Vibrance, Saturation, and a full HSL color mixer.
- Detail Enhancement: Sharpening, Clarity, Structure, and Noise Reduction.
- Effects: Dehaze, Vignette, and realistic Film Grain simulation.
- Transform Tools: Crop with aspect ratio locking, Rotate, and Flip.
Library & Workflow
- Image Library: Effortlessly sort, rate, tag, and manage your entire photo collection for a streamlined and efficient workflow.
- Folder Management: Integrated folder tree, create, rename, and delete folders directly within the app.
- File Operations: Import, copy, move, rename, and duplicate images and their associated edits.
- Filmstrip View: Quickly navigate between all the images in your current folder while editing.
- Batch Operations: Save significant time by applying a consistent set of adjustments or exporting entire batches of images simultaneously.
- EXIF Data Viewer: Gain insights by inspecting the complete metadata from your camera, including shutter speed, aperture, ISO, and lens information.
Productivity & UI
- Preset System: Create, save, import, and export your favorite looks.
- Copy & Paste Settings: Quickly transfer adjustments between images.
- Undo/Redo History: A robust history system for every edit.
- Customizable UI: Resizable panels and multiple beautiful UI themes with smooth animations.
- Exporting: Control file format, quality, naming scheme, metadata, resizing options on export.
In future articles, I will go into much more depth to explain these features. This article is just a first look at this application to bring it to your attention.
Installation and setup of RapidRaw
RapidRAW has the following minimum requirements:
- Windows: Windows 10 or newer
- macOS: macOS 13 (Ventura) or newer
- Linux: Ubuntu 22.04+ or a compatible modern distribution
There are multiple ways to get, install, and set up RapidRAW. First of all, you can build it from source, which is out of the scope of this article. Or you can just download the pre-built installer or application package for each operating system, which can be found on the RapidRAW releases page.
Because this is a Linux-focused website, you have the following options:
- Ubuntu 22.04 x86_64 .deb
- Ubuntu 24.04 x86_64 .deb
- 03_RapidRAW_v1.3.4_ubuntu-22.04-arm_aarch64.AppImage
- 03_RapidRAW_v1.3.4_ubuntu-22.04-arm_aarch64.rpm
- 03_RapidRAW_v1.3.4_ubuntu-22.04-arm_arm64.deb
- 03_RapidRAW_v1.3.4_ubuntu-22.04_amd64.AppImage
- 03_RapidRAW_v1.3.4_ubuntu-22.04_amd64.deb
- 03_RapidRAW_v1.3.4_ubuntu-22.04_x86_64.rpm
- 03_RapidRAW_v1.3.4_ubuntu-24.04-arm_aarch64.AppImage
- 03_RapidRAW_v1.3.4_ubuntu-24.04-arm_aarch64.rpm
- 03_RapidRAW_v1.3.4_ubuntu-24.04-arm_arm64.deb
- 03_RapidRAW_v1.3.4_ubuntu-24.04_amd64.AppImage
- 03_RapidRAW_v1.3.4_ubuntu-24.04_amd64.deb
- 03_RapidRAW_v1.3.4_ubuntu-24.04_x86_64.rpm
For this first basic review, running on Zorin OS 17.3, I used the amd64.AppImage format.
After downloading your preferred installer or package, and the first startup of RapidRAW, you get the following screen:

Before selecting your first folder with image files, let’s first look at the available settings by clicking on the Settings icon.
General Settings
- Theme: Here, you can change the look and feel of the application. Switch between Dark, Light, Grey, Muted Green, Blue, Sepia, Snow, and Arctic.
- Editor Theme: With the option Adaptive Editor Theme, you dynamically change the editor colors based on your current image.
- AI Tagging: This enables automatic image tagging using an AI (CLIP) model. Tags are used for searching a folder.
- Window Effects: This enables or disables transparency effects for the application window.
- Preview Resolution: Here, you can change the preview resolution.
Integrations
- ComfyUI Address: Here you can enter the address and port of your running ComfyUI instance, which is required for generative AI features.
Data Management
- Here you can clear your Sidecar Files, Tags, and Thumbnail Cache, if required.
Keyboard Shortcuts
- Here you can see the available keyboard shortcuts for copying adjustments, setting star ratings, setting color labels, navigation, and different editor-related options.
A first look at RapidRaw
From the initial RapidRAW landing page, click on Open Folder. Here you can select one of your image folders, or the highest level containing all subfolders with your photo files.
Library

The first thing that will be opened is the Library screen, which shows your images in the selected folder. Your images are shown in a square crop, which looks nice as an overview, but personally, I like to see the complete image in the format as it was created.
At the top of the Library screen, you have the option to search by tags, open another folder, go to the Home screen, and open the View options. When you click on View Options, you get the following overview:

Here you can change the thumbnail size, filter by rating, filter by file type, filter by color label, and sort by name, date, and rating.
At the bottom of the screen, you have the option to see and set the star ratings for one or more images at the same time. You can copy settings, reset all adjustments, and export selected images.
When selecting the export options, you will get the following side screen:

Here you can choose between file formats, decide on the file naming, image sizing, and metadata settings.
Now right-click on one of the thumbnails to open the following menu:

Here you have the options to go to the Edit mode (you can also do this by double-clicking a thumbnail), copy and paste adjustments from one image to another, auto adjust your image, copy the image, duplicate image, set rating, set color label, show the image in the file explorer, reset your adjustmentss, and delete the image.
Editor
Now double-click on one of your images to open the Editor mode.

Here the magic begins. Let’s have a look at all the available options.
Note: An important feature of a RAW application, such as RapidRAW, is the non-destructive way in which adjustments are made to photo files. Each photo file is opened as a read-only image. Adjustments in contrast, color, gradient, and sharpness are not processed directly in the pixels, but are recorded as metadata in a sidecar file. The set values that are mutated via sliders and graphs are recorded separately, and each time you open and look at the same photo, these mutation values are executed again, which means that you can copy these same settings to other files as well and have them edited in the same way without extra work. Pixels are only mutated when you export the photo you edited to, for example, a JPEG or TIFF file. And even then, you always keep the original file intact. An export is always a new copy.
In the middle, you see a large presentation of your current image. In the bottom section, you see your image strip from where you can easily switch between images, give star ratings, and change the zoom percentage. Above the image, you have the option to undo and redo changes, show the original, and toggle full screen.
The right-hand side is for the different editing modules. Here you find the following main views:
- Metadata
- Adjustments
- Crop & Transform
- Masking
- Presets
- AI Tools
- Export
Metadata
In the Metadata view, you find all the metadata with respect to the current selected image, like file properties, key camera settings, and EXIF data.

Adjustments
In the Adjustments view, you have your different adjustment tools available, like exposure, contrast, highlights, curves, vibrance, saturation, color grading, color mixer, sharpening, noise reduction, and effects, like vignette and grain.

Crop & Transform
In the Crop & Transform view, you have the option to play around with different aspect ratios and rotation options.

Masking
In the Masking section, you have powerful options to use different masks to edit specific parts of your image. Here, you can create new masks based on subject, foreground, brush, linear, radial, and color. When you make a selection, you will get most of the options you find under the Adjustment view.
Presets
Here, you can create reusable presets based on the edits you did on a specific image, which you can choose from and use on other images. This can speed up your editing workflow if you have to edit a big batch of images and they all need to have the same editing.

AI Tools
Here you have the options to create new generative edits, do style shifts, and use AI for upscaling your image.
Export
Here you will get the export options, as already described earlier in this article.
Note: In one or more future articles, I will go in much more depth to explain how all the editing functionalities can be used on your RAW image files. In this article, I only want to show what RapidRAW has to offer.
Bugs and missing features
Although RapidRAW is very new and still in its infancy, this application already has a lot to offer in its current form. It is certainly not a Lightroom alternative yet, but the foundation is there, and it’s already very good. There’s still plenty of room for improvement to become a true Adobe Lightroom alternative. While darktable, for example, is, in my opinion, a product in itself, focusing more on technical, almost lab-like photo editing and color management, and therefore has a steep learning curve, RapidRAW has the potential to reach Lightroom’s level of user-friendliness while being powerful. If the developer can maintain passion for the project in the long term, I foresee a bright future.
Here, a few things that I noticed in my short time with RapidRAW:
- When I switch between the various sections, such as Adjustments, Crop & Transform, and Masking, I often find that the normally selectable tools are no longer selectable but grayed out. I have to close the application completely to make the functionality usable again.
- The library image overview looks rather nice with the square, rounded corners thumbnails of your images, but I prefer to see the full image instead of a square crop of my images, because I want to know if the image is, for example, portrait-oriented or horizontal-oriented.
- Just a personal preference, but I am missing the standard aspect ratio based on the classic and legendary XPan aspect ratio, which is a 65:24 aspect ratio to capture panoramic pictures. Please add it to RapidRAW.
- Because there is no XPan preset, I wanted to set this aspect ratio via the custom setting. Not sure if it is a bug, or if there is something wrong with my installation, but I was not able to manually type 65 x 24, or whatever other combination. The values immediately change while typing to for example, 3248 x 100. I was not able to choose my preferred values.
Final words
In the coming time, I will go in much more depth to better experience what RapdRAW can do for me and you, but I hope you already have a nice overview of this exciting new application.
In a review of RapidRAW I found on YouTube, I saw a comment from the developer of RapidRAW. He says:
“Hi, dev here – thanks so much for the review! To be honest, the attention it’s starting to get is a bit overwhelming. This is still very much an early-stage side project I built for fun, mostly aimed at people who enjoy open source tools and like to experiment. As I mentioned in the description, it’s not yet on the level of Lightroom, Darktable, or RawTherapee – those projects are far more mature and refined.”
Of course, he’s right that his project doesn’t yet reach the level of applications like Lightroom. But behind such applications are often large teams of developers, color specialists, and so on. RapidRAW, as it’s available now, was built by one person in just a few weeks. I think the developer is far too modest and has already managed to create a fantastic product. I’m very much looking forward to what the future holds.
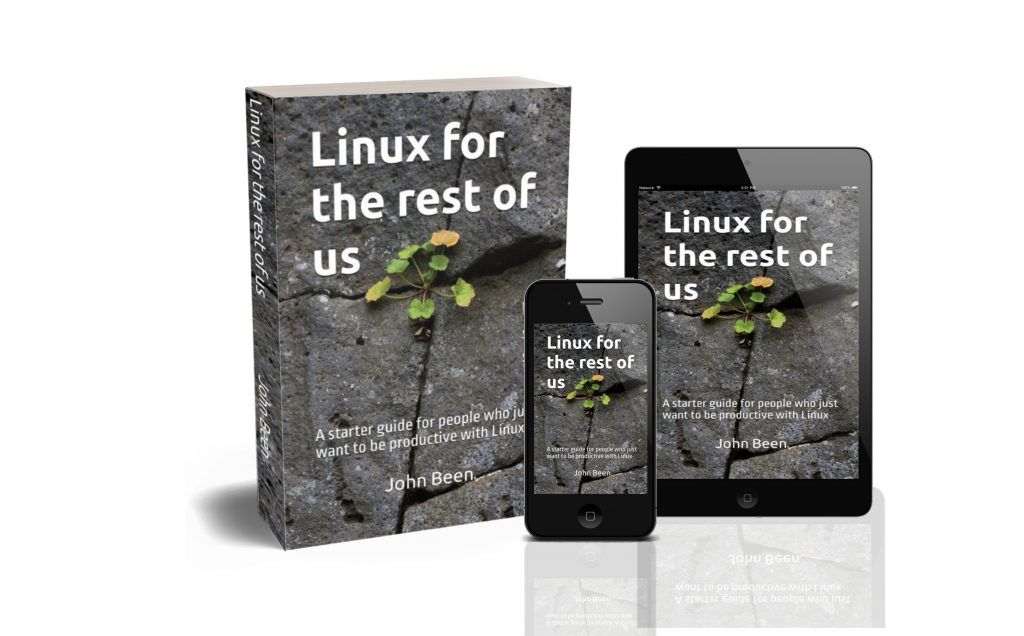
Have a look at my latest book on Linux, in Paperback or Kindle format.
For more info on my book click here.
When you want to buy the book click on the image below.
If you appreciate what I do on this website…,